
Notes:
I’d like to dedicate this blog article to my Eastern European grandparents Mary and Andrew, and their four children: Nellie, Mike (my dad), Tony, and Vee. It was surely through my father’s family that we came to love strawberries. In the 1920s, the family grew them for one of their cash crops, in a field at their small farm, located on one of the highest plateaus in Norwichtown, CT.
Aunt Vee is celebrating her 97th birthday! With Father’s Day sharing her special day this year, I will also be thinking about my dad (Mike) who was ‘crazy’ for strawberries his whole life, and Uncle Tony, who survived a micro-preemie birth in 1922 and lived to be 99-1/2 years old. He just passed away this month and we will miss him terribly. Aunt Nellie left this earth almost 40 years ago, but I still think of her often. She was the family storyteller (after my great grandfather Nikodimas returned to Lithuania). I sometimes feel she helps me tell our stories.
————————————————————————————————————-
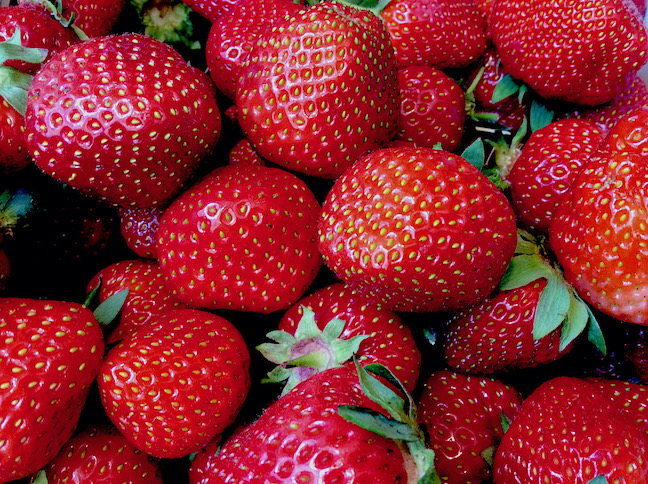
If it is June, I am picking native (local) strawberries in Connecticut. Strawberries go way back in my memory. When I was little, I happily plopped myself down in the Norwichtown, CT fields where I grew up. In those leisurely summer moments, there seemed no greater delight to me than picking and eating every sweet wild strawberry I could find.
The cultivated strawberries were captivating, too. My family took full advantage of the pick-your-own strawberrying option at local farms. Our perspective was: how could anyone not love eating fresh ripe strawberries every single day?
Usually my sister and I went picking with Dad right after supper, while Mom babysat our youngest sibling. We picked a quart each, and that evening the entire family joyfully consumed strawberry shortcake. From the start of strawberry season, unless there was rain, we’d repeat the event every few days. For a related and bittersweet story on my crazy for strawberries dad and family, please click here.
We didn’t freeze strawberries in those early days, probably because our refrigerator’s freezer in the late 1950s was kind of tiny, a twelve-inch or so metal storage cube with its own little door, and a shelf for two metal ice cube trays. After I married, I started to experiment with freezing strawberries. Couldn’t I somehow extend the strawberry season?
What I am sharing in this blog article represents many years of freezing and tweaking the approach. I have yet to find a way to fully preserve a seasonal strawberry’s firm raw texture, but my approach retains more of a berry’s goodness than some methods.
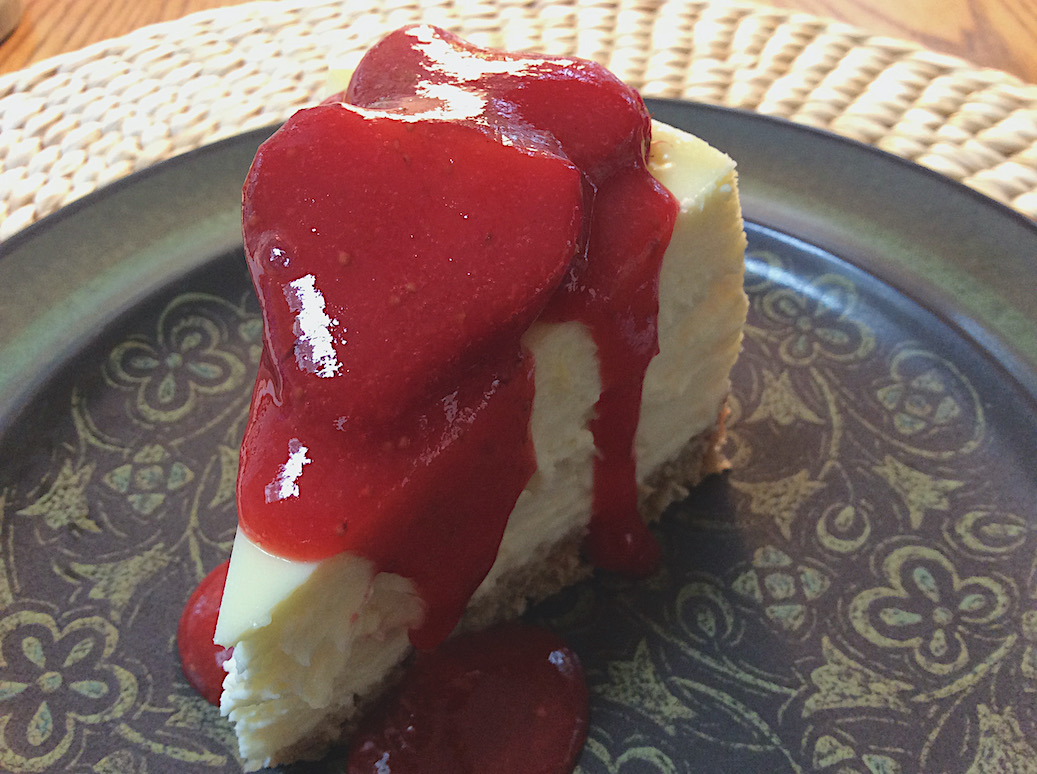
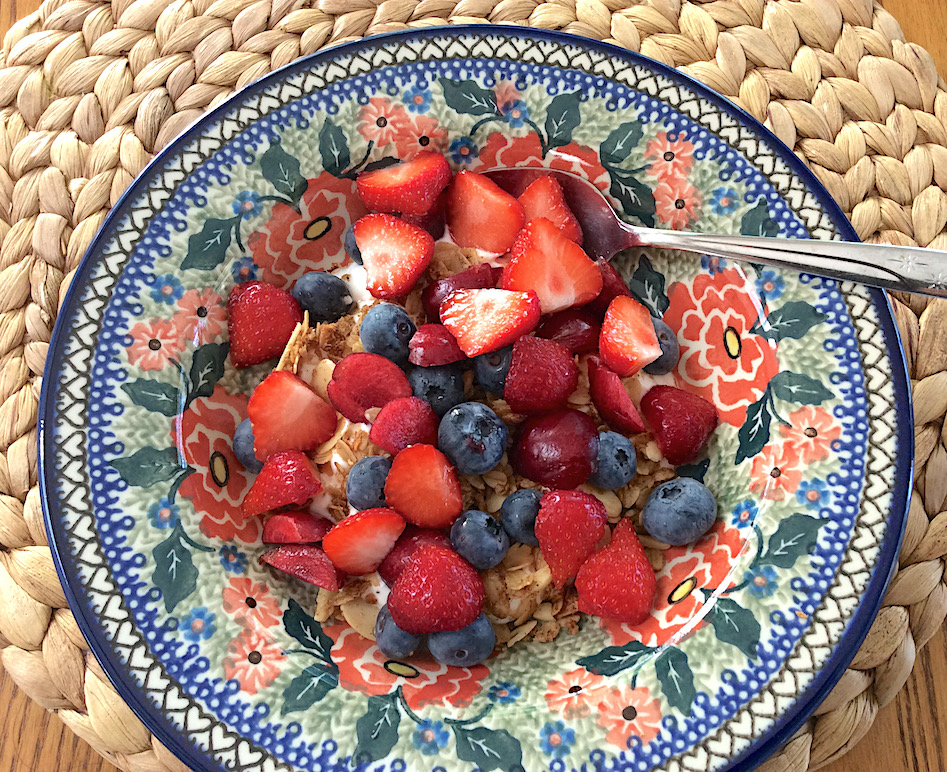
Of course, eating as many of the freshly picked strawberries as possible is still a priority for us, over freezing. With each picking, we reserve and refrigerate the very best berries for all the wonderful ways we like them. Our perennial favorites include pancakes or waffles, cheesecake, and pairing (end of season) strawberries and early blueberries with granola and yogurt. Strawberry ice cream is a welcome creation, too!

 Prior to discussing how I freeze strawberries, I want to share a few general tips about picking and storing the fresh strawberries. Those with a single asterisk (*) indicate actions which contribute directly to achieving high quality frozen strawberries.
TIPS FOR PICKING STRAWBERRIES
The farm where we pick strawberries has two container sizes they provide to most pickers.
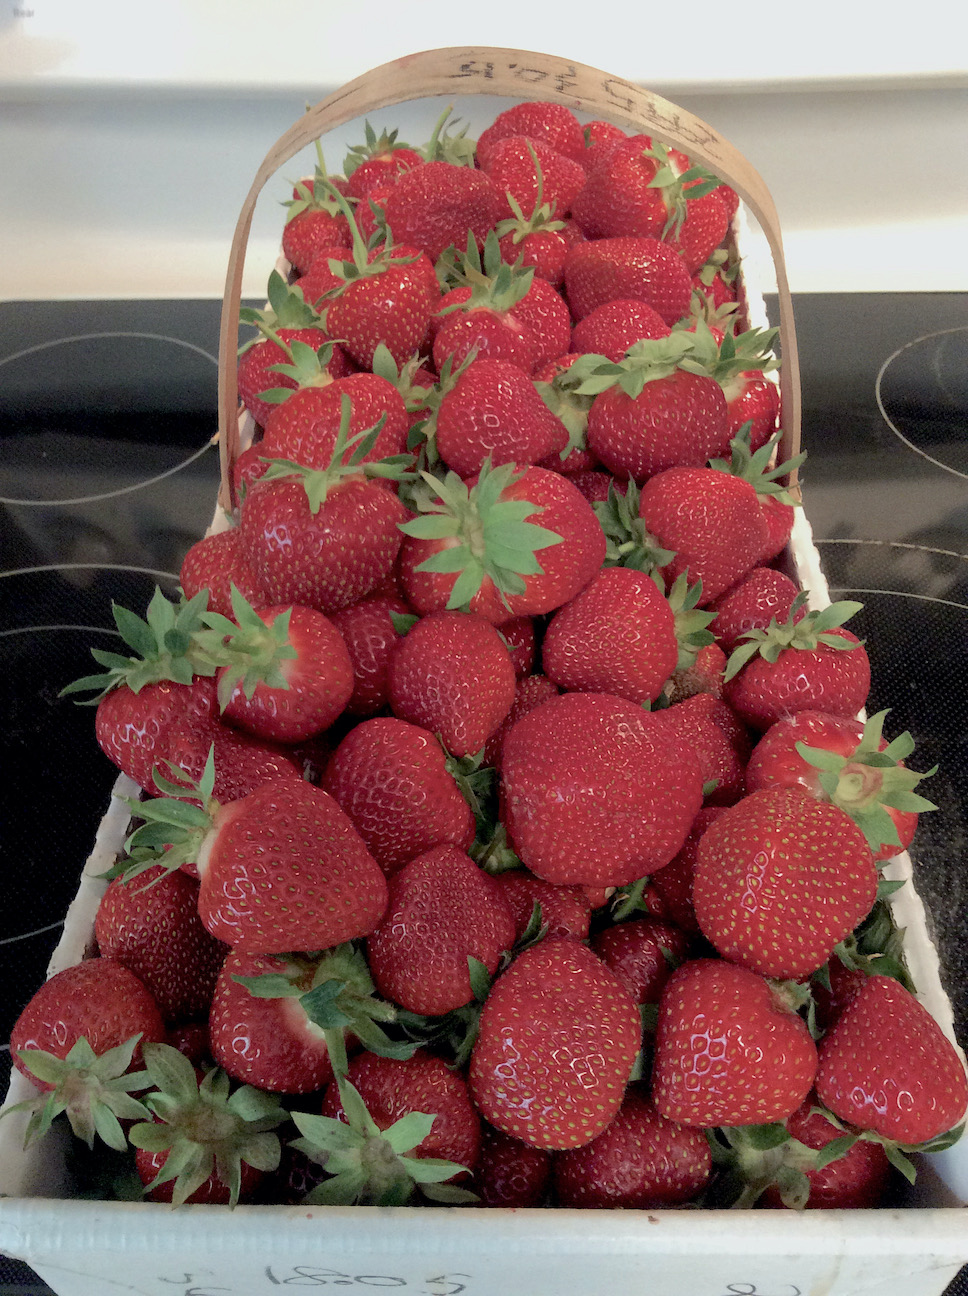
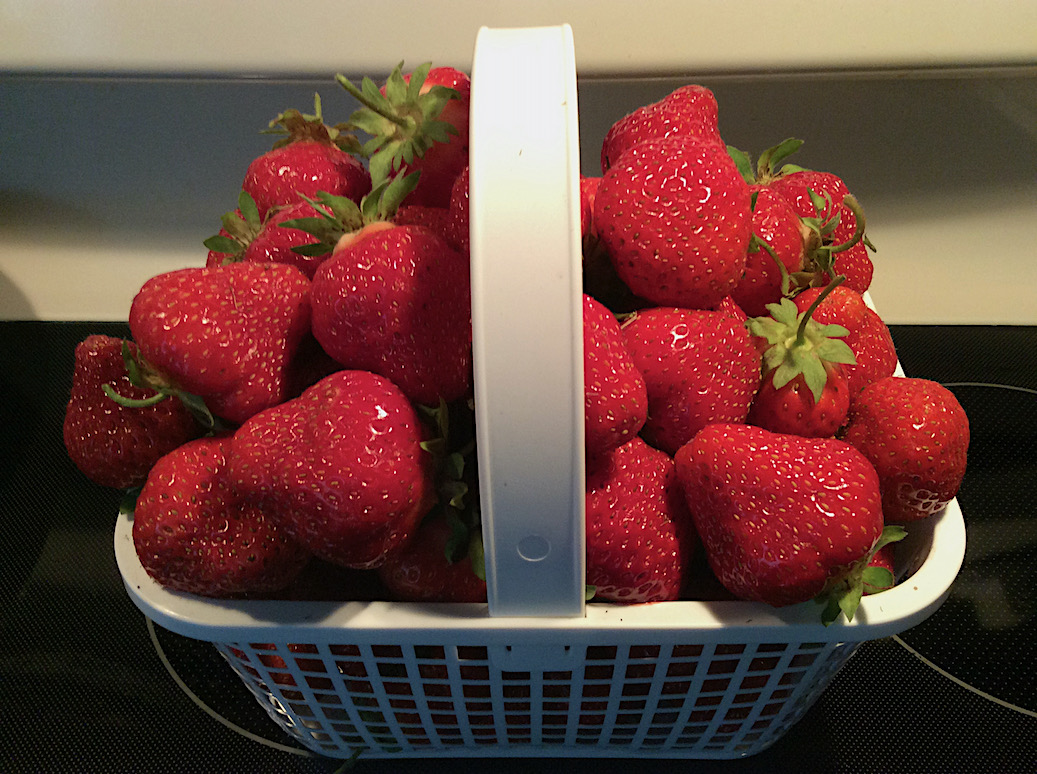
The box holds about 8 quarts (12-14 pounds) of strawberries.
The smaller basket holds about 2 quarts.
It does help to know in advance how much you plan to pick. The farm gives us a small credit each time we return to pick with their container(s).
From early to mid-season (usually about June 5-20 in Connecticut) when the strawberries are the largest and most plentiful, I can pick a box in about 60 minutes, and basket in about 15-20 minutes.
Here are my strawberry picking tips:
— Select a day when the weather is clear and sunny, with temperatures from 65-75 degrees. Avoid picking when it has showered overnight, rained within 48 hours, or is just unpleasantly humid.*
— Wear comfortable clothing (you can afford to stain) with deep pockets for car keys, water, cash or credit card, tissues, etc.
— Bring a kneeling pad, a few stalks of mint or other insect repellent in case it’s needed, and reading glasses if you use them.
— Lift the plant leaves and turn each candidate berry gently before you pick it, selecting only berries fully ripe on all sides. Avoid dark wine color, pale red, or any with white flesh, as well as berries with any damage.*
— Use your thumbnail to sever the berry’s stem, about one inch from the berry’s green cap.*
— Gently, place each berry upside-down in your basket (green cap with stem downward and red tip upward). Fill your box/basket in layers, ensuring that the stems are placed in the cavities between berries (to avoid stabbing a berry below with the stem) as you layer upward in the container.*
— Where we pick, the pricing is for “filling” your box or basket, so most pickers pile their strawberry haul above the top edge of their container. Careful stacking from the start will help you take home as many beautiful berries as possible for what you pay the farm.
— When finished picking, be sure that your container of strawberries is reasonably secure in your vehicle, so they don’t topple out and roll around the floor, seat, or trunk. I lean paper grocery bags on their folded side edge against the two long edges of the my berry container.
— When you arrive home, it is important to avoid washing the berries until you are ready to eat or freeze them.*
SORTING AND STORING FRESHLY-PICKED STRAWBERRIES
Once home, I like to begin sorting, storing, and/or freezing my strawberries within an hour because fresh, ripe strawberries are quite perishable. Despite careful efforts, expect to find some berries with cuts or bruises. Definitely don’t leave your cache of berries sitting on your counter for several hours, unattended, except for the small portion of underripe berries you segment out.
Select a few storage containers with tight fitting lids for the most pristine berries that you will set aside for your use in the next 2-5 days, or for any gifts to family and/or friends. Before you begin sorting, ensure your counter is clean, or use a few jelly roll pans (cookie sheet with a shallow edge) lined with paper towels to hold the sorted berries temporarily.
These 4 sorting categories serve me well after picking a full box:
— pristine berries for our eating;
— pristine berries for gifting;
— berries for freezing including any slightly marred or mis-shaped berries:
— and berries that need to ripen a bit more.
The pristine berries go into the containers with tight lids, and then directly into the refrigerator. Yes, I am confirming it is best to store the freshly picked strawberries dry and unwashed. Wash them just before you are ready to use them. Wet berries stored in the refrigerator do not hold up well!
As you sort, place the pristine berries directly into containers the same way you stacked your picking basket or box: red tip upward and green cap downward with its stem placed into a cavity between berries. For now, place the berries you’ll freeze on (the counter or) one of the trays, and the berries that need ripening on the other tray.
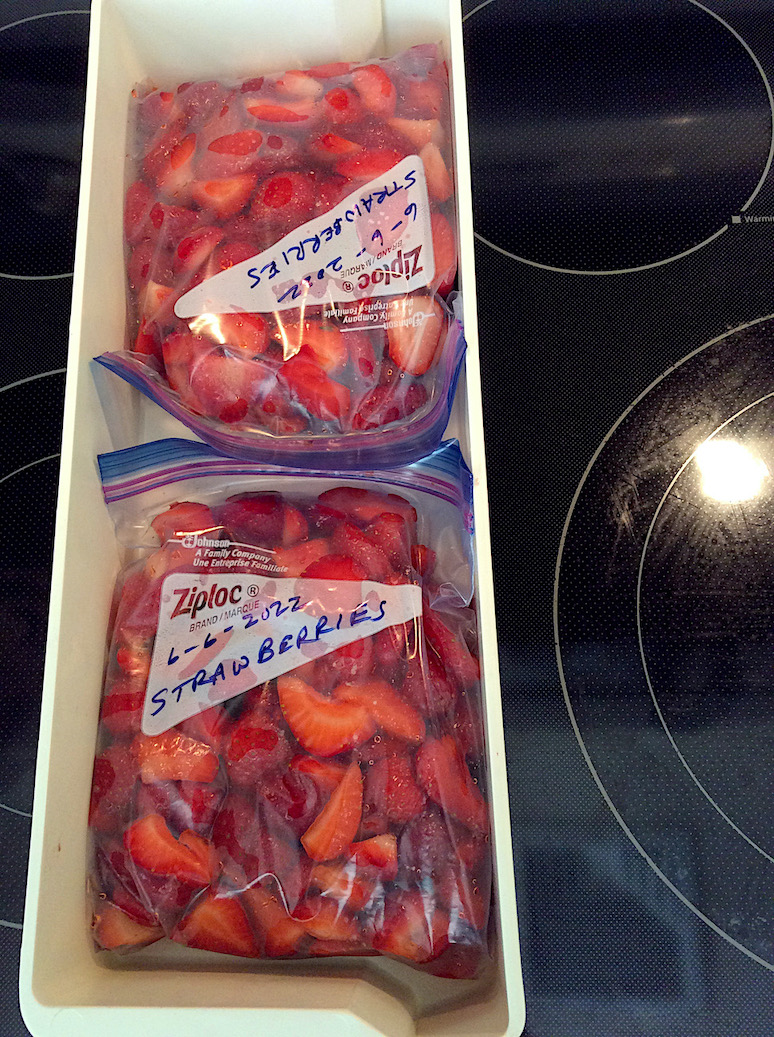
A few weeks ago, on June 6th and 7th, we went strawberrying two days in a row, because the weather had been beautiful for a stretch of days. I put 3 full containers aside in the refrigerator for us, and we have enjoyed them daily.
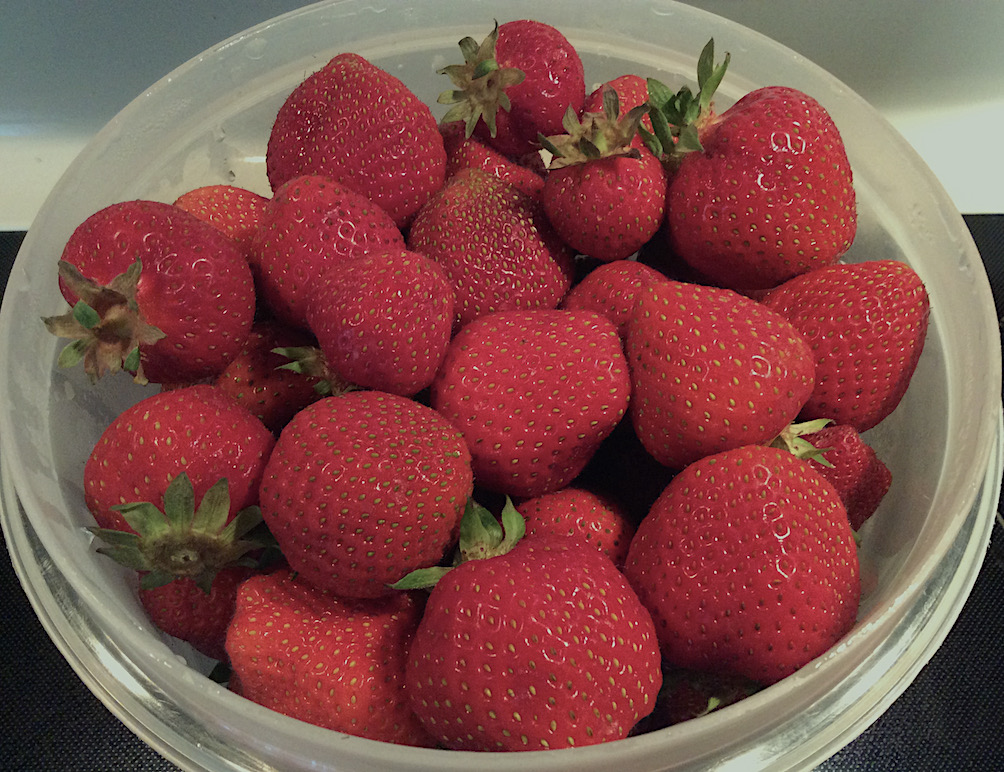 Seven days later, I opened the last refrigerated container (of the most pristine berries) for the first time. This is how the strawberries looked. Amazing, wasn’t it?
Though ideal weather conditions and careful handling contributed, I am wondering if the strawberry variety played a preservation role as well.
These berries were delicious. Food experts say expect freshly picked strawberries to last just 2-3 days, refrigerated! Typically, my refrigerated strawberries last 4-5 days.
When I finish filling each of the containers that are either for our use or are gifts, I place the container(s) in the refrigerator right away. And sometimes, before I completely sort a box of strawberries, I have started to prepare strawberries for freezing. That will open up space on the trays or counter to finish the sorting in a short while. The amount of strawberries a box holds can surprise you!
PREPARING FRESHLY-PICKED STRAWBERRIES FOR FREEZING
STEP 1: Set up a workspace
When I prepare 1 quart of strawberries for freezing, I use the following ingredients and tools.
Ingredients:
4 cups of washed, hulled and sliced strawberries
1/4 rounded cup of granulated sugar (use 1/3 cup if berries are very tart)
Juice of half a lemon
1 freezer strength quart-size plastic bag (OR comparable capacity glass or other plastic freezer-compatible container with tight lid)
Tools:
1 large bowl
1 small to medium bowl (for washing the berries)
4-cup measuring glass
1 sharp paring knife
1 large mixing spoon
1 juicer (can also squeeze out juice over a cupped fingers to catch seeds)
For convenience, I typically prepare two quarts at once (so I double the berries, sugar, lemon, and freezer bag). After I’ve prepared two quarts of strawberries for freezing, my workspace looks like this photo below.
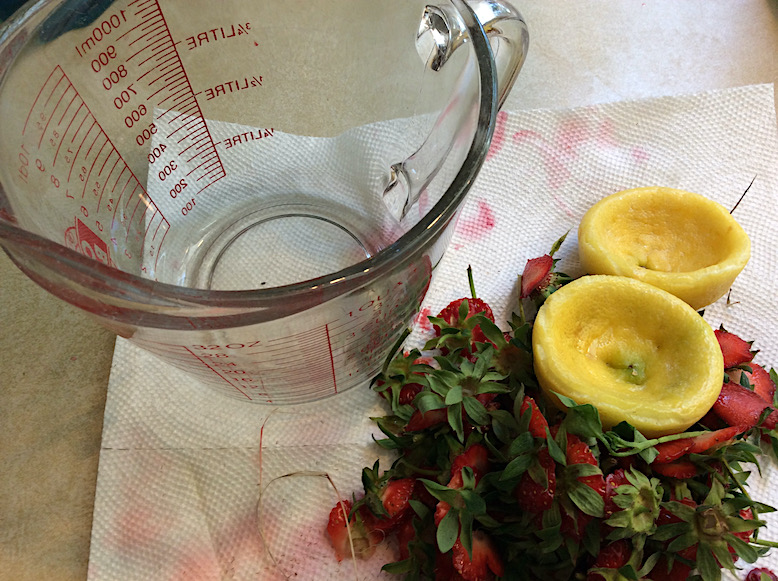
I set up my workspace where there is good light.
I place a standard size paper towel on the counter, along with a sharp paring knife, a small bowl for washing my berries, and the measuring device.
I place the large bowl off to my left, a one-arm reach from my working area.
STEP 2: Prepare, wash, and slice the picked strawberries
**
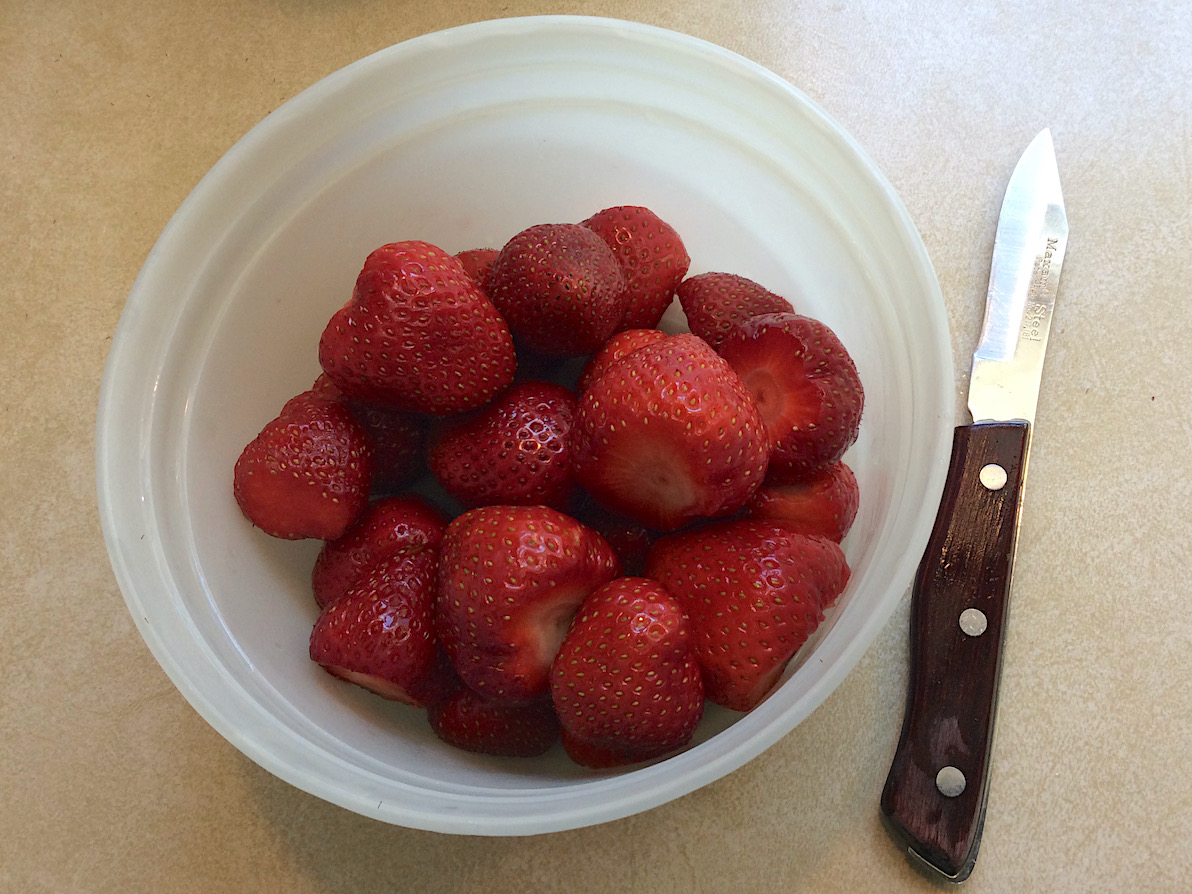
I gently grab a few handfuls of berries and place them on my paper towel. With a sharp paring knife, I remove the green cap from each berry, using slightly notched cuts into the berry’s narrower sides, so that I remove the slightly fibrous nodule right below the cap. I also slice away any damaged spots.
I place each de-capped strawberry in the washing bowl.
When the bowl is half full, I add enough cool water to cover the berries by an inch.
Then, I quickly swish the berries around, and immediately drain the water, while preventing the berries from falling into the sink.
This paring knife in the photo was my Mom’s favorite later in life, when she was the age I am now. I think of her every time I use it.
I don’t dry the berries or the bowl. This is an instance where the wetness is actually going to work for us in a few minutes.
Next, I slice those moist berries into the 4-quart measure. You can cut them a variety of ways. I like to highlight the beautiful chevron pattern Do you see it in the photo below. So, I hope you can follow this cutting pattern I try to describe in the next paragraph.
Make your first slicing cut vertically, 1/4-inch wide across the edge of the narrower side. If the berry size is small, one inch or less across its wider side, continue to slice it in 3/8-inch slices. You’ll get 3-4 slices, on average.
For larger berries, make the same end slice initially across the narrower edge, then slice along the vertical, in a circular pattern of 3/8 to 1/2 inch slices.
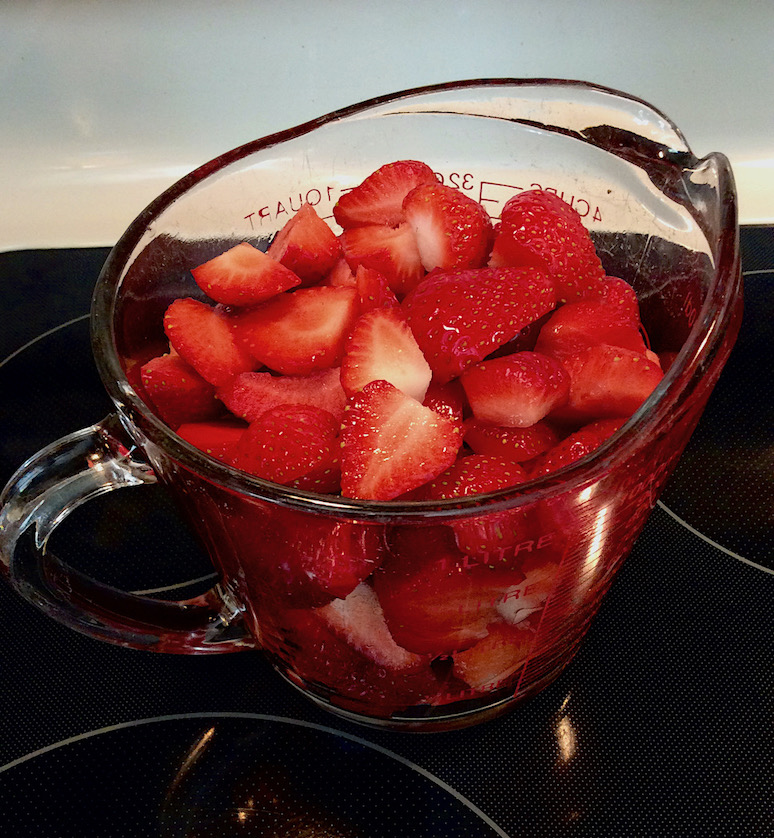
I repeat the washing and slicing processes until I have 4 cups of sliced strawberries in the measuring glass.
At this point, I empty the 4 cups of sliced berries into the large bowl nearby. If you are going to prepare a second quart of berries, generally repeat the instructions that begin earlier in this article at the double asterisk(**) following STEP 2. Then continue below.
STEP 3: Blend the sugar and lemon into the sliced strawberries
I usually do not prepare more than 2 quarts of strawberries simultaneously in one large bowl. I’ve learned over time it makes the whole process easier.
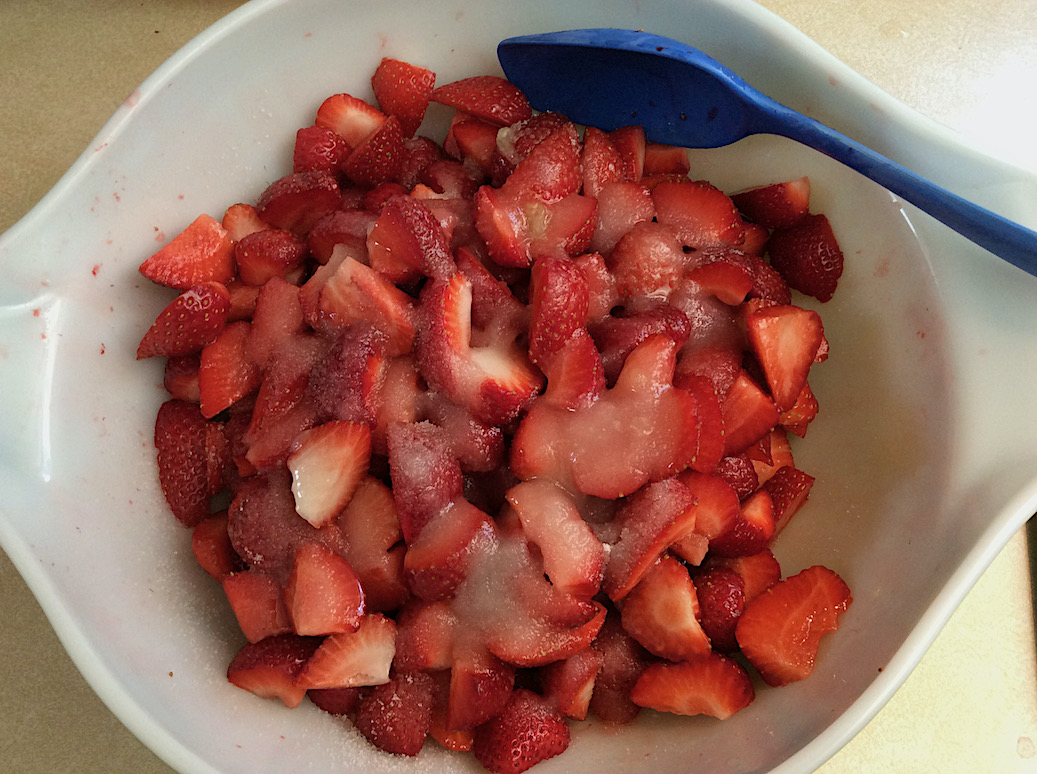
So, sugar and lemon juice are added to the berries in the large bowl, in amounts appropriate to whether you have 4 cups or 8 cups of sliced berries there. Do not stir yet. Let the berry slices sit in the bowl for 5-10 minutes, then stir gently in 5-6 passes. Let it sit for another 20-30 minutes, stirring a few times.
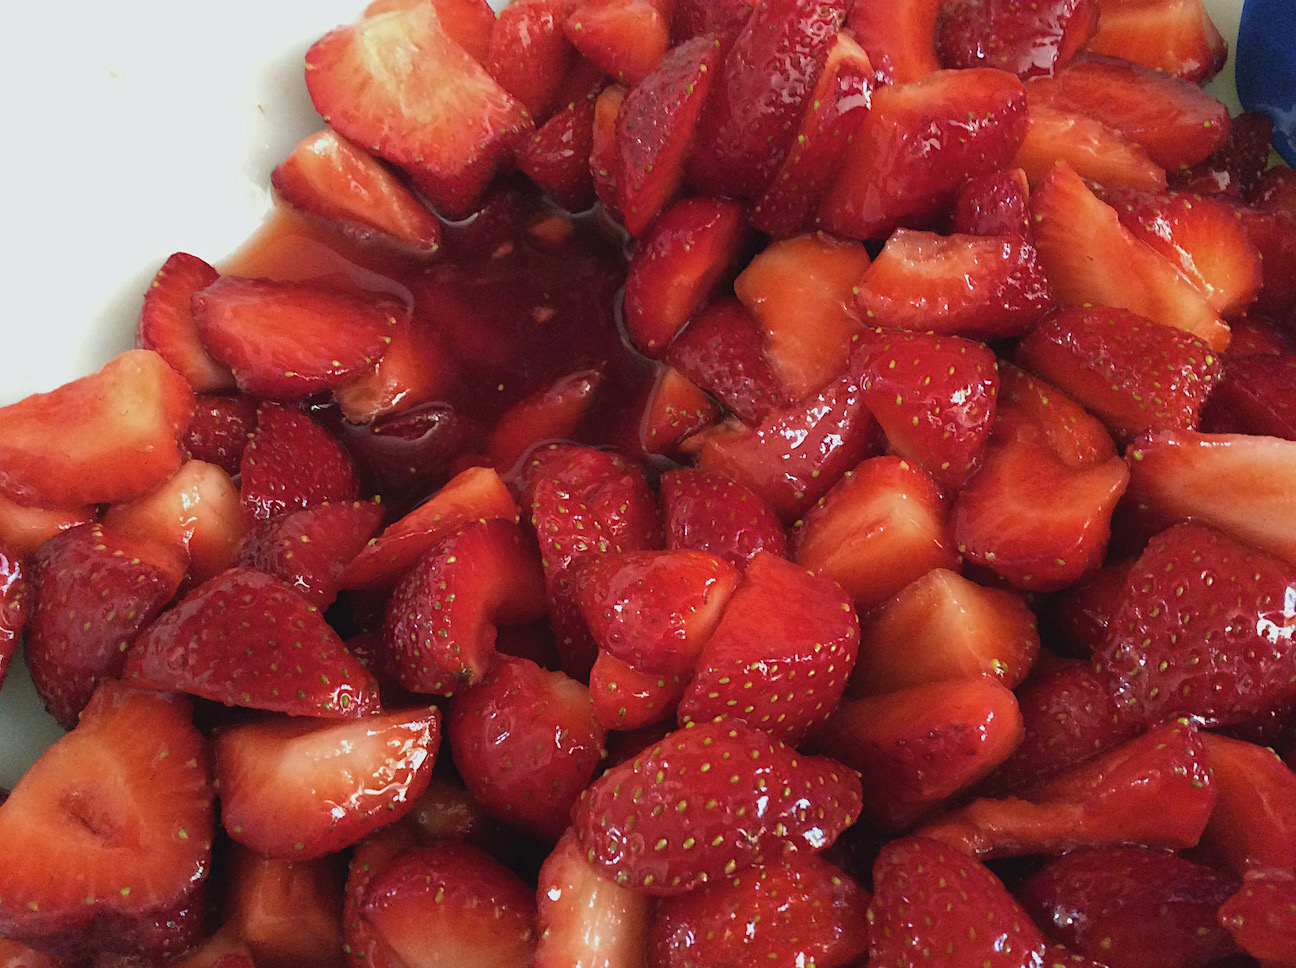
By then, you should have about a half inch of beautiful dark juice at the bottom of the bowl. You can see the juice in this photo below. Are you wondering why I add lemon juice?
Along the way in my cooking and baking I learned more about lemons. One strawberry season, I tried adding the juice of half a lemon per quart of berries. Adding this lemon juice improved the freezing process. We found it sharpened the berry flavor and better preserved the color of the strawberries.
STEP 4: Pack the freezer bags (or containers) and freeze the strawberries
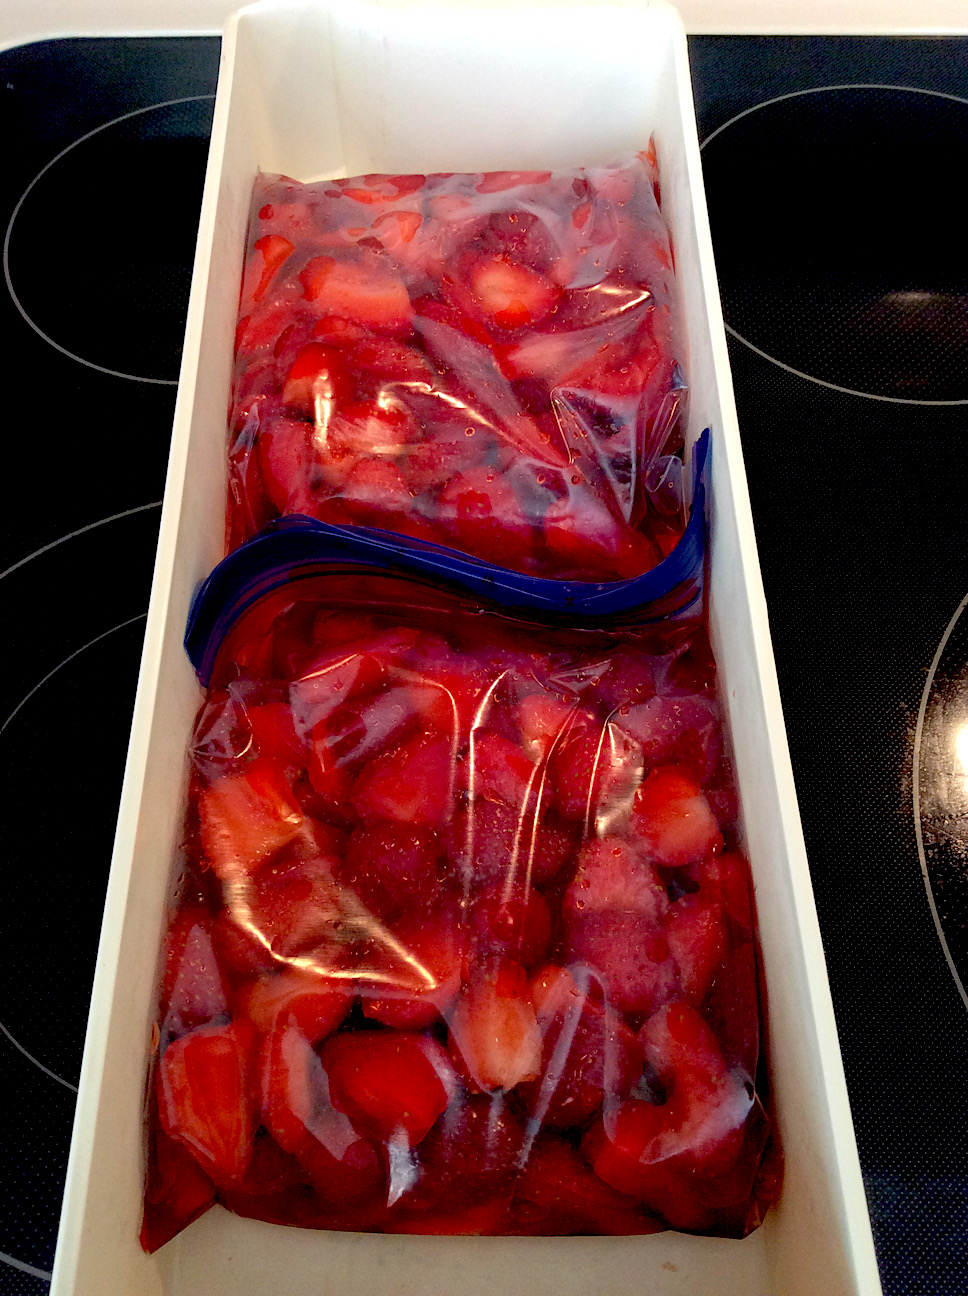
Using a large, but sort of narrow stirring/serving spoon, transfer spoonfuls of the juiced berries into the quart container(s) you are using, either the plastic freezer bag(s) or one glass/plastic container per quart. If you made 2 quarts and are using plastic freezer bags, try to divide the overall quantity evenly.
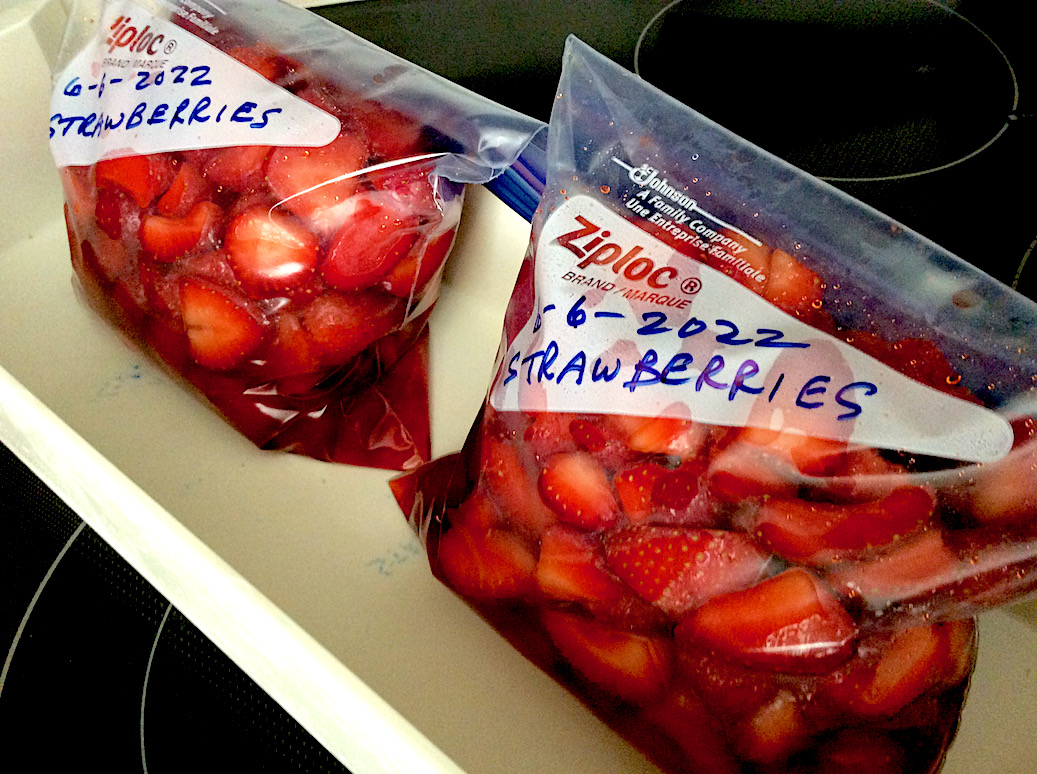
Fold over the upper third of the freezer bag, so that air is forced out.
If using a container with a cover – once filled, secure the lid on, then lift the cover slightly and immediately close it again. Air will tend to get pulled out.
Place the sealed bag or freezing container on a level area in your freezer.
I retained some trays from my previous refrigerator, and use them to shape the freezer bags, so that I can later store them upright more easily. Though not required to freeze your berries, I have found these trays bring uniformity, so easier storage for me, so keep your eyes open for using something like these when you freeze using plastic bags.
I place this tray holding 2 quarts of strawberries into my freezer.
After about 6 hours, I like to carefully flip the packages, so that any remaining juice sinks to the front side, re-bathing those strawberries which are now on the bottom.
After another 3-6 hours, the freezing is solid and I stand up my packages in a storage tray, like this one shown below. Into the freezer they go, for however long their stay is!
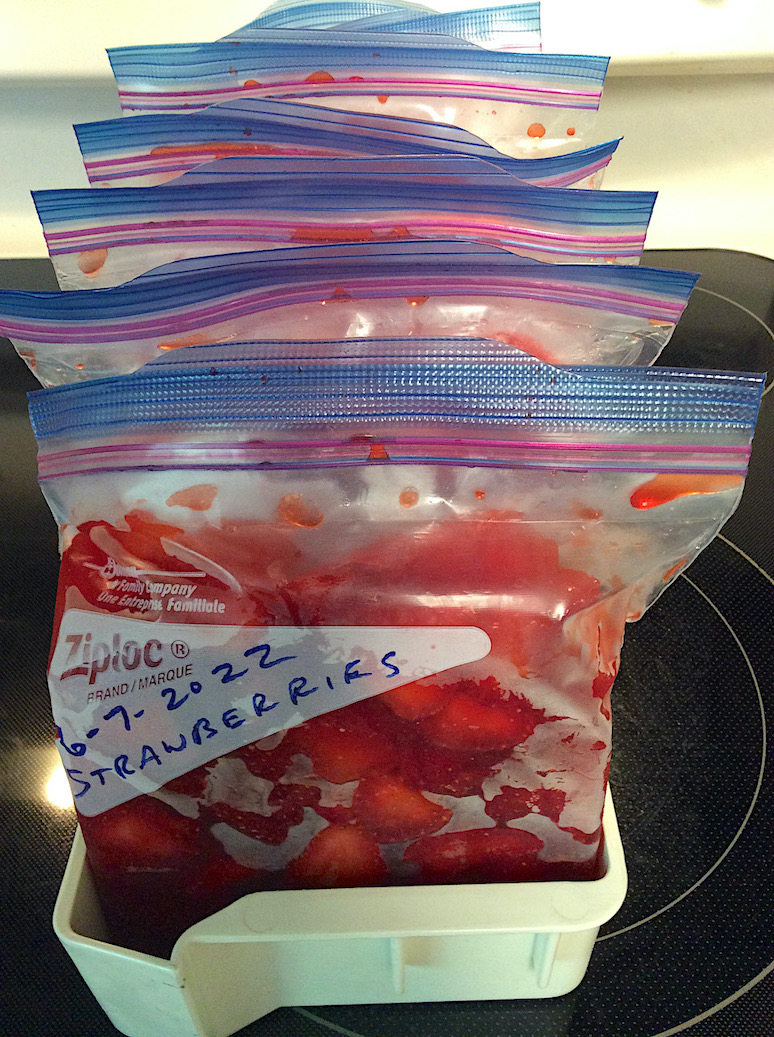
The frozen strawberries will be viable for about 12 months, unless we have a long multi-day power interruption.
In all the years we have frozen strawberries, only once did we lose them: a freak summer windstorm (75 mph). Our house lost power for 5 days while we were away on vacation.
Our wonderful neighbors, bless their hearts, took on the task of cleaning out of our refrigerator in the ensuing hot weather.
STEP 5: Use the Frozen Strawberries
When the late fall and winter weather is upon us, we move a package of strawberries from the freezer to the refrigerator to thaw for a day or so. Then, we make something tasty.

Our first choice is often Belgian waffles. I encountered them the first time at the New York World’s Fair in 1964. They wowed me then and since then have been in my food life! Soft waffles are my preference, like the wonderful waffles Aunt Vee made when I was growing up. The secret to soft waffles is adding (more than usual quantity of) eggs to the batter. In the day, our family found many ways to use the fresh eggs from my grandmother’s hens!
Here, we love soft waffles covered with local strawberries in their juices, whipped cream, and a few banana slices on top!
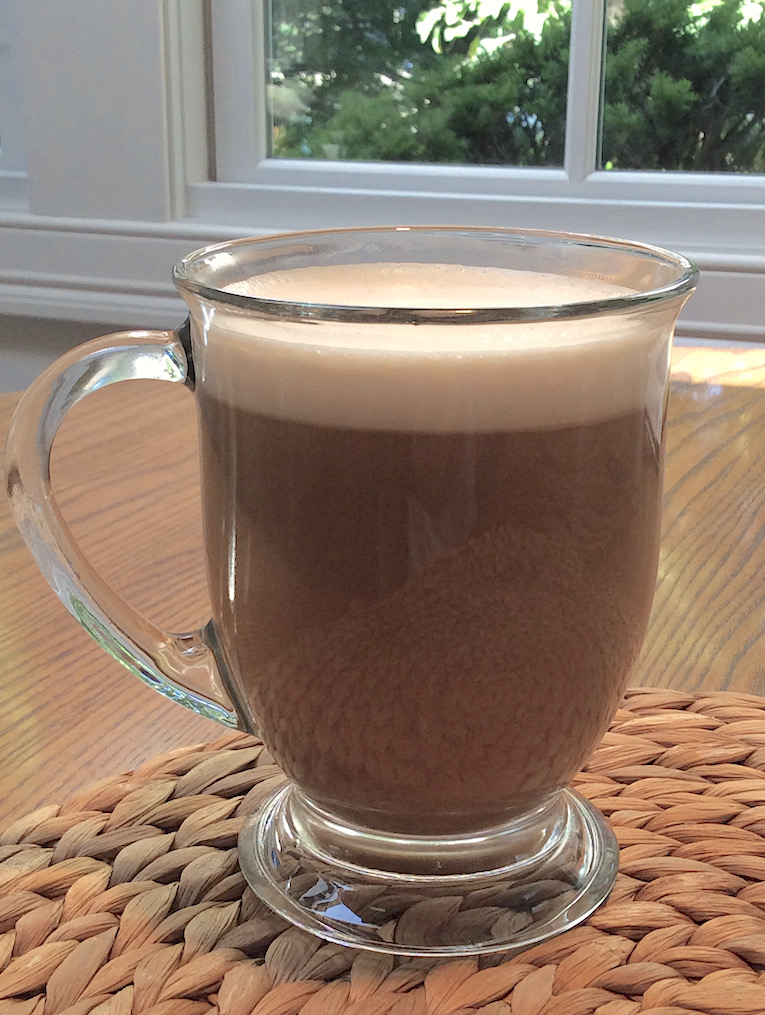
Oh, and our breakfast would not be complete without a Moco Croco, a Hubby term for coffee with a few good dollops of whipped cream.
By the way, converting the juice of the strawberries to a syrup, i.e., creating a slightly thicker consistency, is easy, once you’ve done it a few times. See the instructions at the end of this article.
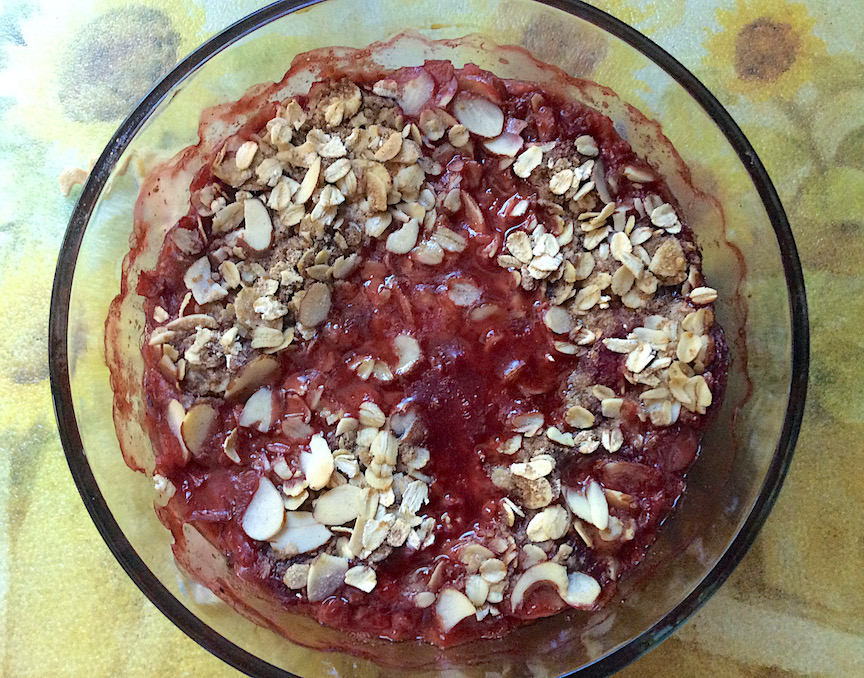
It often seems just a blink when a year has passed and we are heading again into strawberry season. If any strawberry packages remain, a spring favorite is fresh rhubarb and strawberry crisp (see photo below), using a thawed package of those wonderful strawberries we picked a year ago.
Soon, we’ll be picking, enjoying, and preserving fresh native strawberries again!
To make a syrup for 1 quart of thawed strawberries:
(a) Into a 3-quart saucepan add a strainer-sifted tablespoon of cornstarch (a generous rounded tablespoon). Open the seal of the thawed strawberries’ freezer bag an inch or so, and carefully pour a little splash of juice into the pan in a spot separated from the cornstarch. To avoid lumps forming, I use the back of a mixing spoon to drag a little liquid into an edge of the cornstarch, and smush to blend the two. I continue to add a little juice only (no strawberries) and smushing, until all the cornstarch and most of the juice are mixed well in the pan. Your spoon should no longer drag. The mixture will be a cloudy pink at this stage.
(b) Now, heat the juice/cornstarch mixture on Medium, stirring frequently to avoid sticking for the few minutes it takes to reach a boil bubble or two. Now, reduce the heat to Medium Low and then Low to maintain a simmer for a minimum of 3 minutes, while stirring frequently. This will process the cornstarch. Do notice that as the liquid thickens, it changes from a cloudy liquid to a rich strawberry red syrup. It might seem a little thick to you, but be patient for another minute or so.
(c) Remove the pan from the heat and add the thawed berries and any remaining juice from the freezer bag to the saucepan. The combined juices will produce the consistency of syrup. I am confirming that you do not cook the strawberries. Stir and serve.
© 2022, Bernice L. Rocque, all rights reserved.