
Once upon a time I rode to my job in a vanpool. During the longish ride, those of us who didn’t nap often exchanged ideas, opinions, solutions, and sometimes how-to do this or that information.
In one such conversation, I explained to my travel mates that thousands of pine cones were falling on the yard — from gigantic 100-foot white pines edging 0ur property. Imagine this scene below in near 180-degree splendor. Many of these magnificent trees were planted in the 1930s. They and their generations of seedlings grace our view and support diverse wildlife. We are fortunate to live here.

This gift of pine cones occurs about every three years. Ahead of the cones each fall, the equivalent of 25 bags of pine straw cover the back yard like a tawny blanket, but that’s another story…
First, know that I am not someone who perpetually engages in crafting. There are moments, however, when a compelling crafting concept crosses my radar, such as these Pine Cone Wreaths which require NO WIRING or GLUING. “Tell me more,” I remember saying. My curiosity took over and before I knew it I was learning how to make something beautiful.
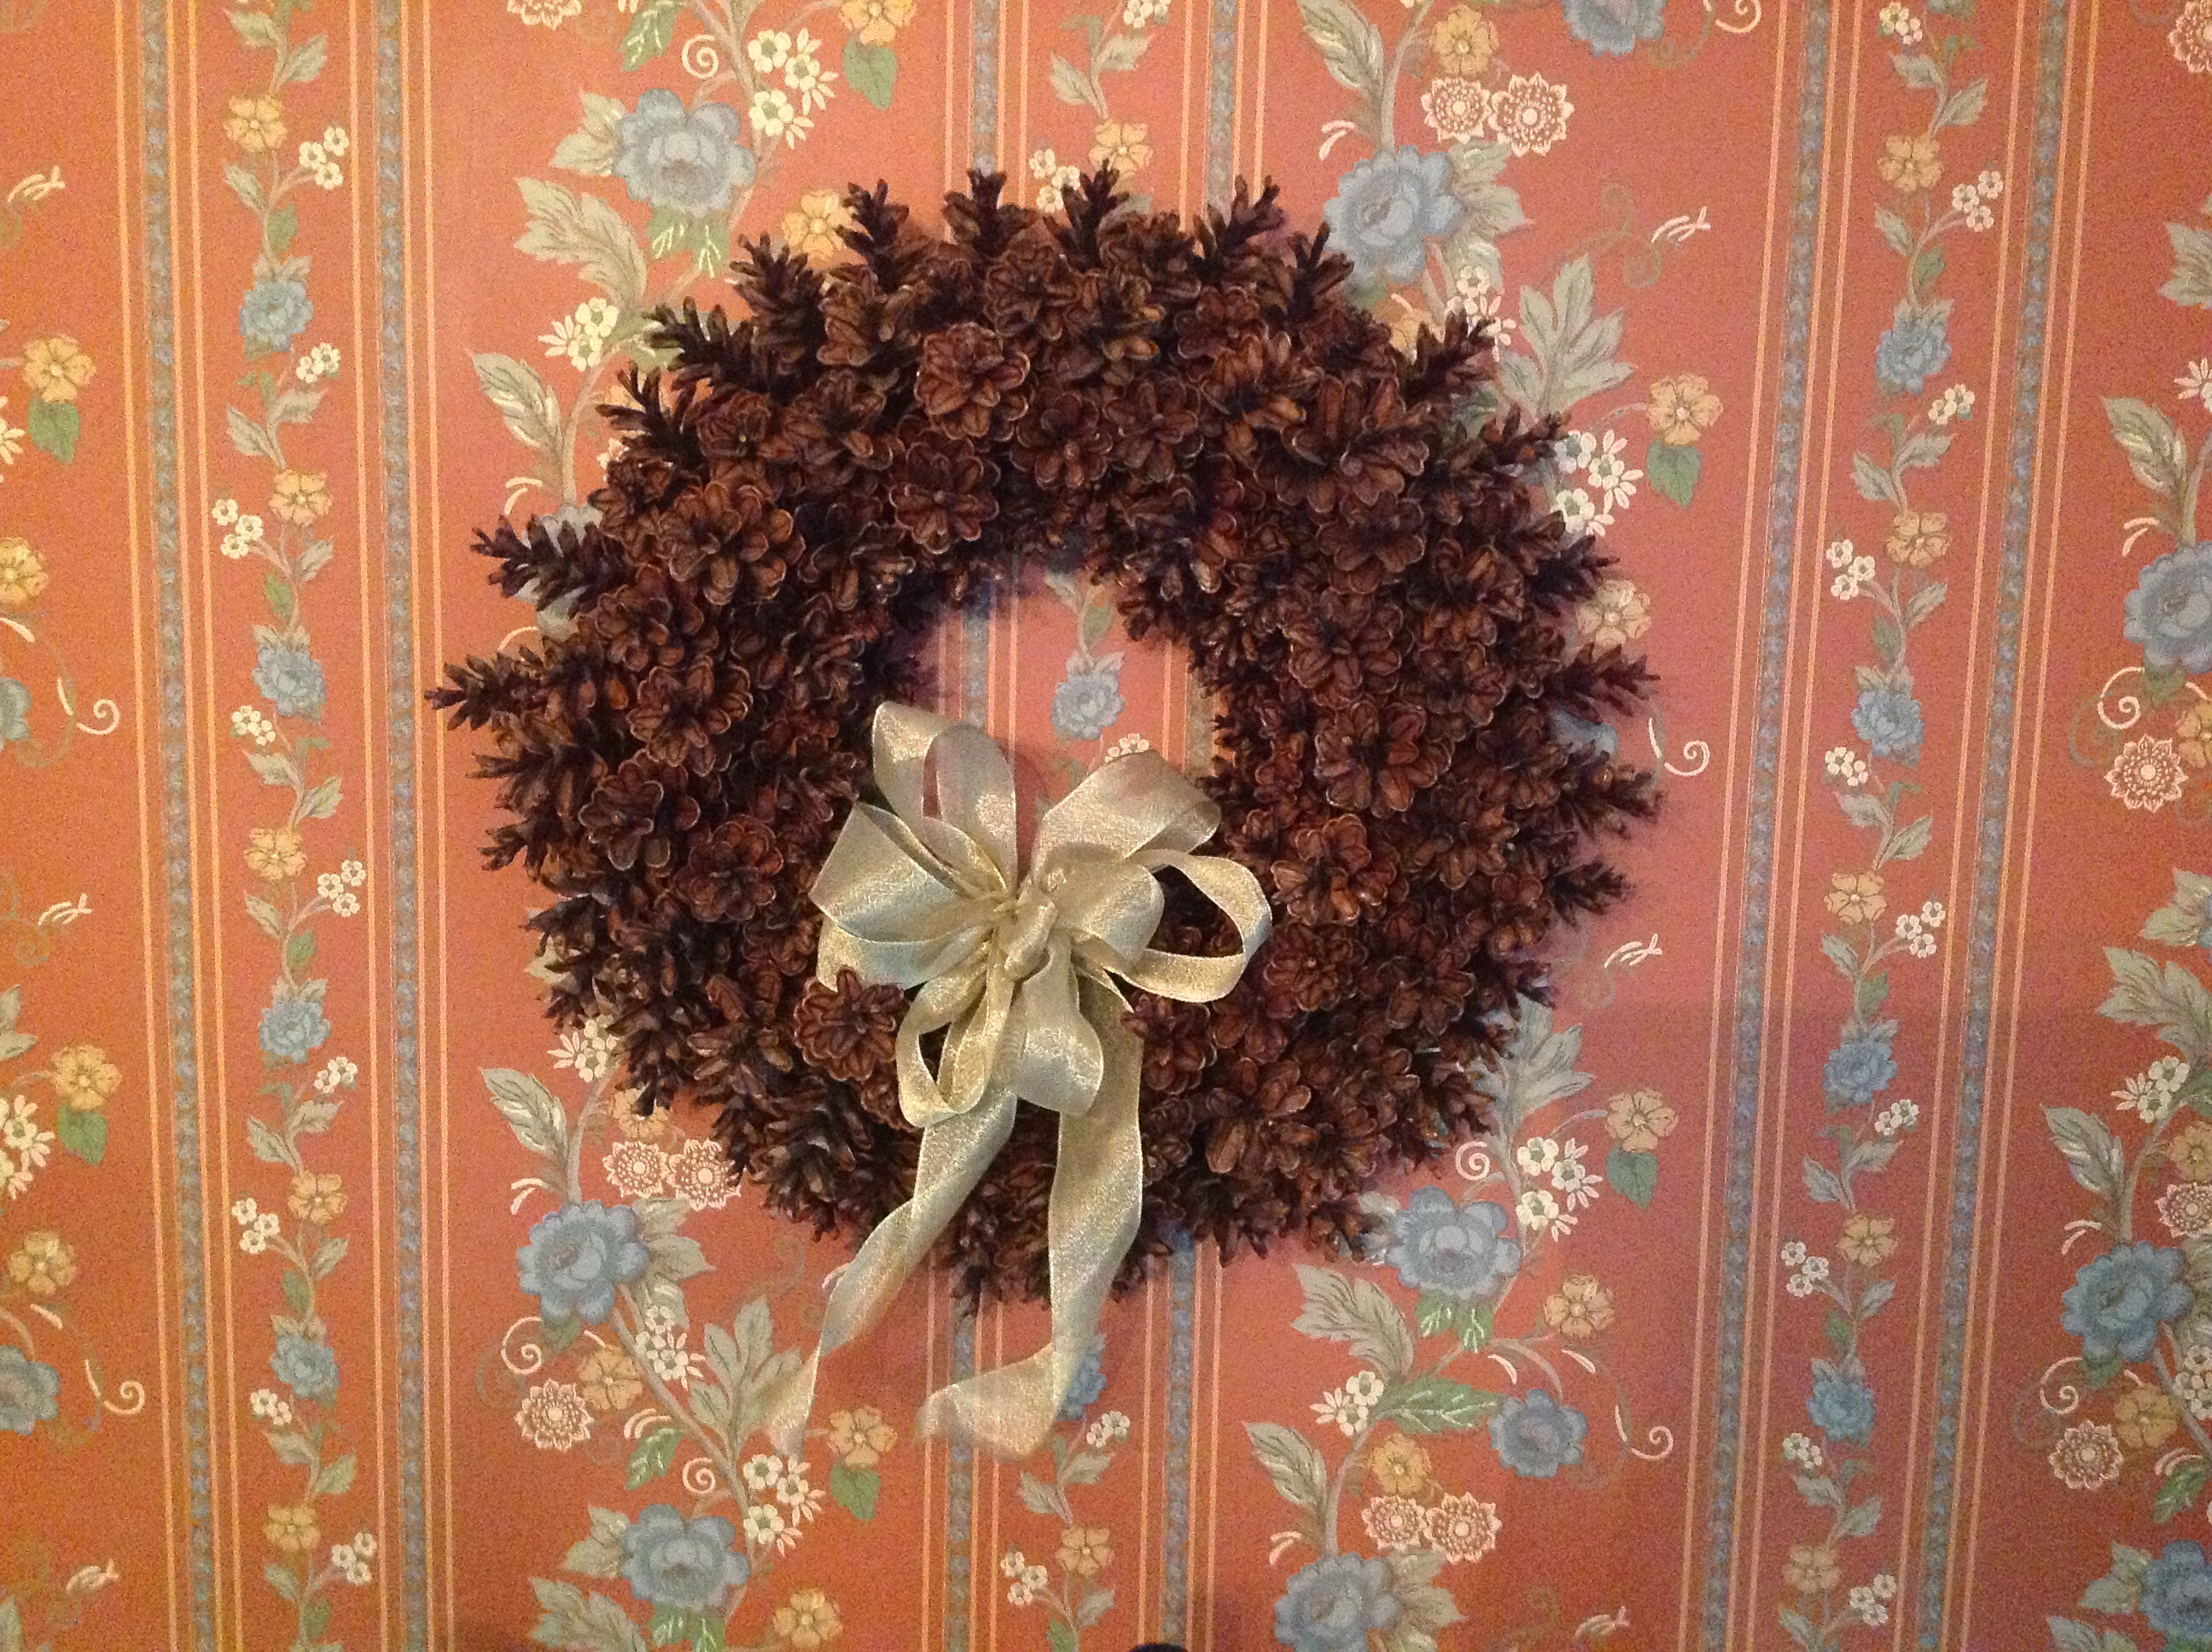
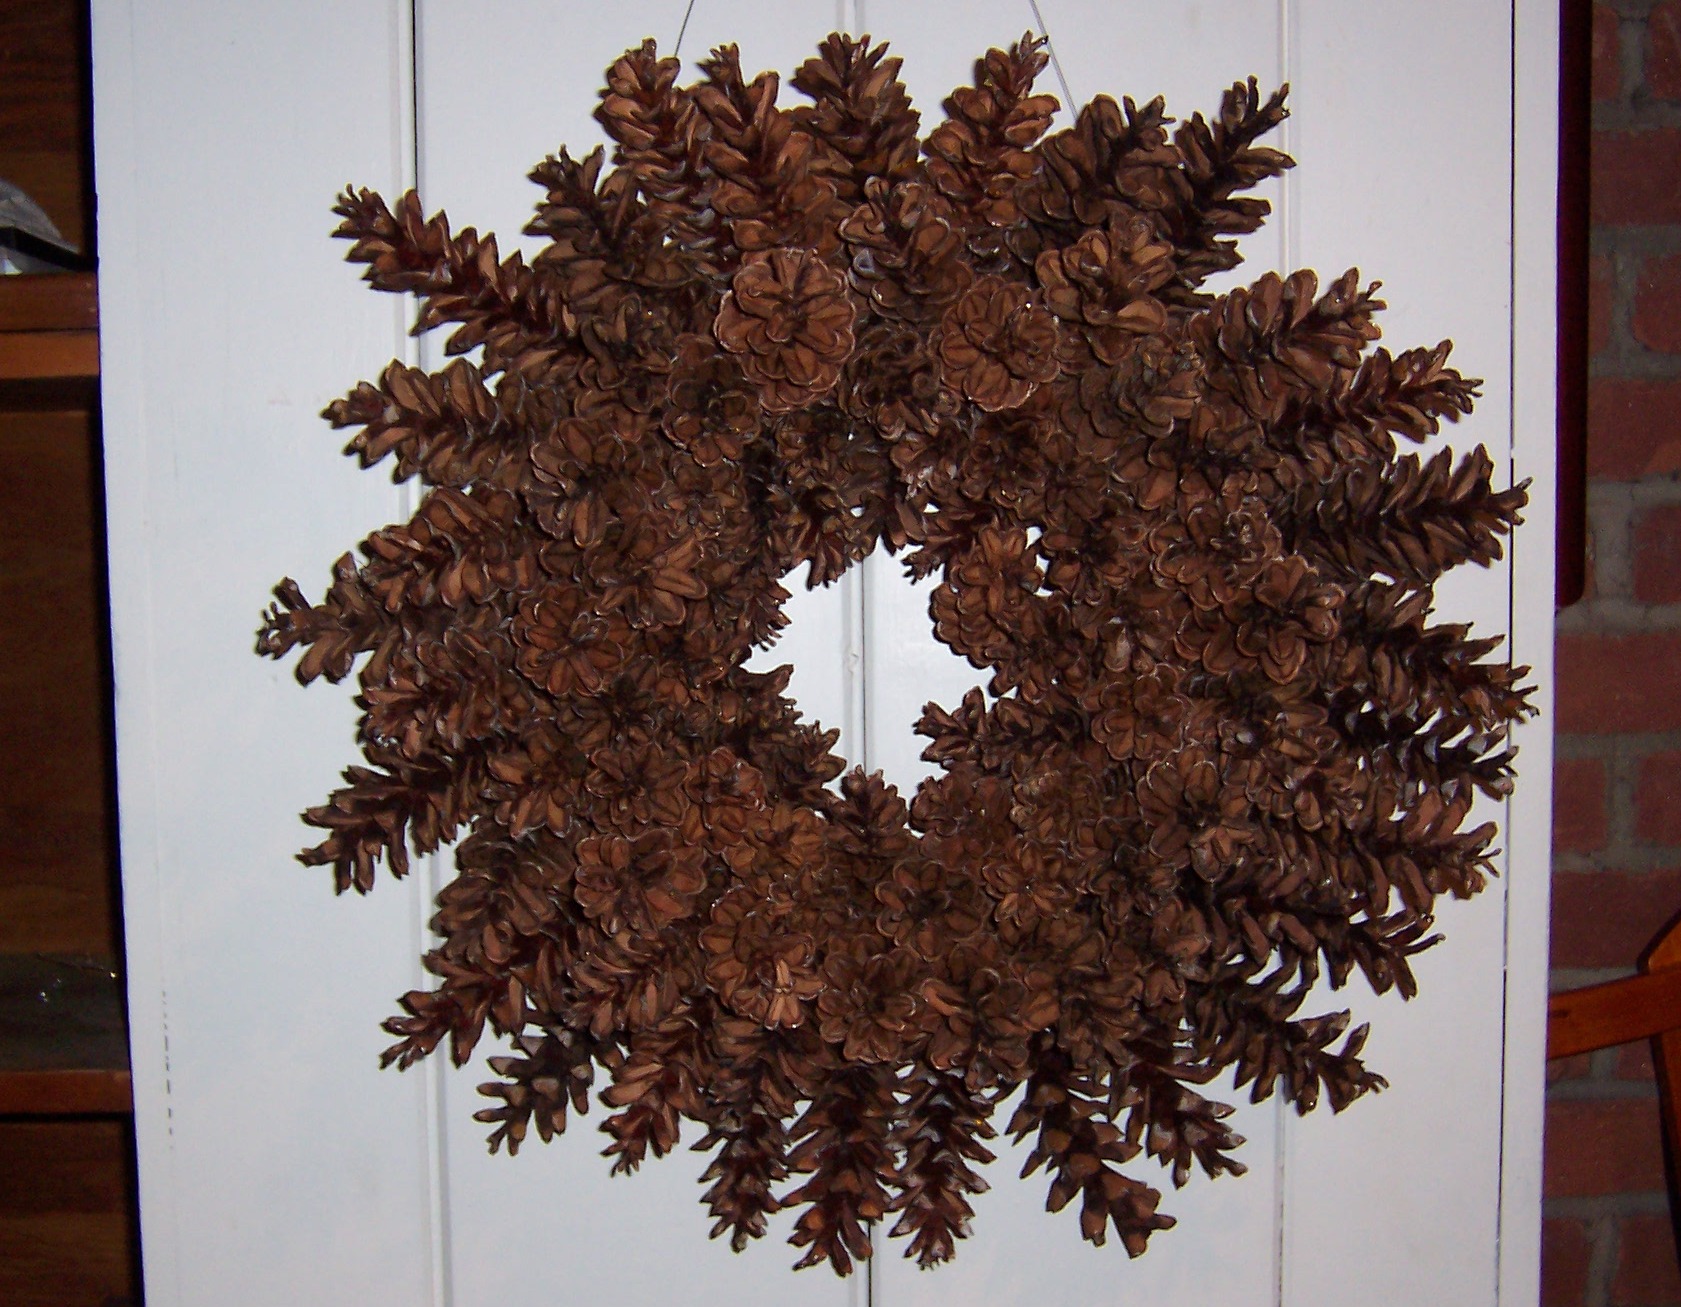
I was so enamored with that first result that I’ve probably made 15-20 of these lovely wreaths in twenty plus years. Here’s the one hanging in my dining room. The finished wreath should be hung inside or in a sheltered area, away from rain and snow. Why will become clearer shortly.
Even if I am not crafting all the time, I admire folks, like my friend, Carol, who regularly create so many ingenious things. Three years ago, she stopped by to watch another friend and I making these pine cone wreaths. This year is the second year she has made and donated one for a local garden club’s holiday bazaar. Last year, her wreath was scooped up in the initial minutes, fetching $60 for the club! Carol graciously took many of the photos in this blog piece and I thank her, as I think they will help you if you decide to give this a try.
So, if you are looking for a great holiday project, a handmade gift for family or friends, a fundraising item, or a way to make some extra money, this wreath might appeal. Both Carol and I have refined the original instructions, but if you find a better way to do this, drop me a comment. Click here if you’d like to see more of Carol’s crafting.
Before beginning, we recommend you read the instructions all the way through, as there will be many opportunities to multitask and save time. This is a great project to do with a friend or with kids inclined to help. Each person can even have an area of responsibility! If you have enough working space, you can also assemble several wreaths at a time.
As an update to this post, last winter I received several inquiries from folks who planned to make the wreath. In one case, a grandmother and young grandson decided to make a wreath for his mother for the holidays.
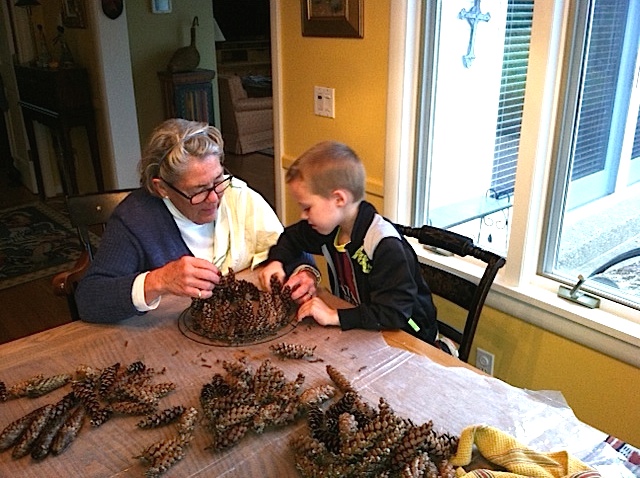
Here are Nee Nee and Mick making a wreath.
My personal thanks to her for sharing a few photos and their story.
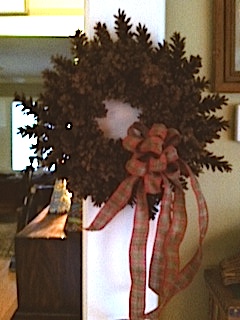
Nee Nee wrote, “Mick’s mother loved the wreath! She cried.
The best part was Mick walking into the family room carrying it — and the smile on his face.”
Here is the pine cone wreath Mick and his grandmother created for his mother.
It seems there is a lot of love in this beautiful wreath. As a family historian, I so enjoy stories like this one because I expect they will produce unforgettable memories!
So, let’s get started. I hope you enjoy making one of these special pine cone wreaths as much as Nee Nee and Mick…
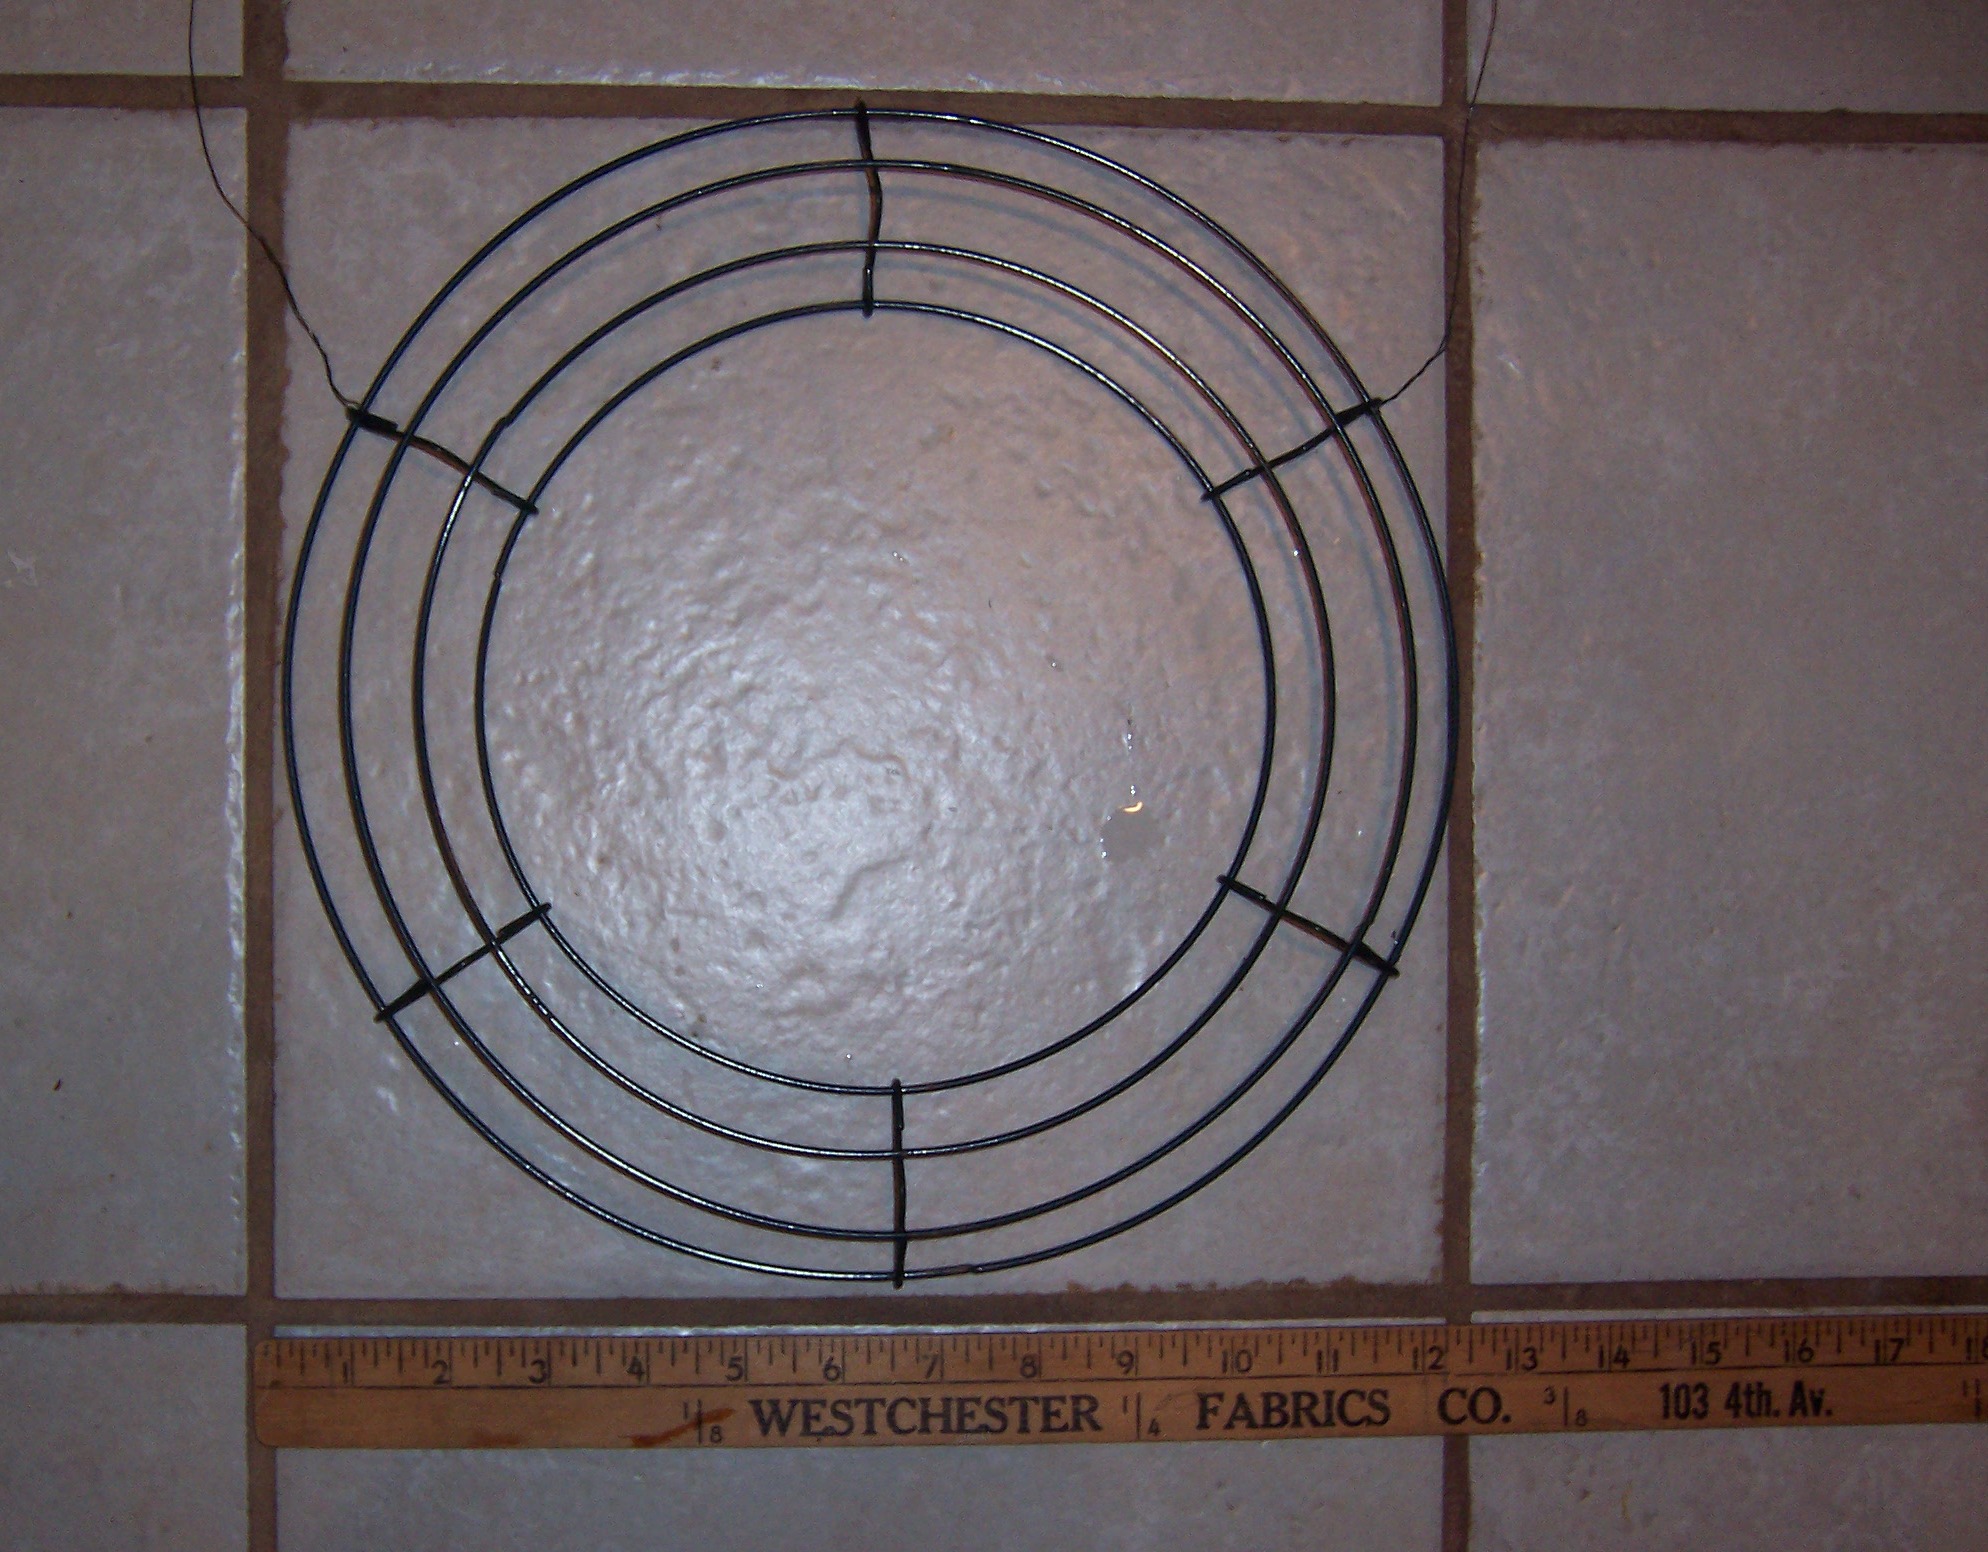
STEP 1 – Get a frame for your wreath
Obtain a metal wreath frame, the type with three circular partitioned tracks. Most craft stores carry them or you can purchase the frames online. I like a 14-inch frame, but 12 inches works well, and the larger ones do, too, if the space where you plan to hang it could use a larger wreath. If you haven’t used this type of frame, here’s what they look like.
I have always used the cones of white pine trees for this wreath. Generally, they are taller than they are wide. Caution: Short wide cones from other types of evergreen trees do not work well with this type of frame, as they are often too fat, even after the washing step, to push into the divided sections. So, stick with the white pine cones or something similar.
STEP 2 – Collect the pine cones
Collect cones when it has been sunny for a few days, as the cones will be fully open and you can inspect them easier, retaining the best ones. (When it has been wet, the pine cones close up like cigars.) Use a large garbage bag or other easy tote.
Put on work clothes and some gloves, otherwise your hands will be covered in sticky pine tar. Plastic or snug fitting gardening gloves work fine. During the process, if you get pine tar on you or your clothes, there are probably many products that can remove it. My work clothes are usually cotton fabric or denim. Lestoil, full strength, works well for me.
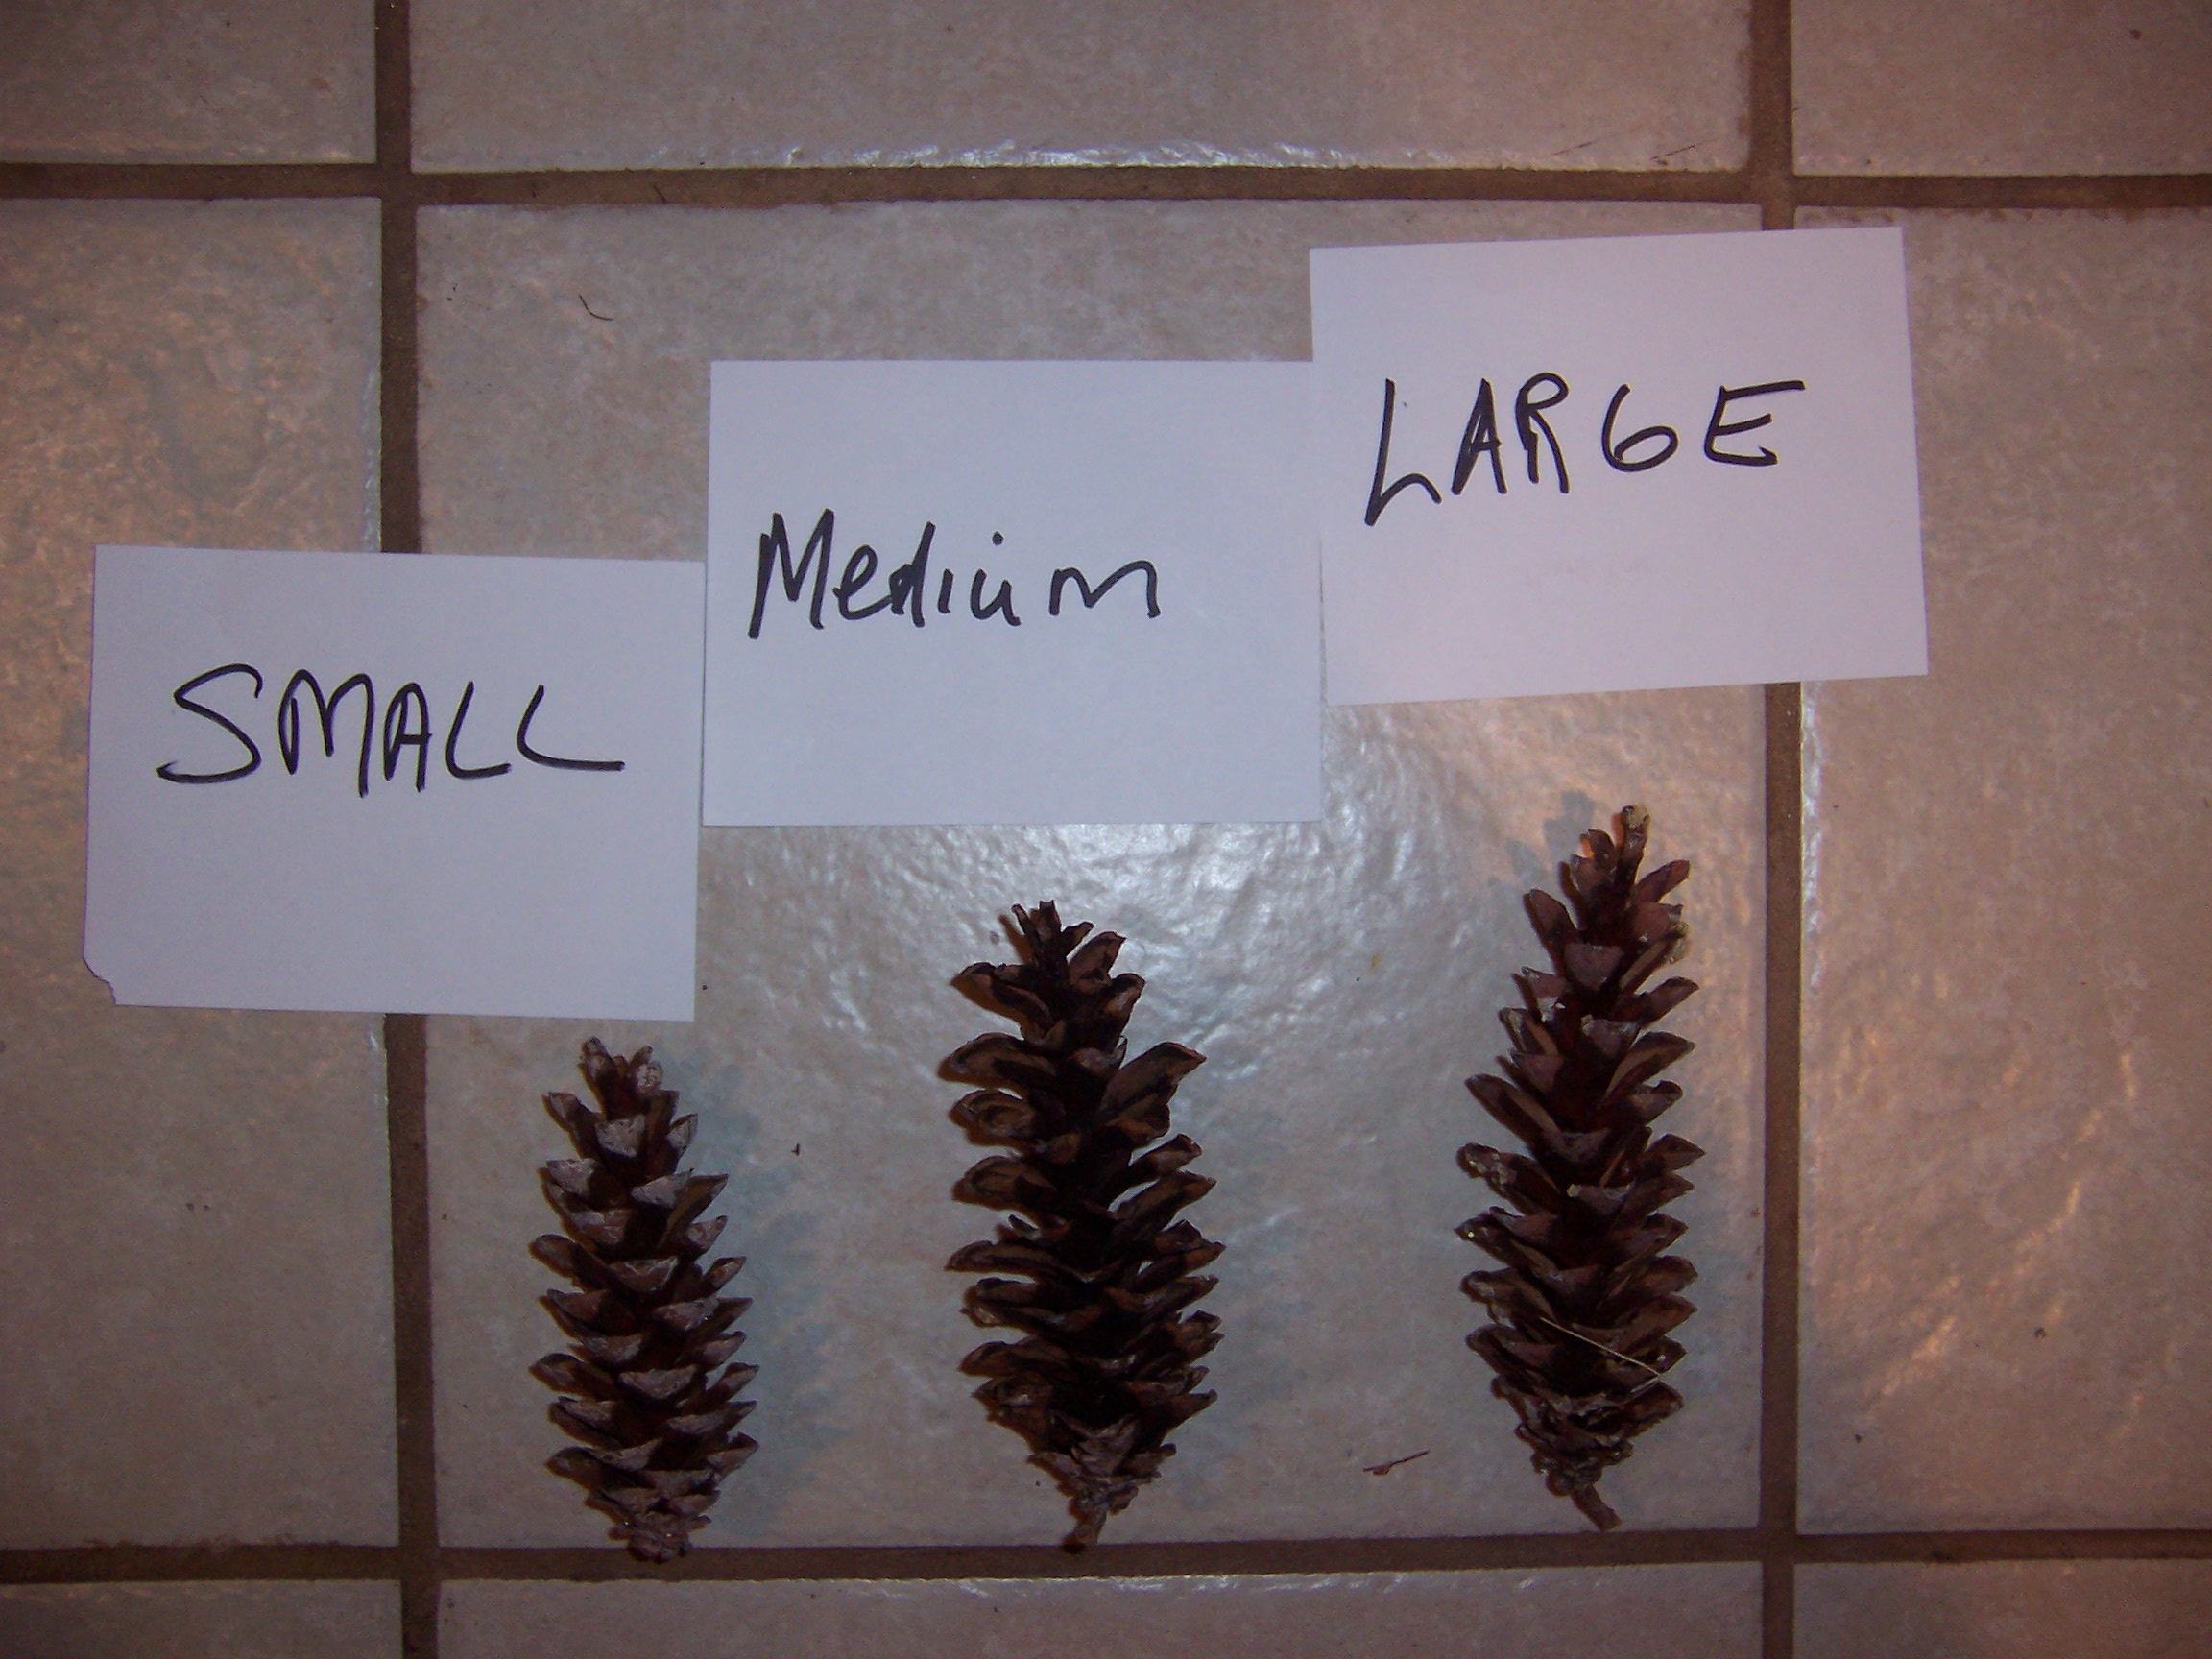
Pick up white pine cones of various sizes. Discard any that are broken, dirty, have split petals, or are severely curved. You’ll need a minimum of 90 pine cones for a 12-inch wreath frame, but it is wise to pick up at least 120 total. Generally, try for a third each that are short (2-3 inches), medium (4 inches), and long (5 inches). The length measures are approximate and meant to guide rather than constrain. This is a rustic-style wreath, though if you have an ample supply of cones and wish to spend the time, matching the cone lengths within each size can improve the symmetry.
Once you have picked up a few pine cones, you’ll realize that some are narrow and some are wider. (In the photo below, notice the medium length cone in the middle is fatter than the other two.) I try to collect a mix of widths, as the wider ones better fill the space between cones (as they dry and expand), and the narrower ones ease into the frame where the spacing is tight. See the next step for a sizing comparison of both length and width.
STEP 3 – Sort the pine cones
Sort your pine cones in three lengths: short, medium, and long. Break off or clip (with pruning hand shears) any stems that you see at the base of the pine cone. (This will make the job easier when you press the cones into the frame.) For example, note the little stem at the bottom of the tallest cone in the picture below. Continue to be on the lookout for any cones that are broken, have excessive dirt or pine tar, are too curvy, etc. You’ll need at least 30 of each size, but I urge you to bring at least 120 through the baking and washing process, as you will surely choose to discard some along the way.
 STEP 4 – Bake the pine cones in batches
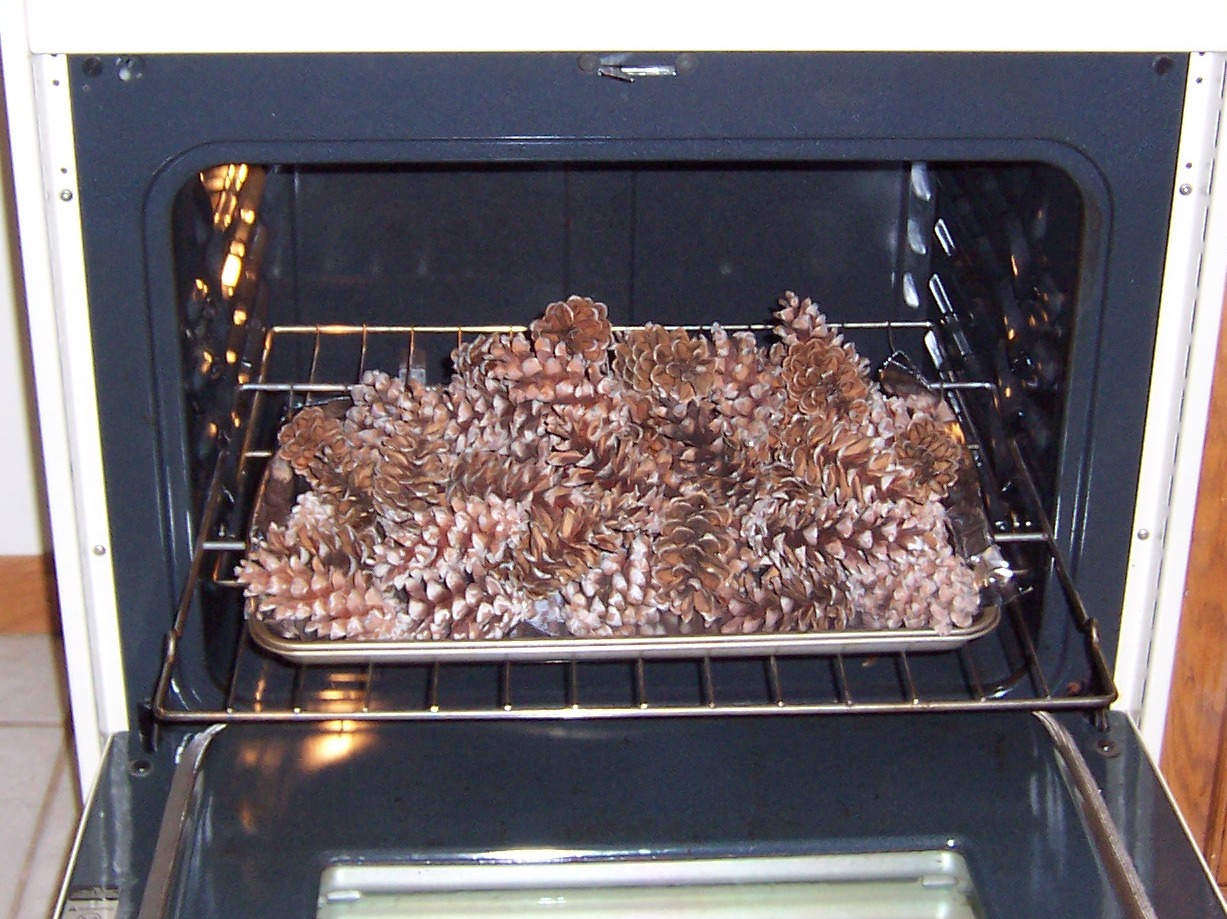
Preheat your oven to 200 degrees. Line a baking tray with aluminum foil. Starting with the small size pine cones that you will use first, count them as you gently place the pine cones horizontally on the tray and stack them to about 5 inches high. You’ll need a minimum of 30. Best to bake 40. Bake the pine cone batch for 20 minutes. This should kill any creepies and their eggs, as well as crystallize much of the pine tar. You may wish to turn on the oven fan. When the timer rings, remove the tray of cones and let it sit on the top of the stove for a few minutes.
STEP 5 – Wash the pine cones
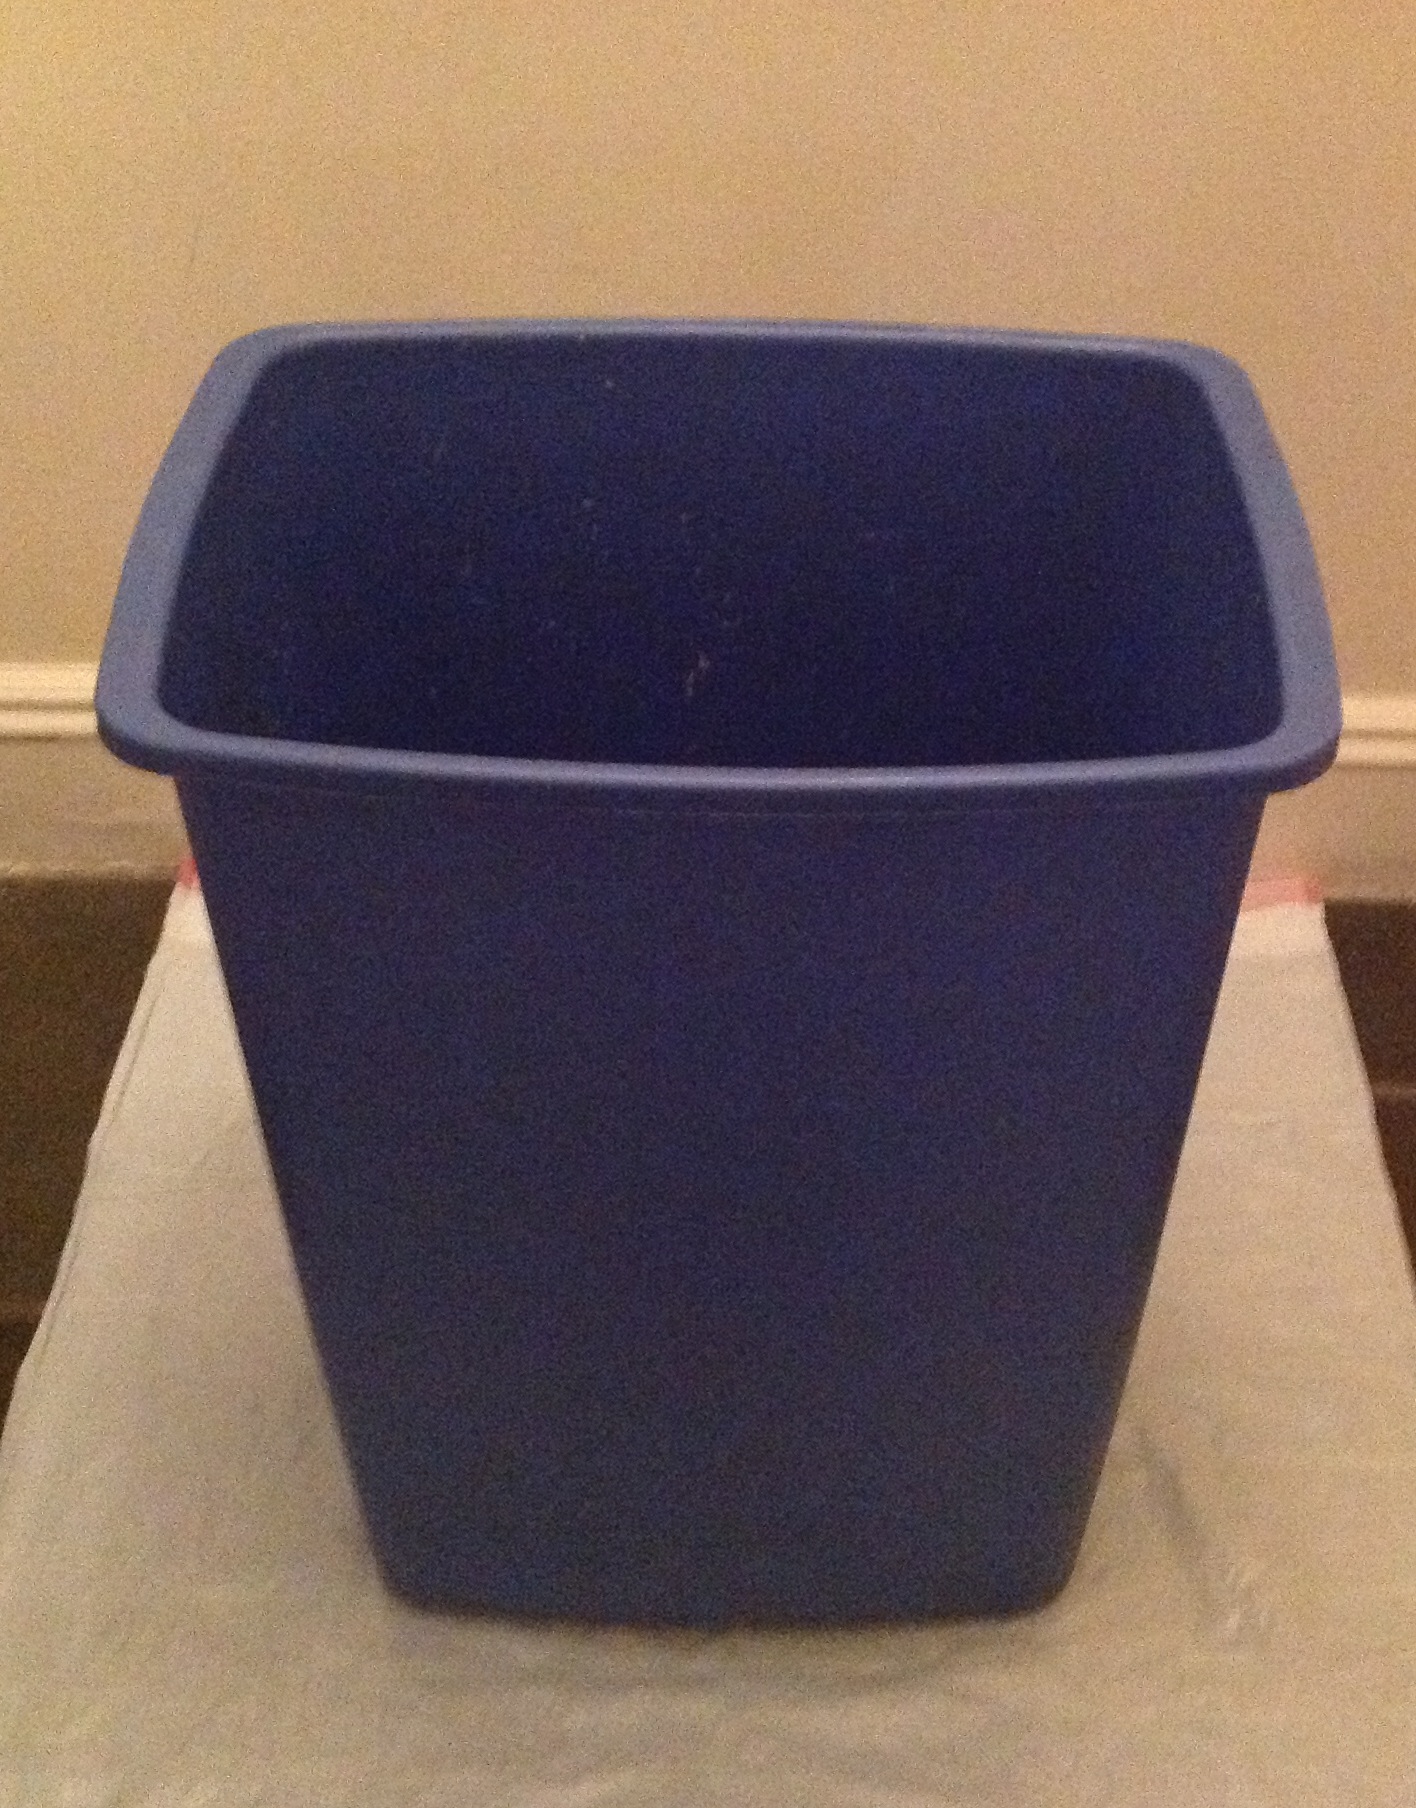
After each batch is baked, you’ll be giving them a bath! A large pail, or a tall clean wastebasket or small garbage can will work fine. Be sure to work in an area that won’t be damaged by water splashing, but also put something down on the floor to absorb or catch puddles. This is the washing container I prefer — about 18 inches high. It nicely accommodates one baked batch. Fill the container half to two thirds with lukewarm water.
The pine cones can become a little brittle from the baking process, so carefully lift them in small bunches from the tray, and then place them in the water. They will want to float, so gently push each small bunch downward into the water before adding more pine cones.
Repeat this until all pine cones from the baking tray have been submerged. If using a smaller pail, just do a second batch. It is far better to have enough room, so you don’t damage the pine cones by squashing them into the pail. Again, as you place bunches into the water, keep your eye out for any that are damaged or unsuitable, and discard them.
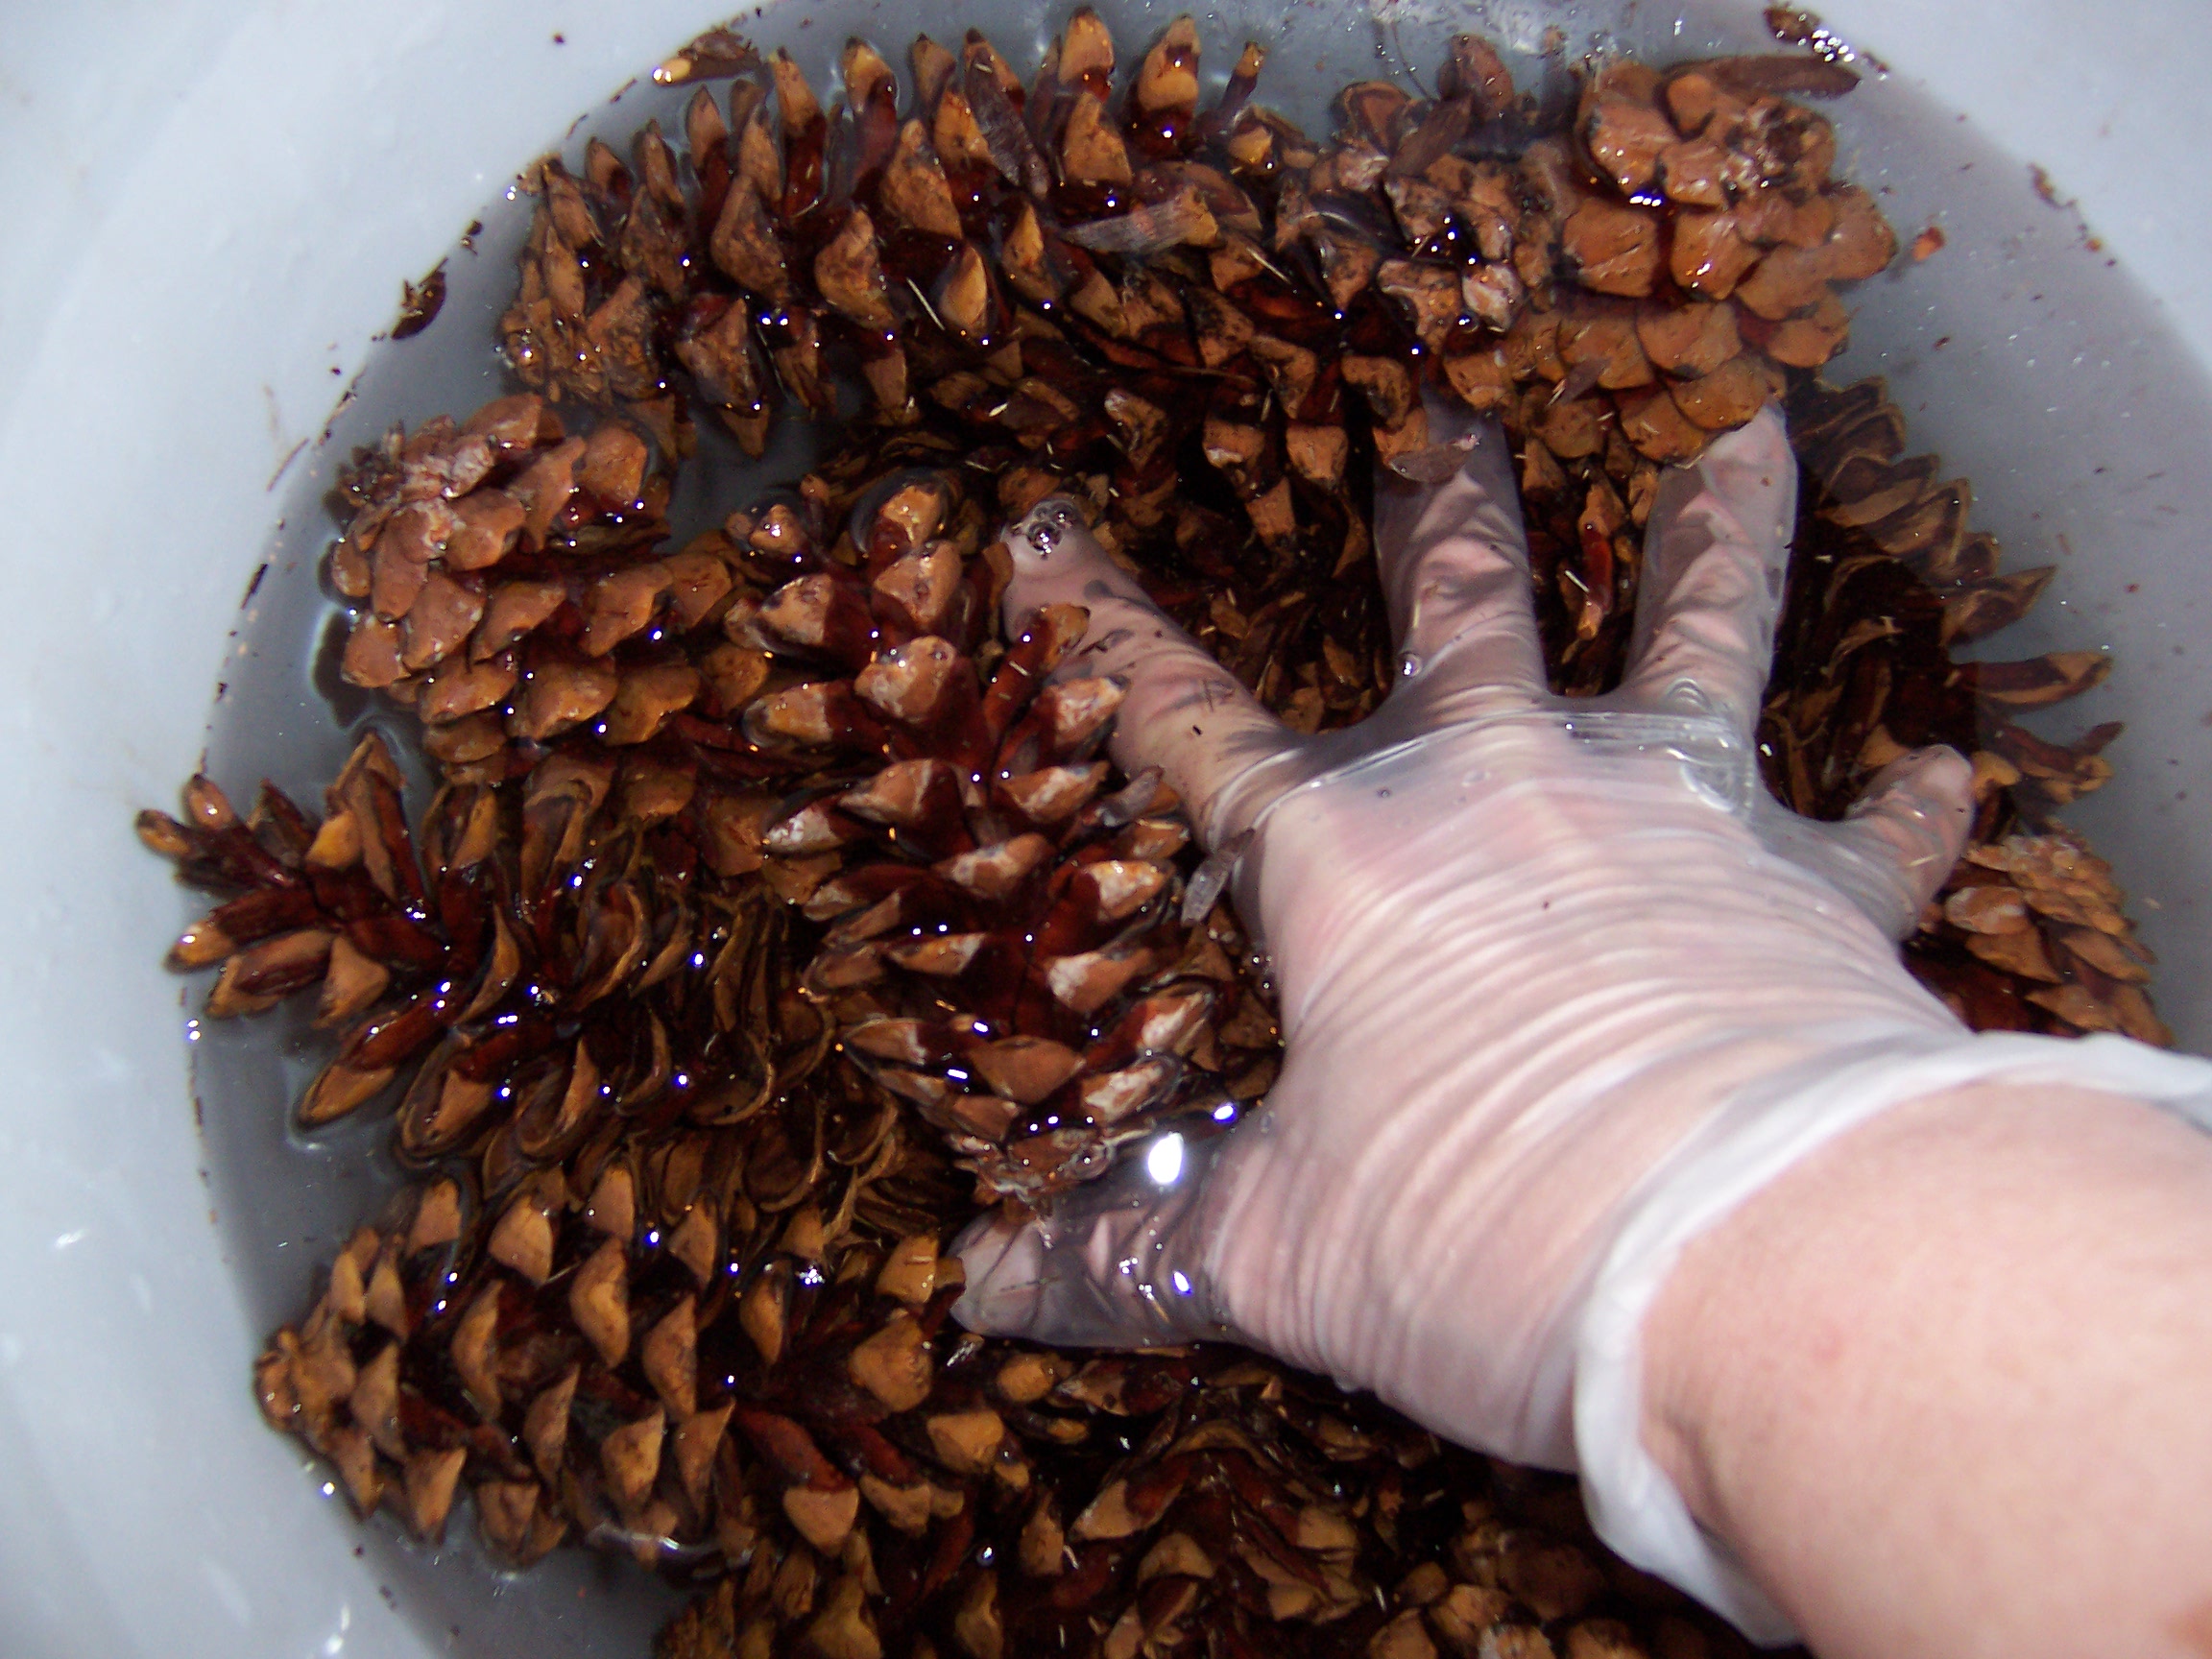
Every few minutes, gently press the pine cones down and hold them under water. I gingerly rotate them as well, by pressing down with one hand on one side of the stack, and then using my other hand to lift and rotate the cluster towards the just submerged cones.
The washing process is complete when the pine cones have closed their petals completely and resemble cigars. You will be amazed how much dirt the washing process removes. Discard and replace the water as needed. As you proceed, you may wish to keep your cone sizes separated, by placing the washed short, medium, and long “cigars” in separate cardboard boxes (that you can recycle/discard later).
Alternate the baking and washing steps until you have enough cones (and some spares) to place 5 cones in each of the frame’s metal sections. So, in assembly line fashion — while the next batch of cones are baking, periodically press down the cones in the water bath, and add the step below to this iterative process.
STEP 6 – Placing the pine cones in the metal frame wreath
Once the the first batch has finished their baking and bath, you can begin to place them in the metal wreath frame. Keep your gloves on, as you can still run into sticky pine tar. Now, look at the frame and think in terms of 3 concentric circles of pine cones: inside, middle, and outside. Make a decision about which concentric circle will hold which size of the pine cones: short, medium, or long.
Both Carol and I like using the shortest pine cones in the innermost concentric circle. Then, you can either adopt Carol’s preference: go from shortest on the inside concentric circle to longest on the outside (with the mediums in the middle concentric). Or, you can try mine: also place the shortest cones on the inside concentric circle, then longest in the middle, and mediums on the outer concentric circle. My finished wreath at the start of this blog piece is the latter. Carol’s finished wreath is shown near the end of these instructions. I don’t think the outcome is substantially different, so suit yourself. I’ve made wreaths both ways.
Put something on the surface where you will be working to absorb or collect the water that drops as you place cones in the wreath frame. Be sure the elevated middle circle of the metal frame is facing up.
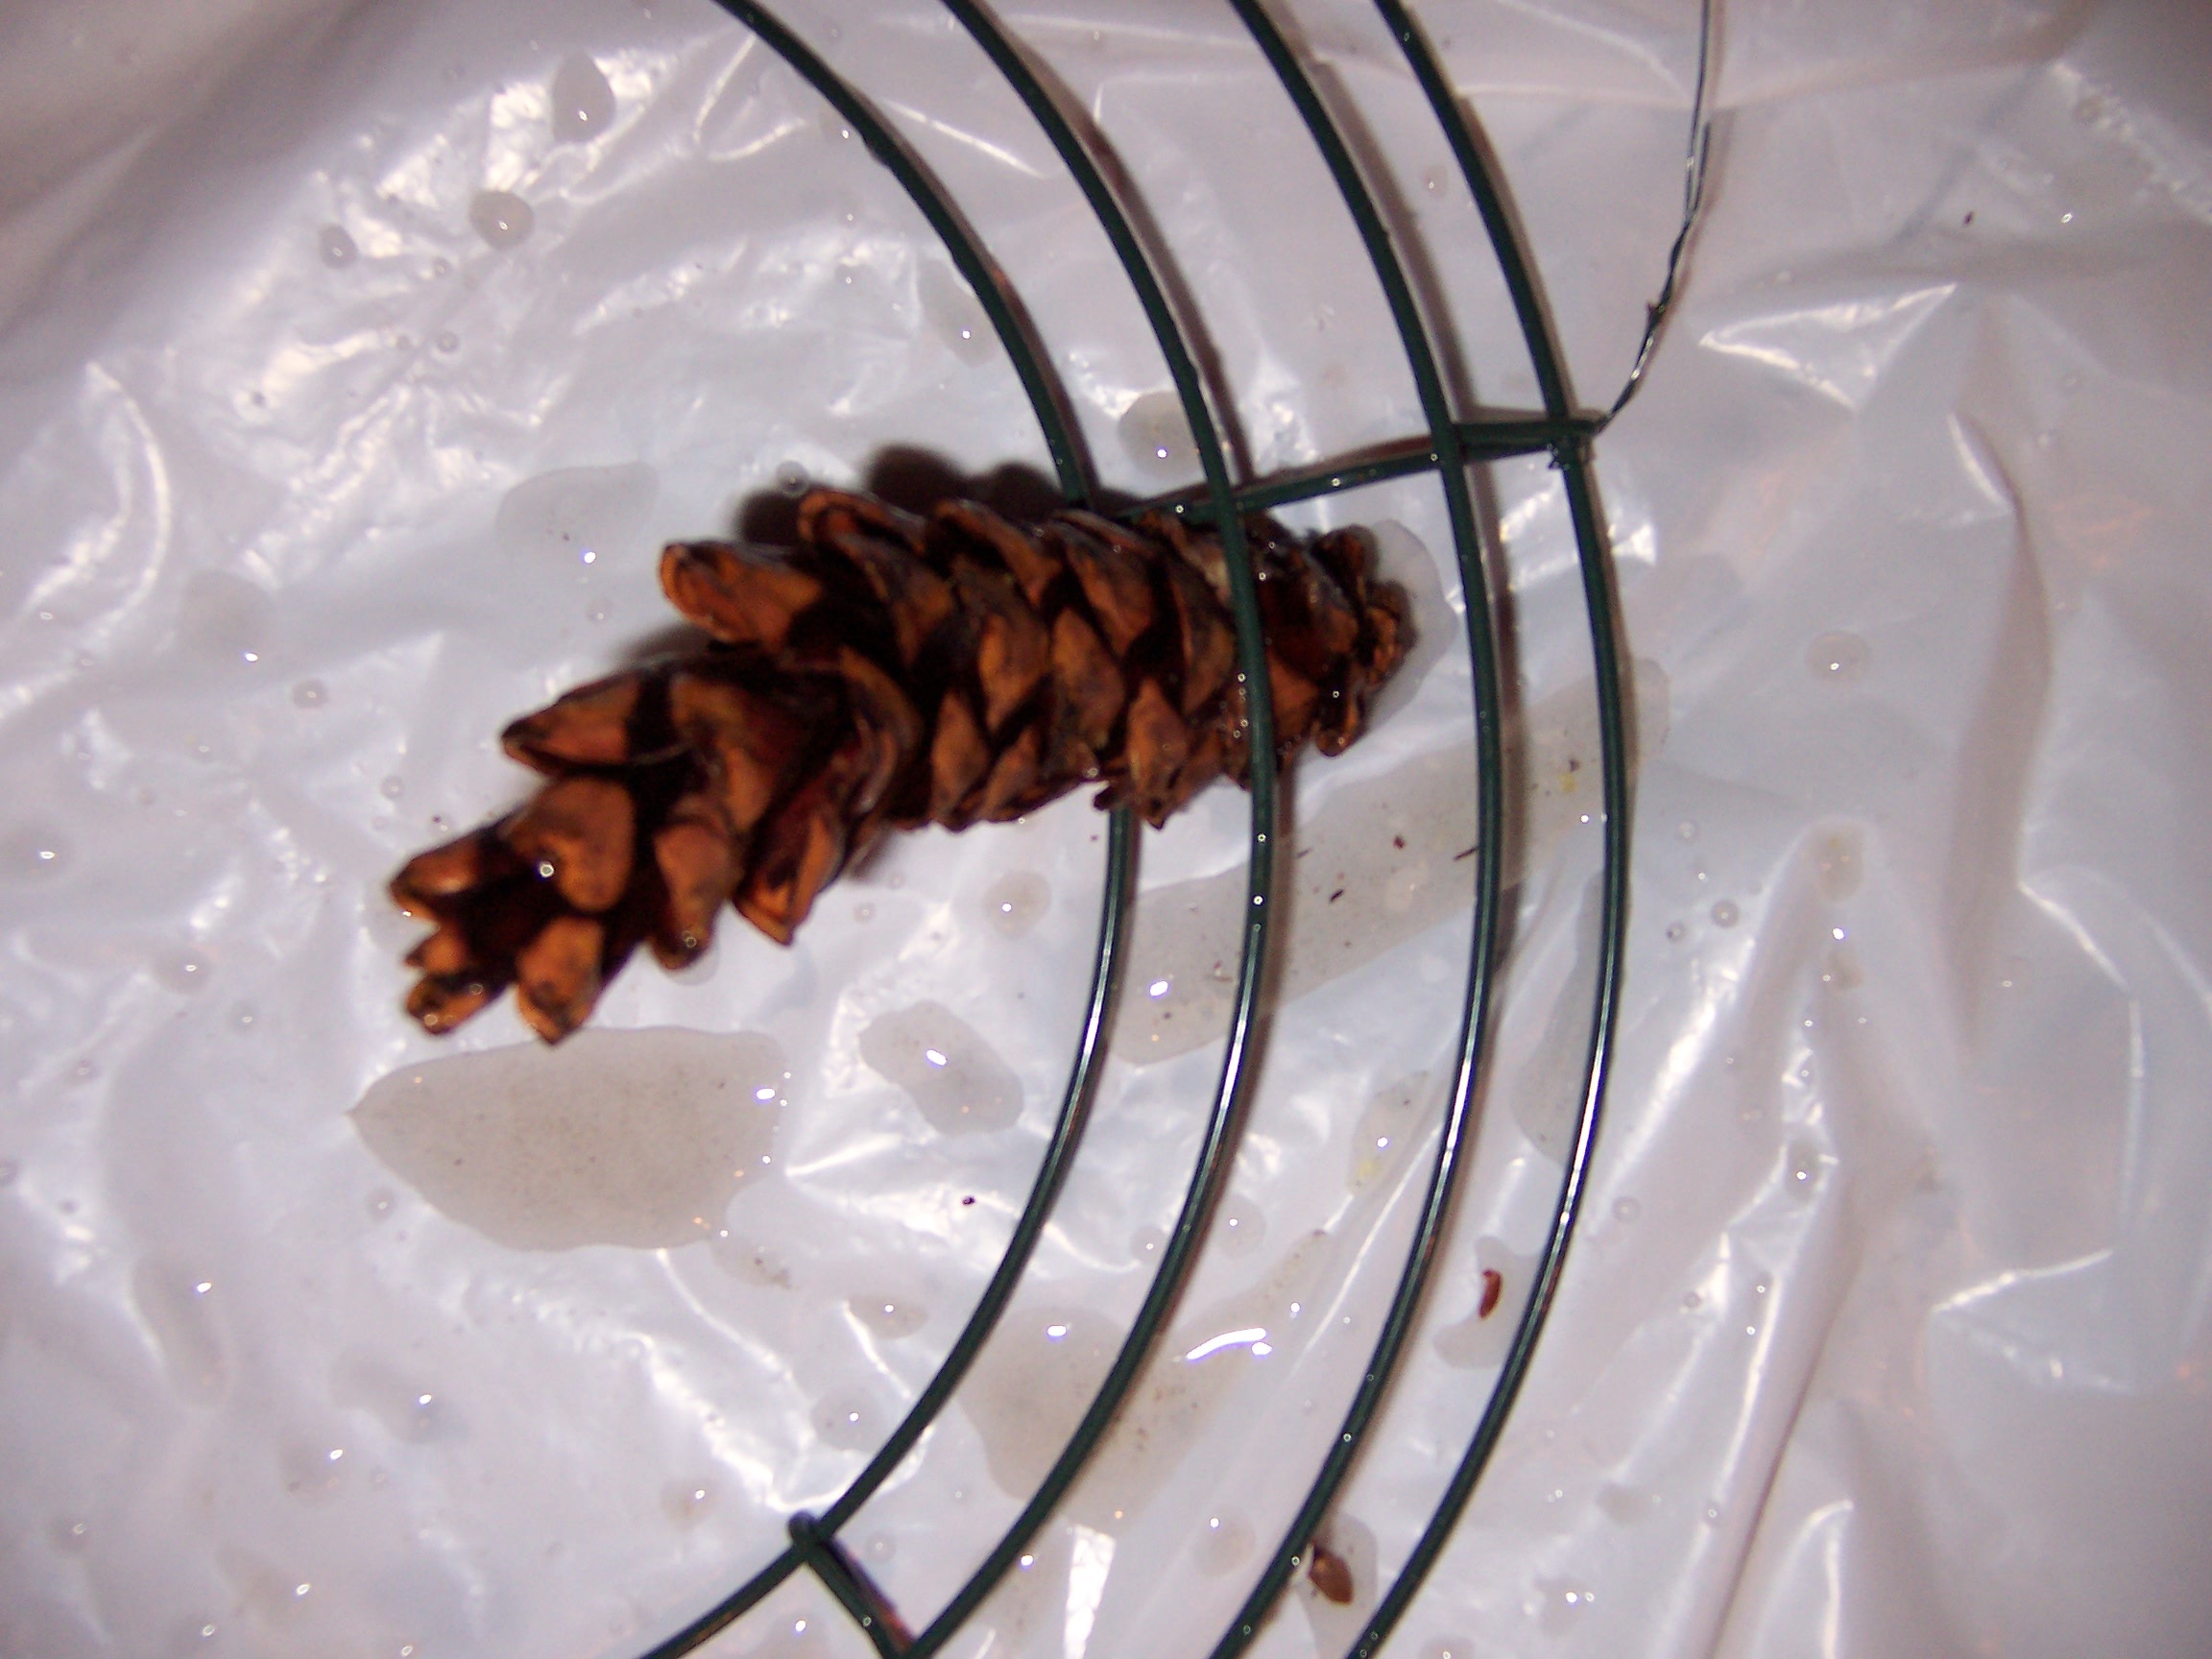
Place the first pine cone in a section of the innermost circle of the frame. As you can see, the base of the pine cone is below the elevated center ring. You want a depth of one to two petals below the metal frame.
Then, proceed in adding more of the shortest pine cones to that inner circle. Five pine cones per section, or thirty total will fit nicely in each of the six inner circle sections of a 12 or 14-inch frame.

When the inner circle is complete, it will look like this (below).
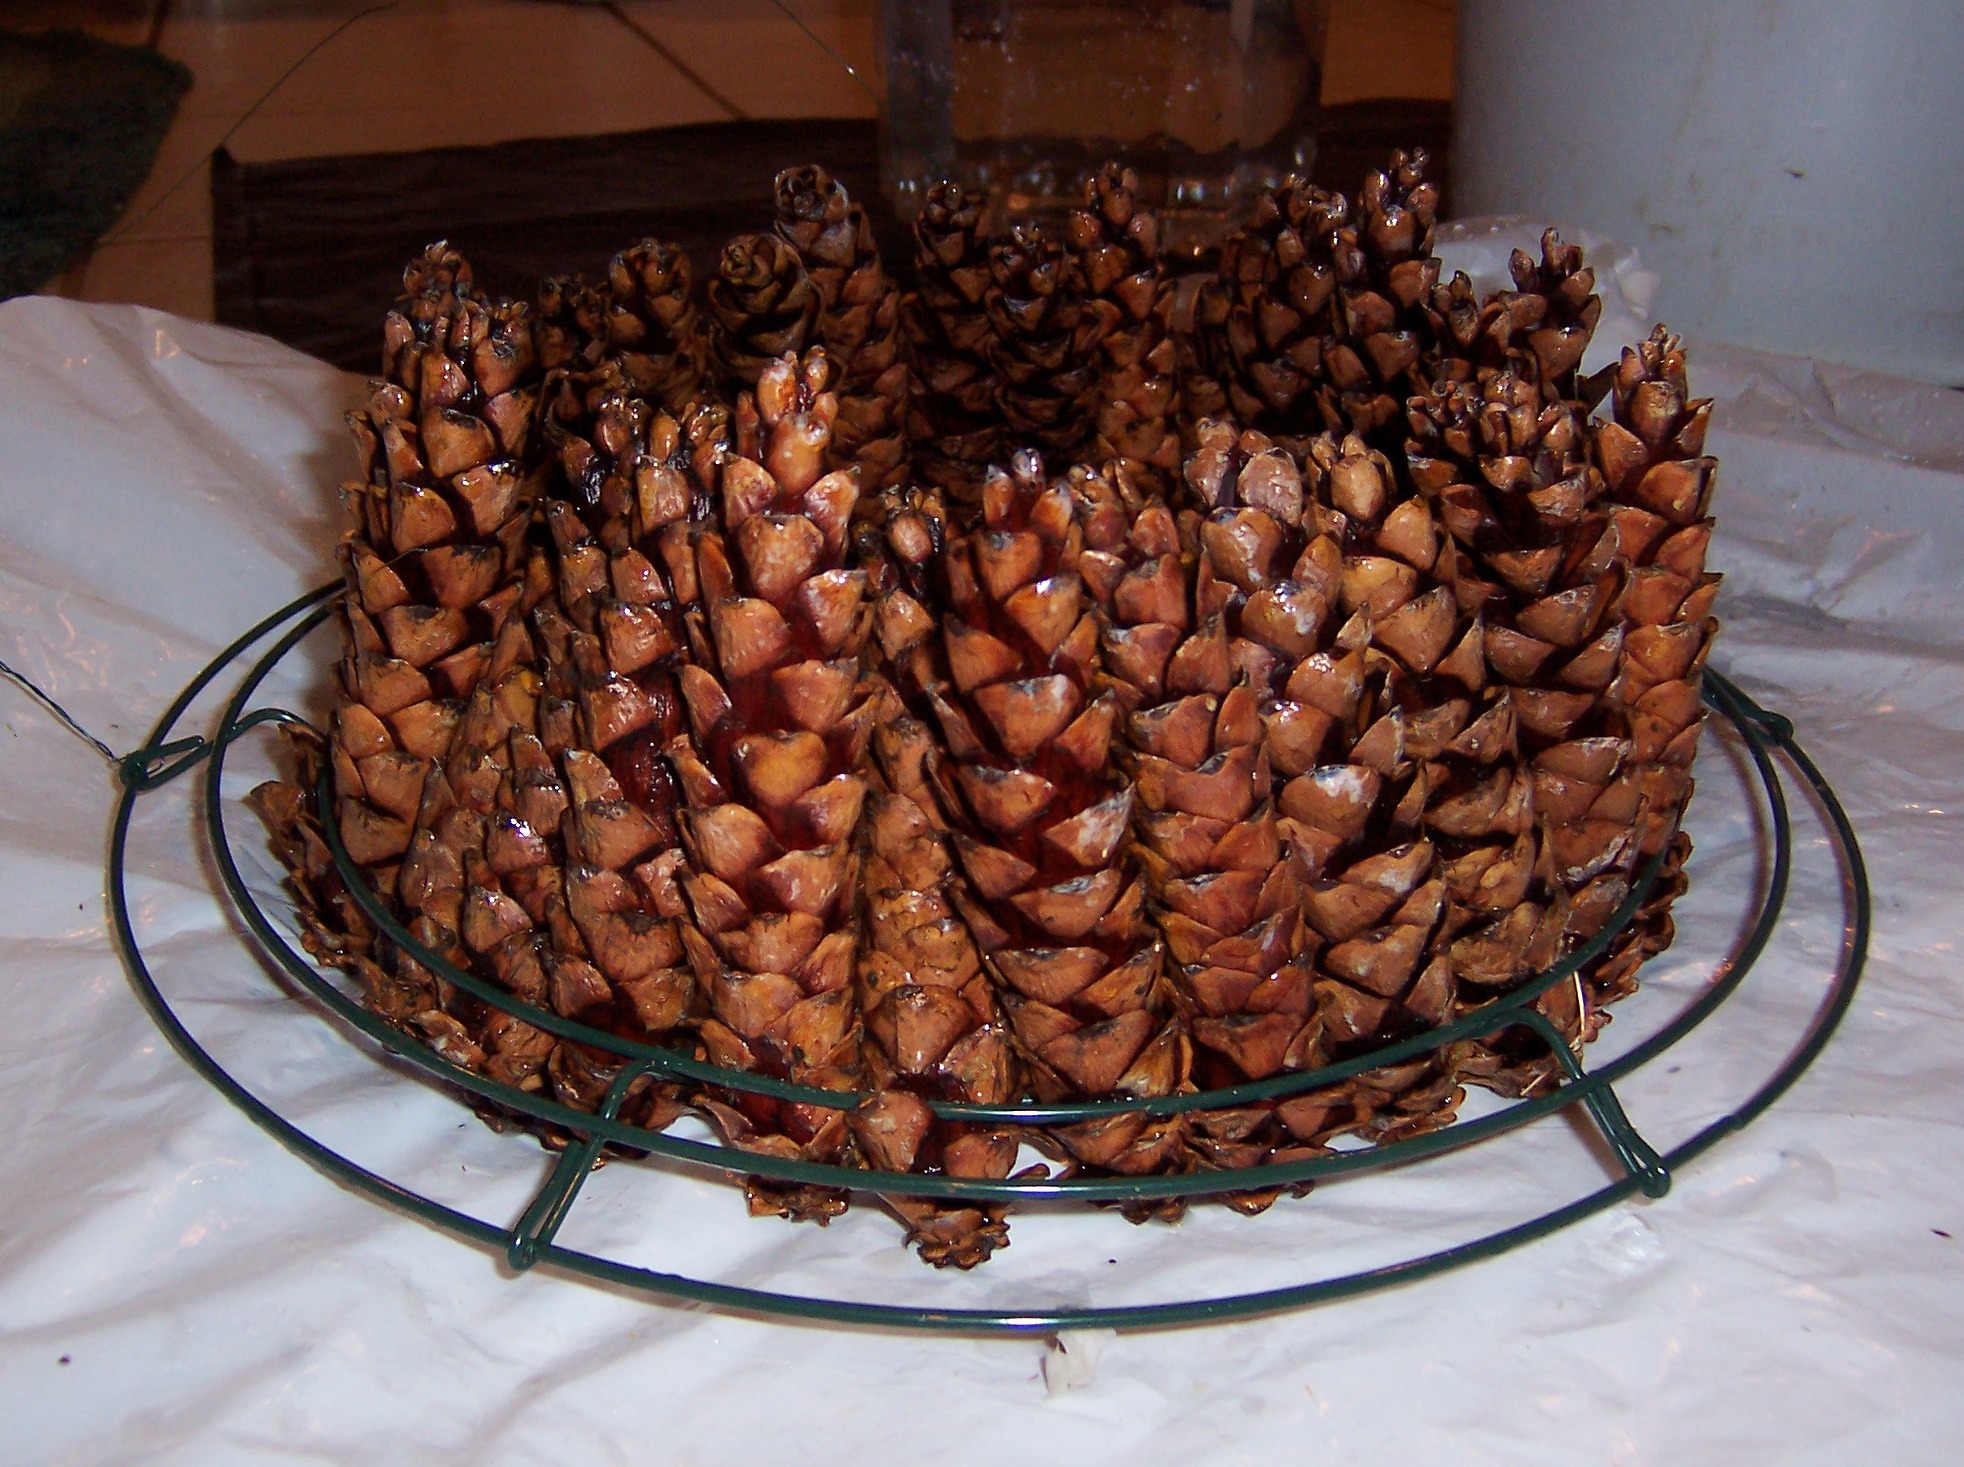
Perhaps you are now realizing why no wiring or gluing are needed to make this pine cone wreath? I just love this wreath!
Before I move on to the middle circle, I usually position (push, pull, twist, or turn) my short pine cones where I want them. Typically, I directionally alternate them: some downward, sort of parallel to the table surface and others raised upward.
Here’s a look at Carol’s wreath after placing the cones in the middle circle. Again, this is a good time to tweek the cone positioning so that they evenly fill the space. Some forward, some back.
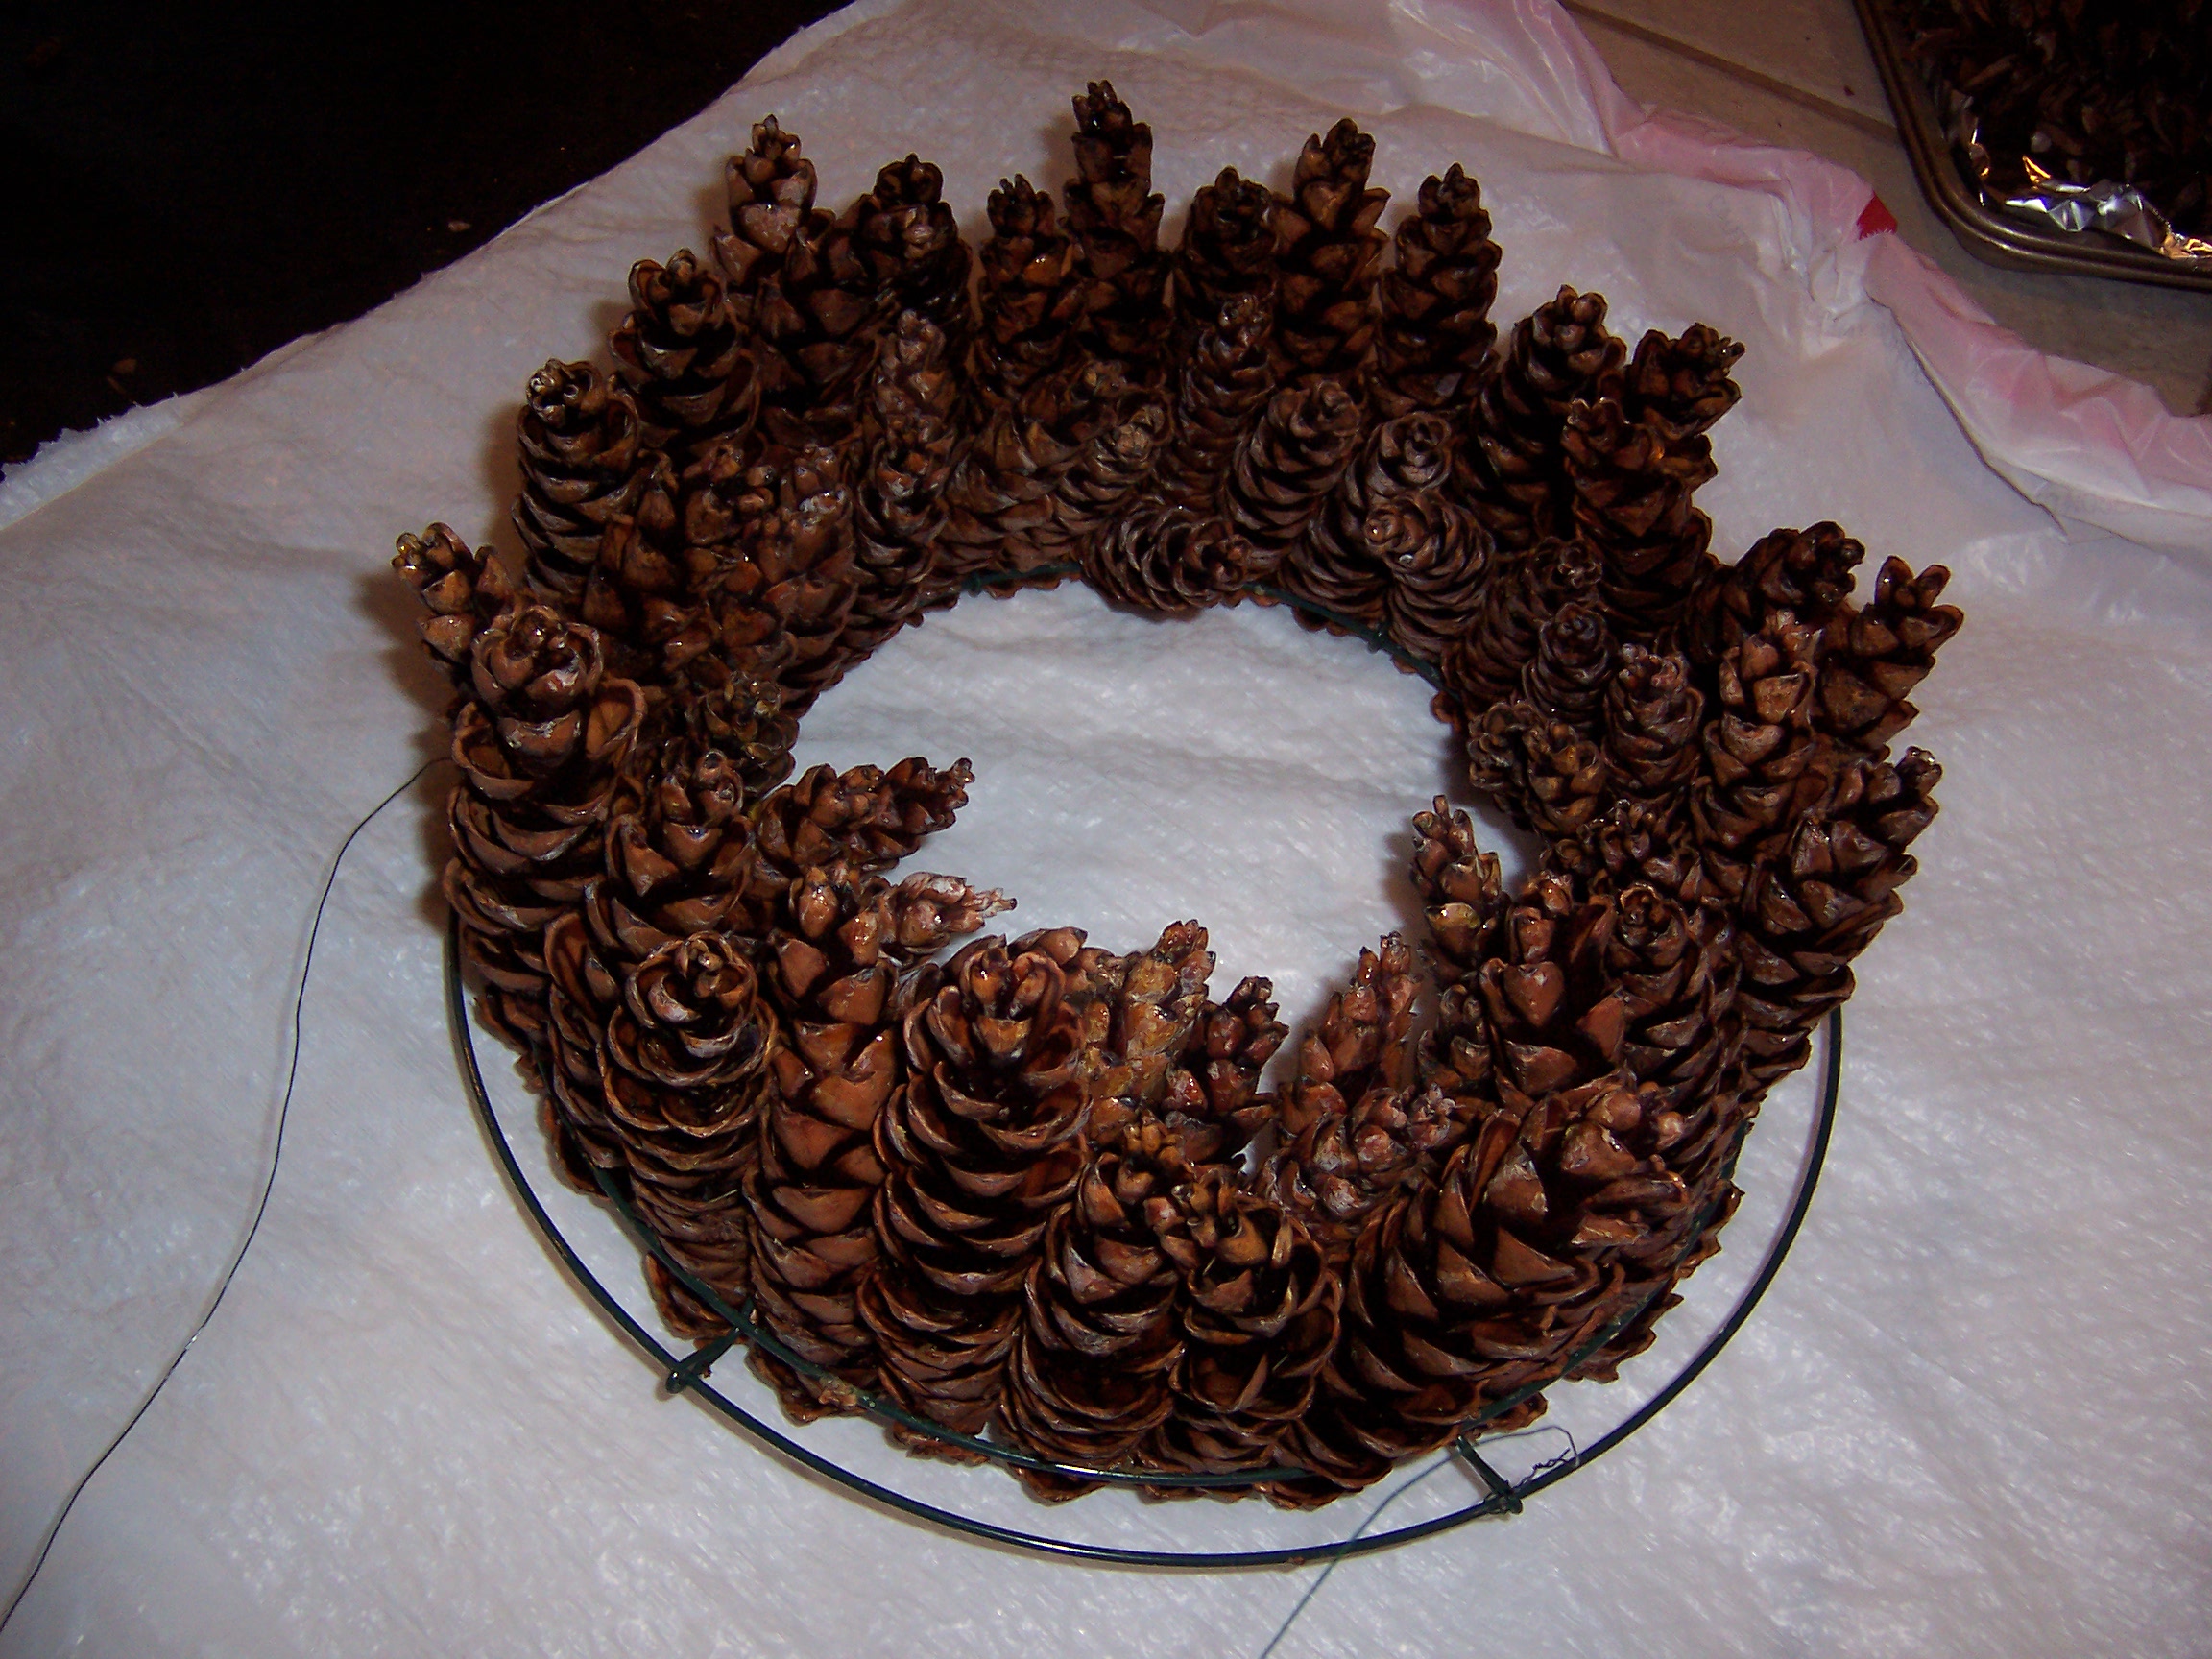
Just one more ring of cones to go!
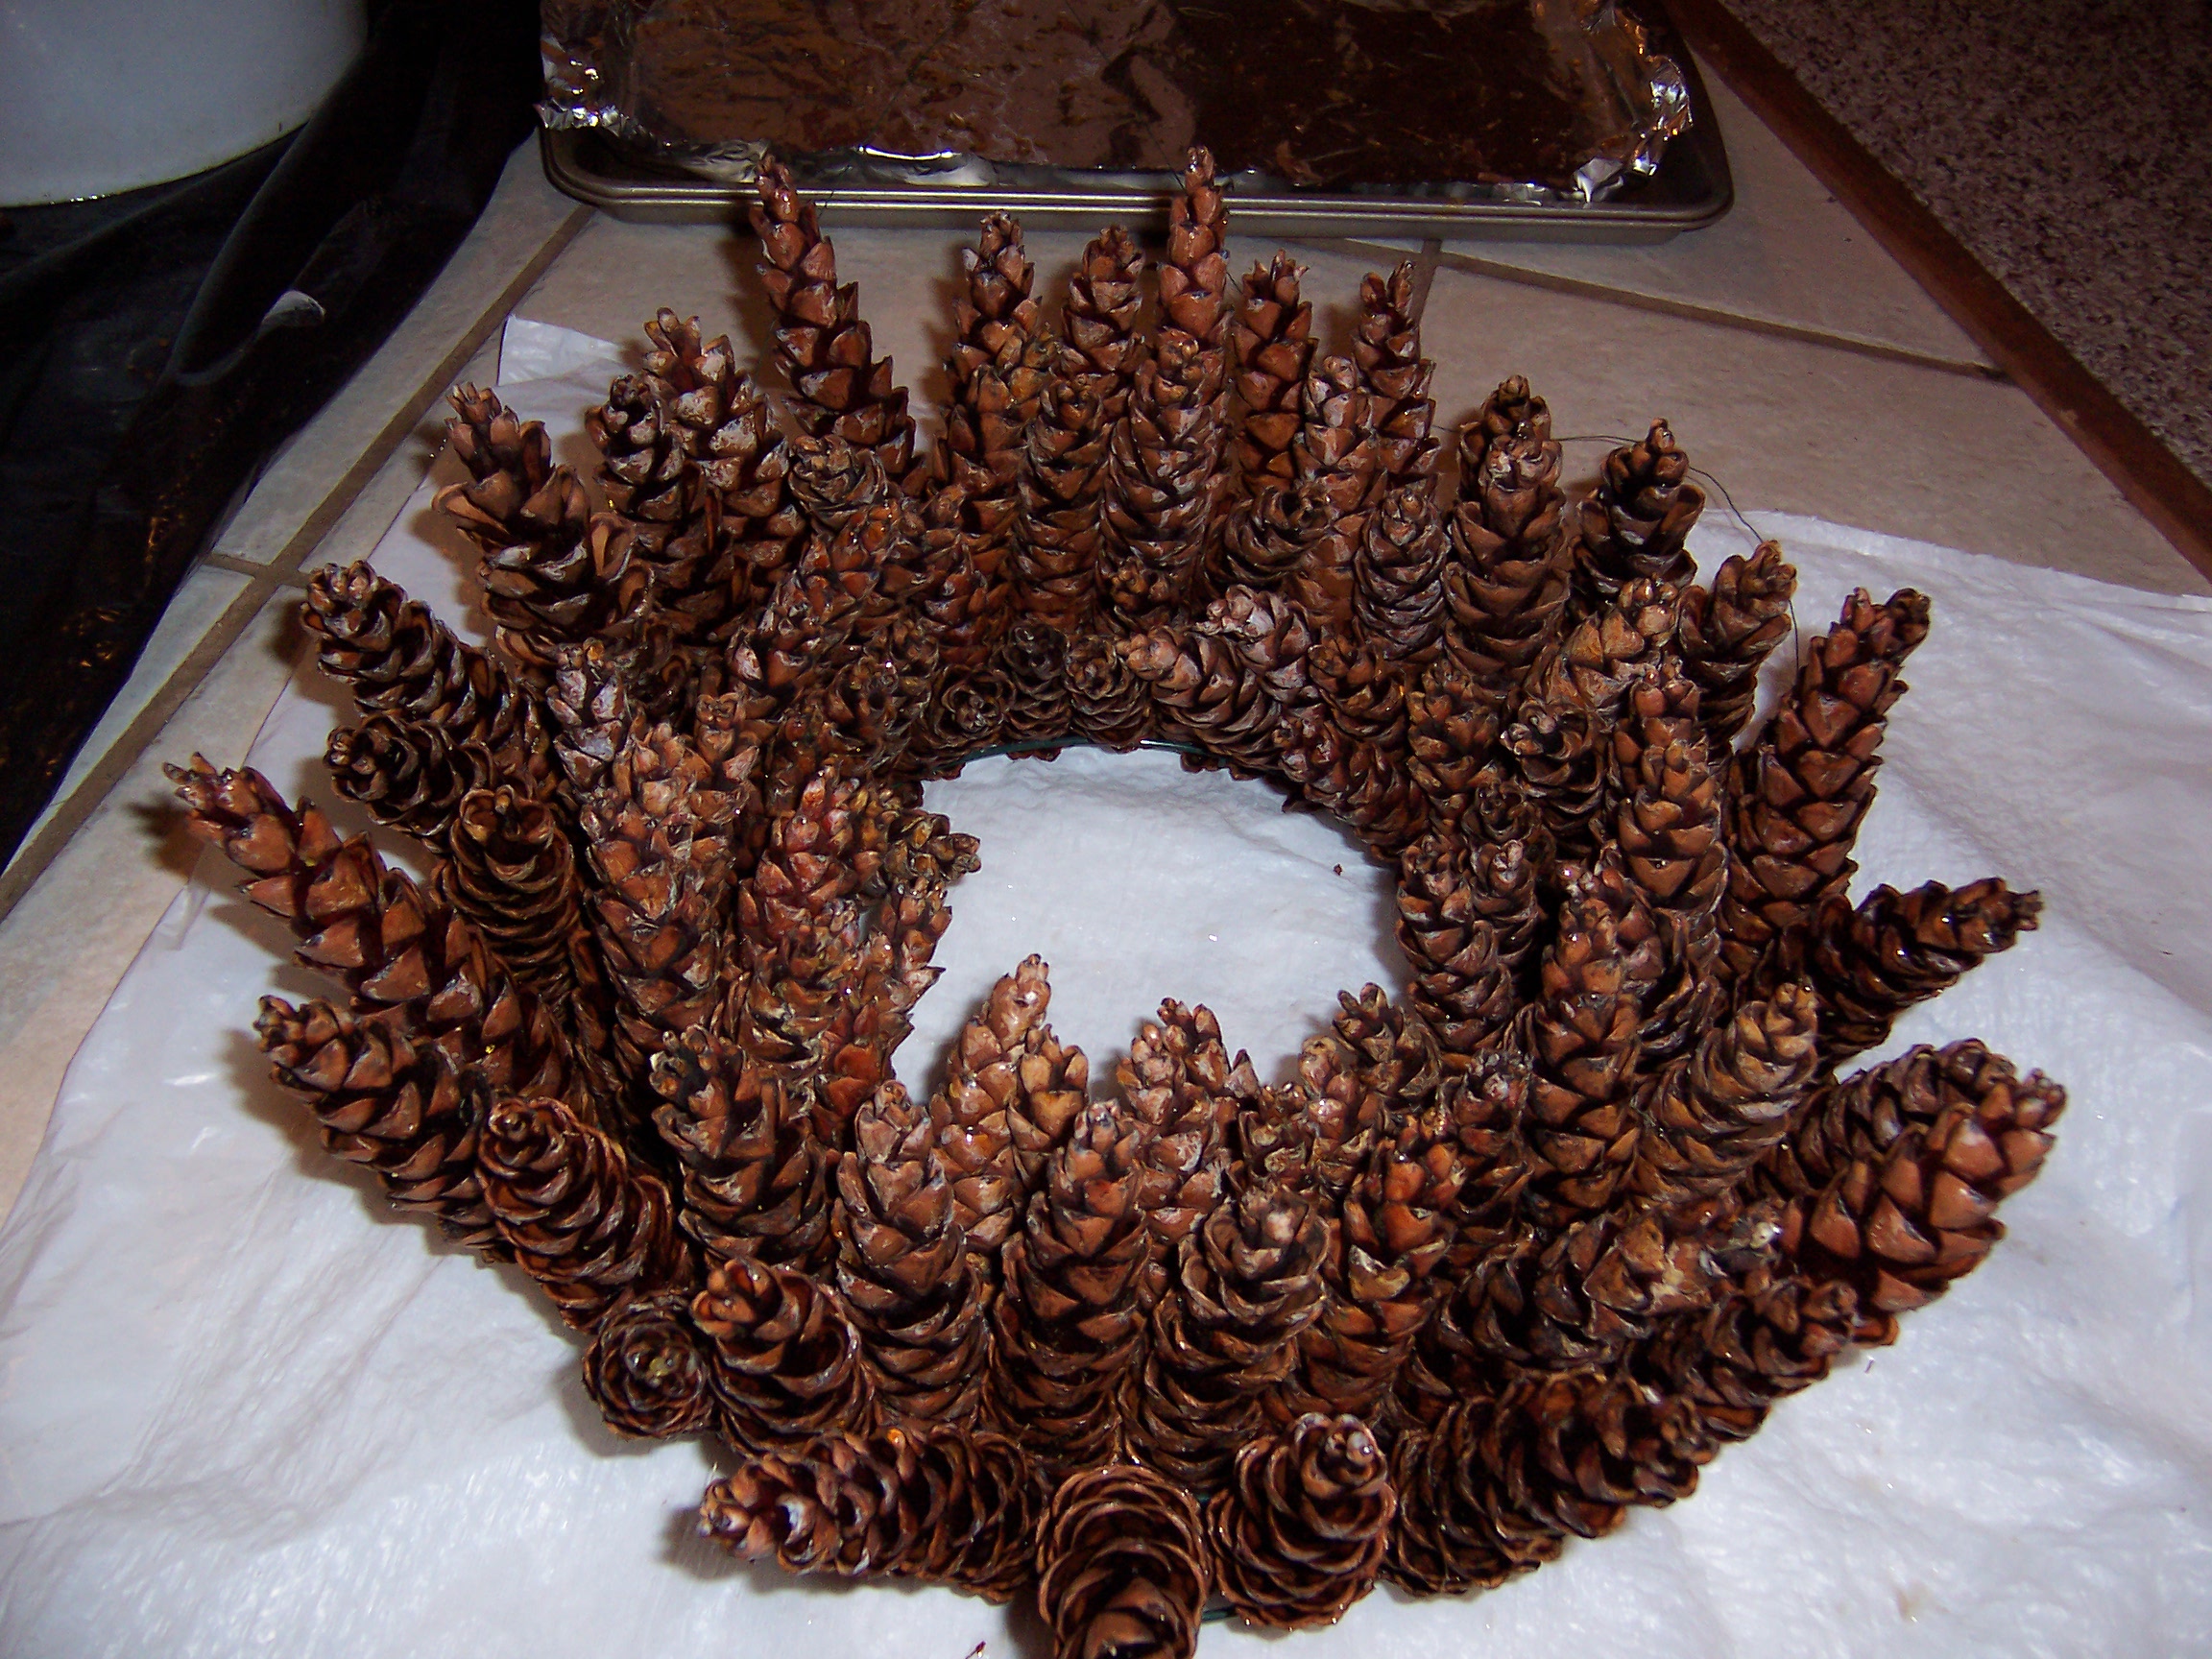
Now place the cones into the outer circle, five to each section, being careful not to damage the base petals of those in the middle ring. Where possible, insert each cone to fit in the slightly larger space between two cones from that middle row, rather than abutting your outer circle cone to a middle circle cone. Place the next cone flat, that is, sort of flat and paralleling the table like you did with the smallest inside circle of cones. Like the inside circle, you are alternating the position of the cones, one upward and between the leaning out cones in the middle row and then one down somewhat flat against the wire frame. This latter positioning will also help the wreath lie flat against your wall later.
When the three concentric circles are filled, you are almost finished! We’ll call this wreath the Day 1 product (below). The final step is to allow the wreath to dry for about a week, making your final cone position adjustments while the petals slowly open. It is awesome visually to watch the wreath “bloom.”
STEP 7 – Let the wreath dry for a week
The pine cones in the wreath need to dry for a week. So, find a place to put the wreath where it will not be disturbed or knocked over. Be sure you lay something protective under it, as shown. Then, carefully grab the metal frame on each side and move the wreath to its drying location, if different from the location where you have been working.
Check the wreath each day. In the first 2-3 days, spend a few minutes fine tuning the position of cones, so that they are as evenly spaced as possible, and any “holes” you can see now will fill in as the petals open further and further each day. The cones will lock in place as the week progresses. Be aware that you risk breaking or damaging the cones if you forcefully move them later in the week.
On day 8, Carol’s wreath looked like this.
STEP 8 – Lightly apply a protective spray (optional)
As I mentioned earlier, I am an ad-hoc crafter, so my overall crafting knowledge is rudimentary at best. I do recommend that you give your wreath a protective spray of a clear, non-yellowing type. If you don’t have a can of this sort of product in your basement arsenal, go to a reputable craft store and ask someone which clear spray preservative you could apply to your pine cone wreath. I used Krylon Crystal Clear Gloss the last time I made a wreath.
Once the wreath has finished the Step 7 drying, I take it outside on a sunny day, put cardboard or comparable under it, and apply the spray, evenly and lightly. These types of spray products usually dry in 15-30 minutes. The application really seems to enhance the patterns in the pine cone leaves (see below closeup).
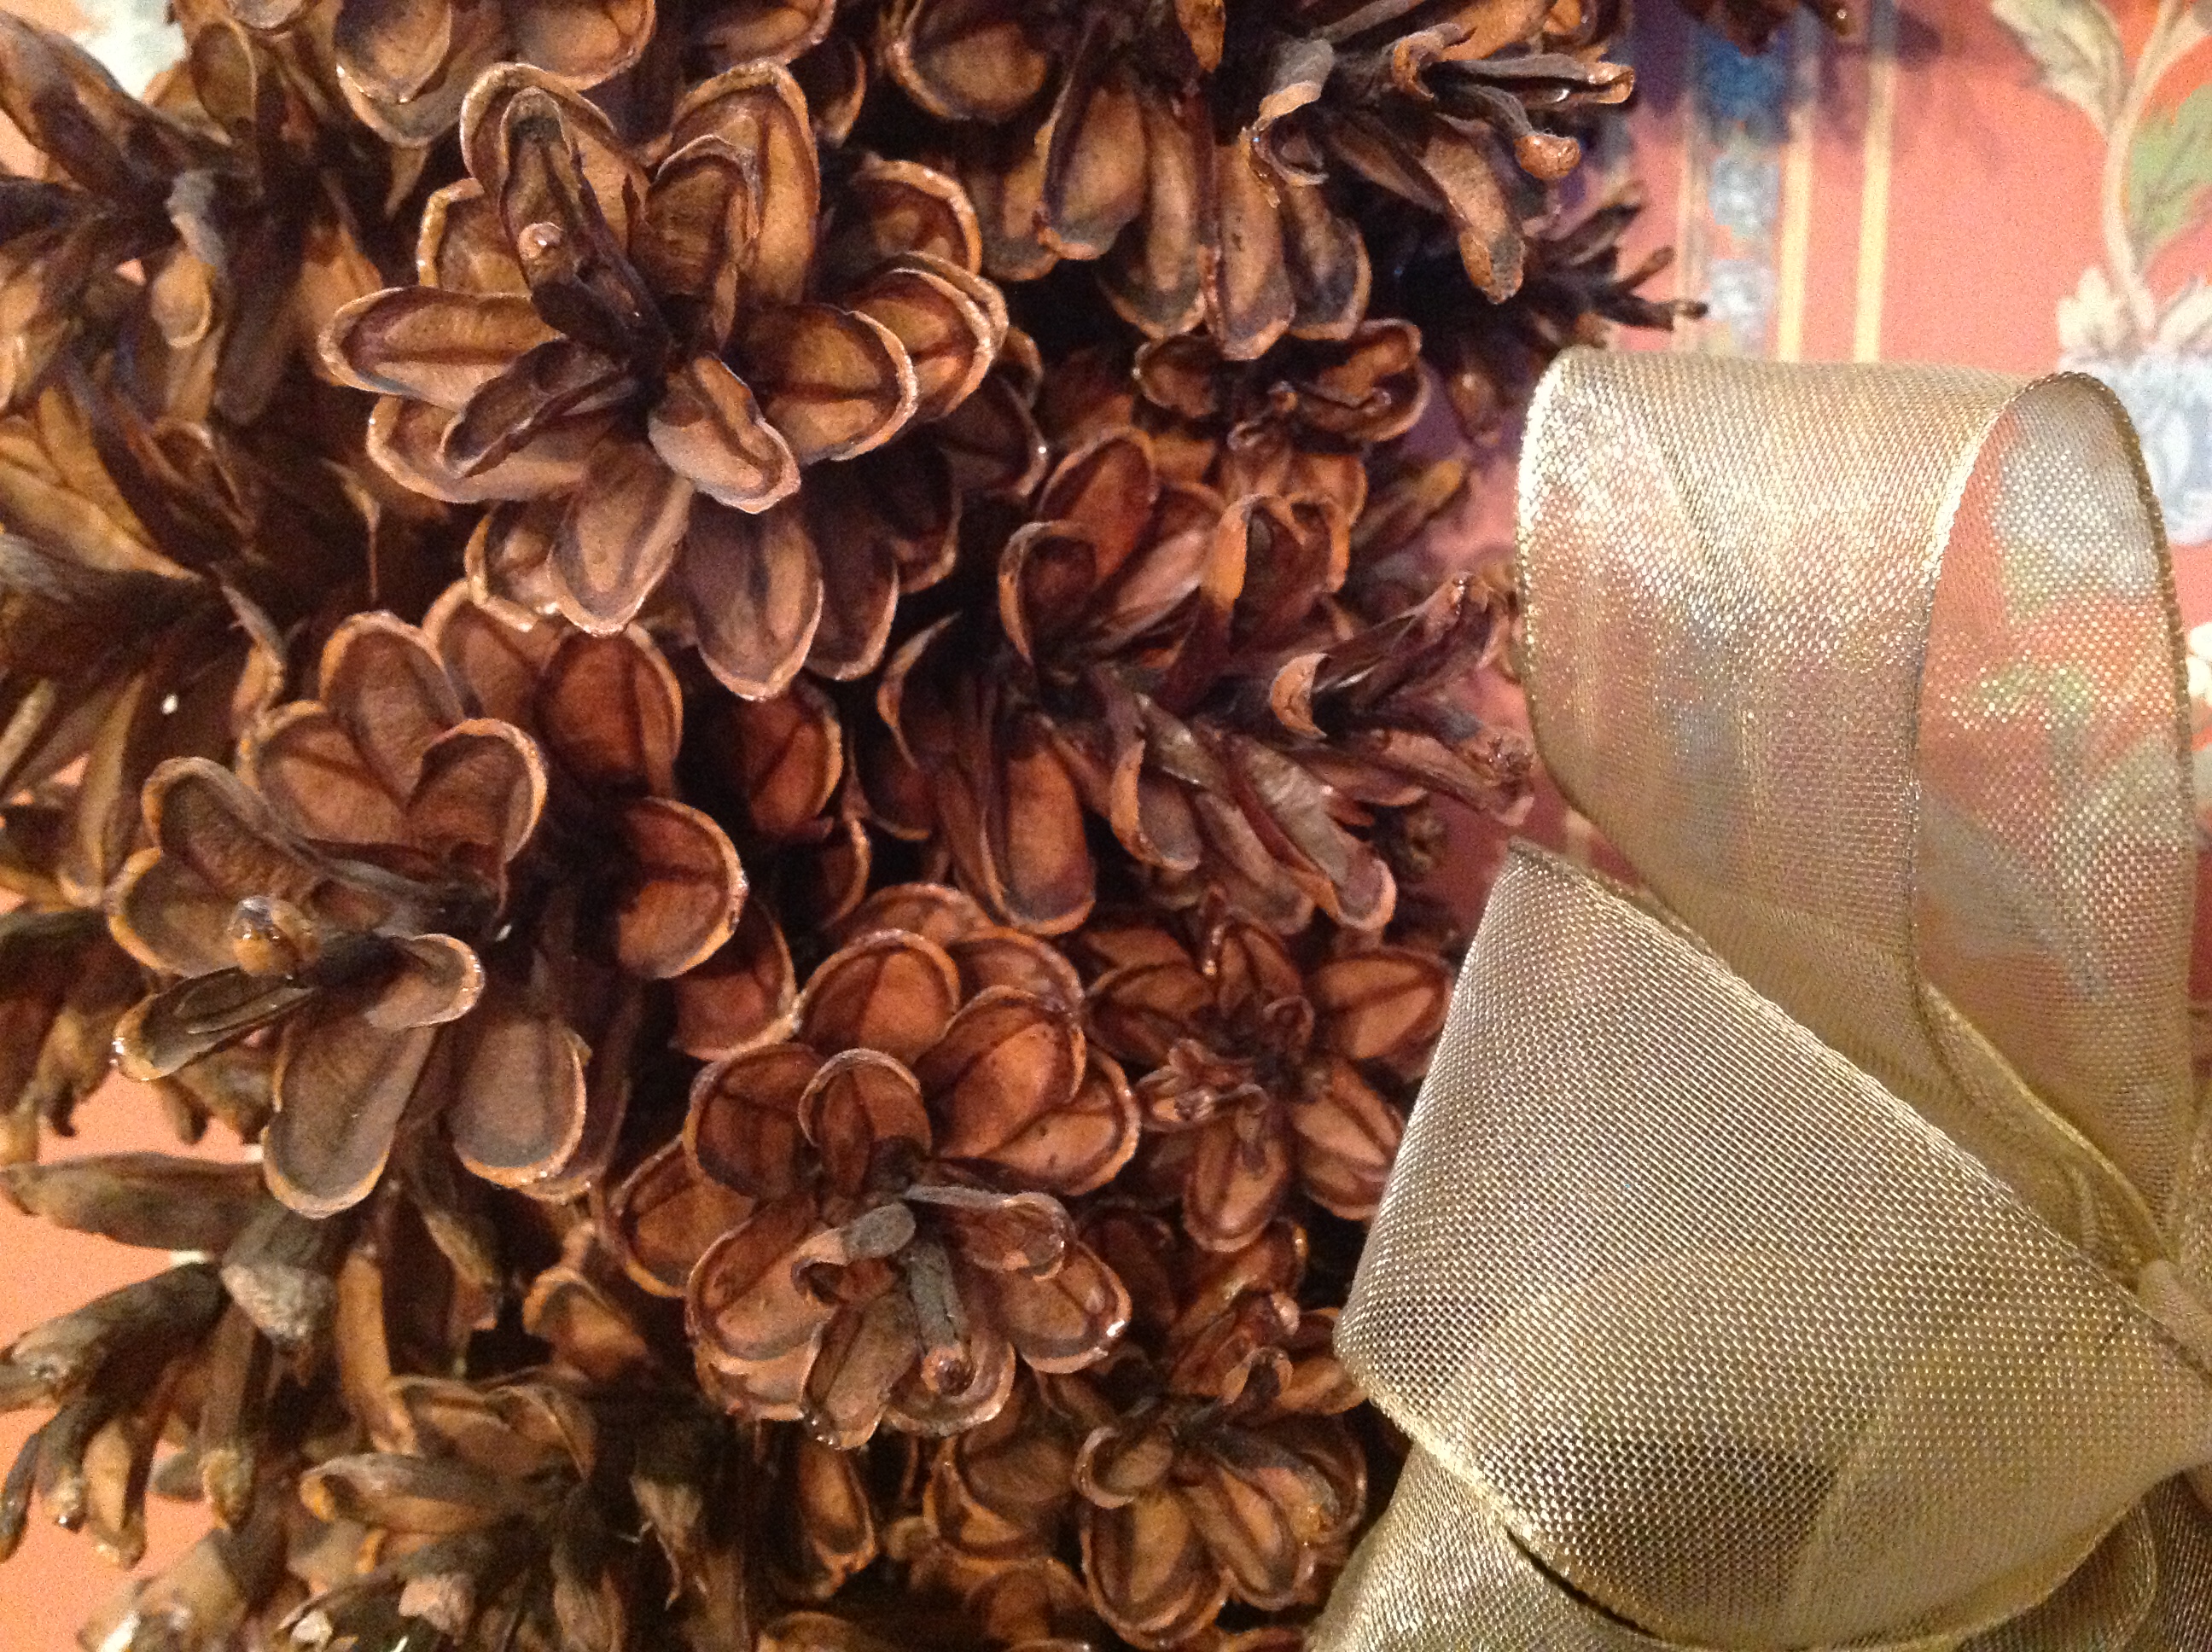
If you want to decorate your wreath, go to a local craft store and select a ribbon. Usually, someone at the store knows how to tie a bow. The service is free or at a small cost.
Good Luck! I’d love to see any wreaths you make. Drop me an email at BLR at 3houses dot com . Thanks again to Carol for most of the photos. And – HAPPY HOLIDAYS !