The traditional Lithuanian food we ate during our 2013 trip was SO delicious. The Lithuanian breakfast crepes served at the Rivastar guest house in Palanga near the coast and by the Shakespeare Boutique Hotel in the Old Town section of Vilnius were a taste of heaven. The Lithuanian name is Lietiniai su varske, or crepes filled with soft cheese.
Rather than rolled like French crepes, these are folded, and presented as a plump square or rectangular shape, accompanied by jam and thick, sweet cream. My cousin, Egle, told me she adores them with sliced bananas.
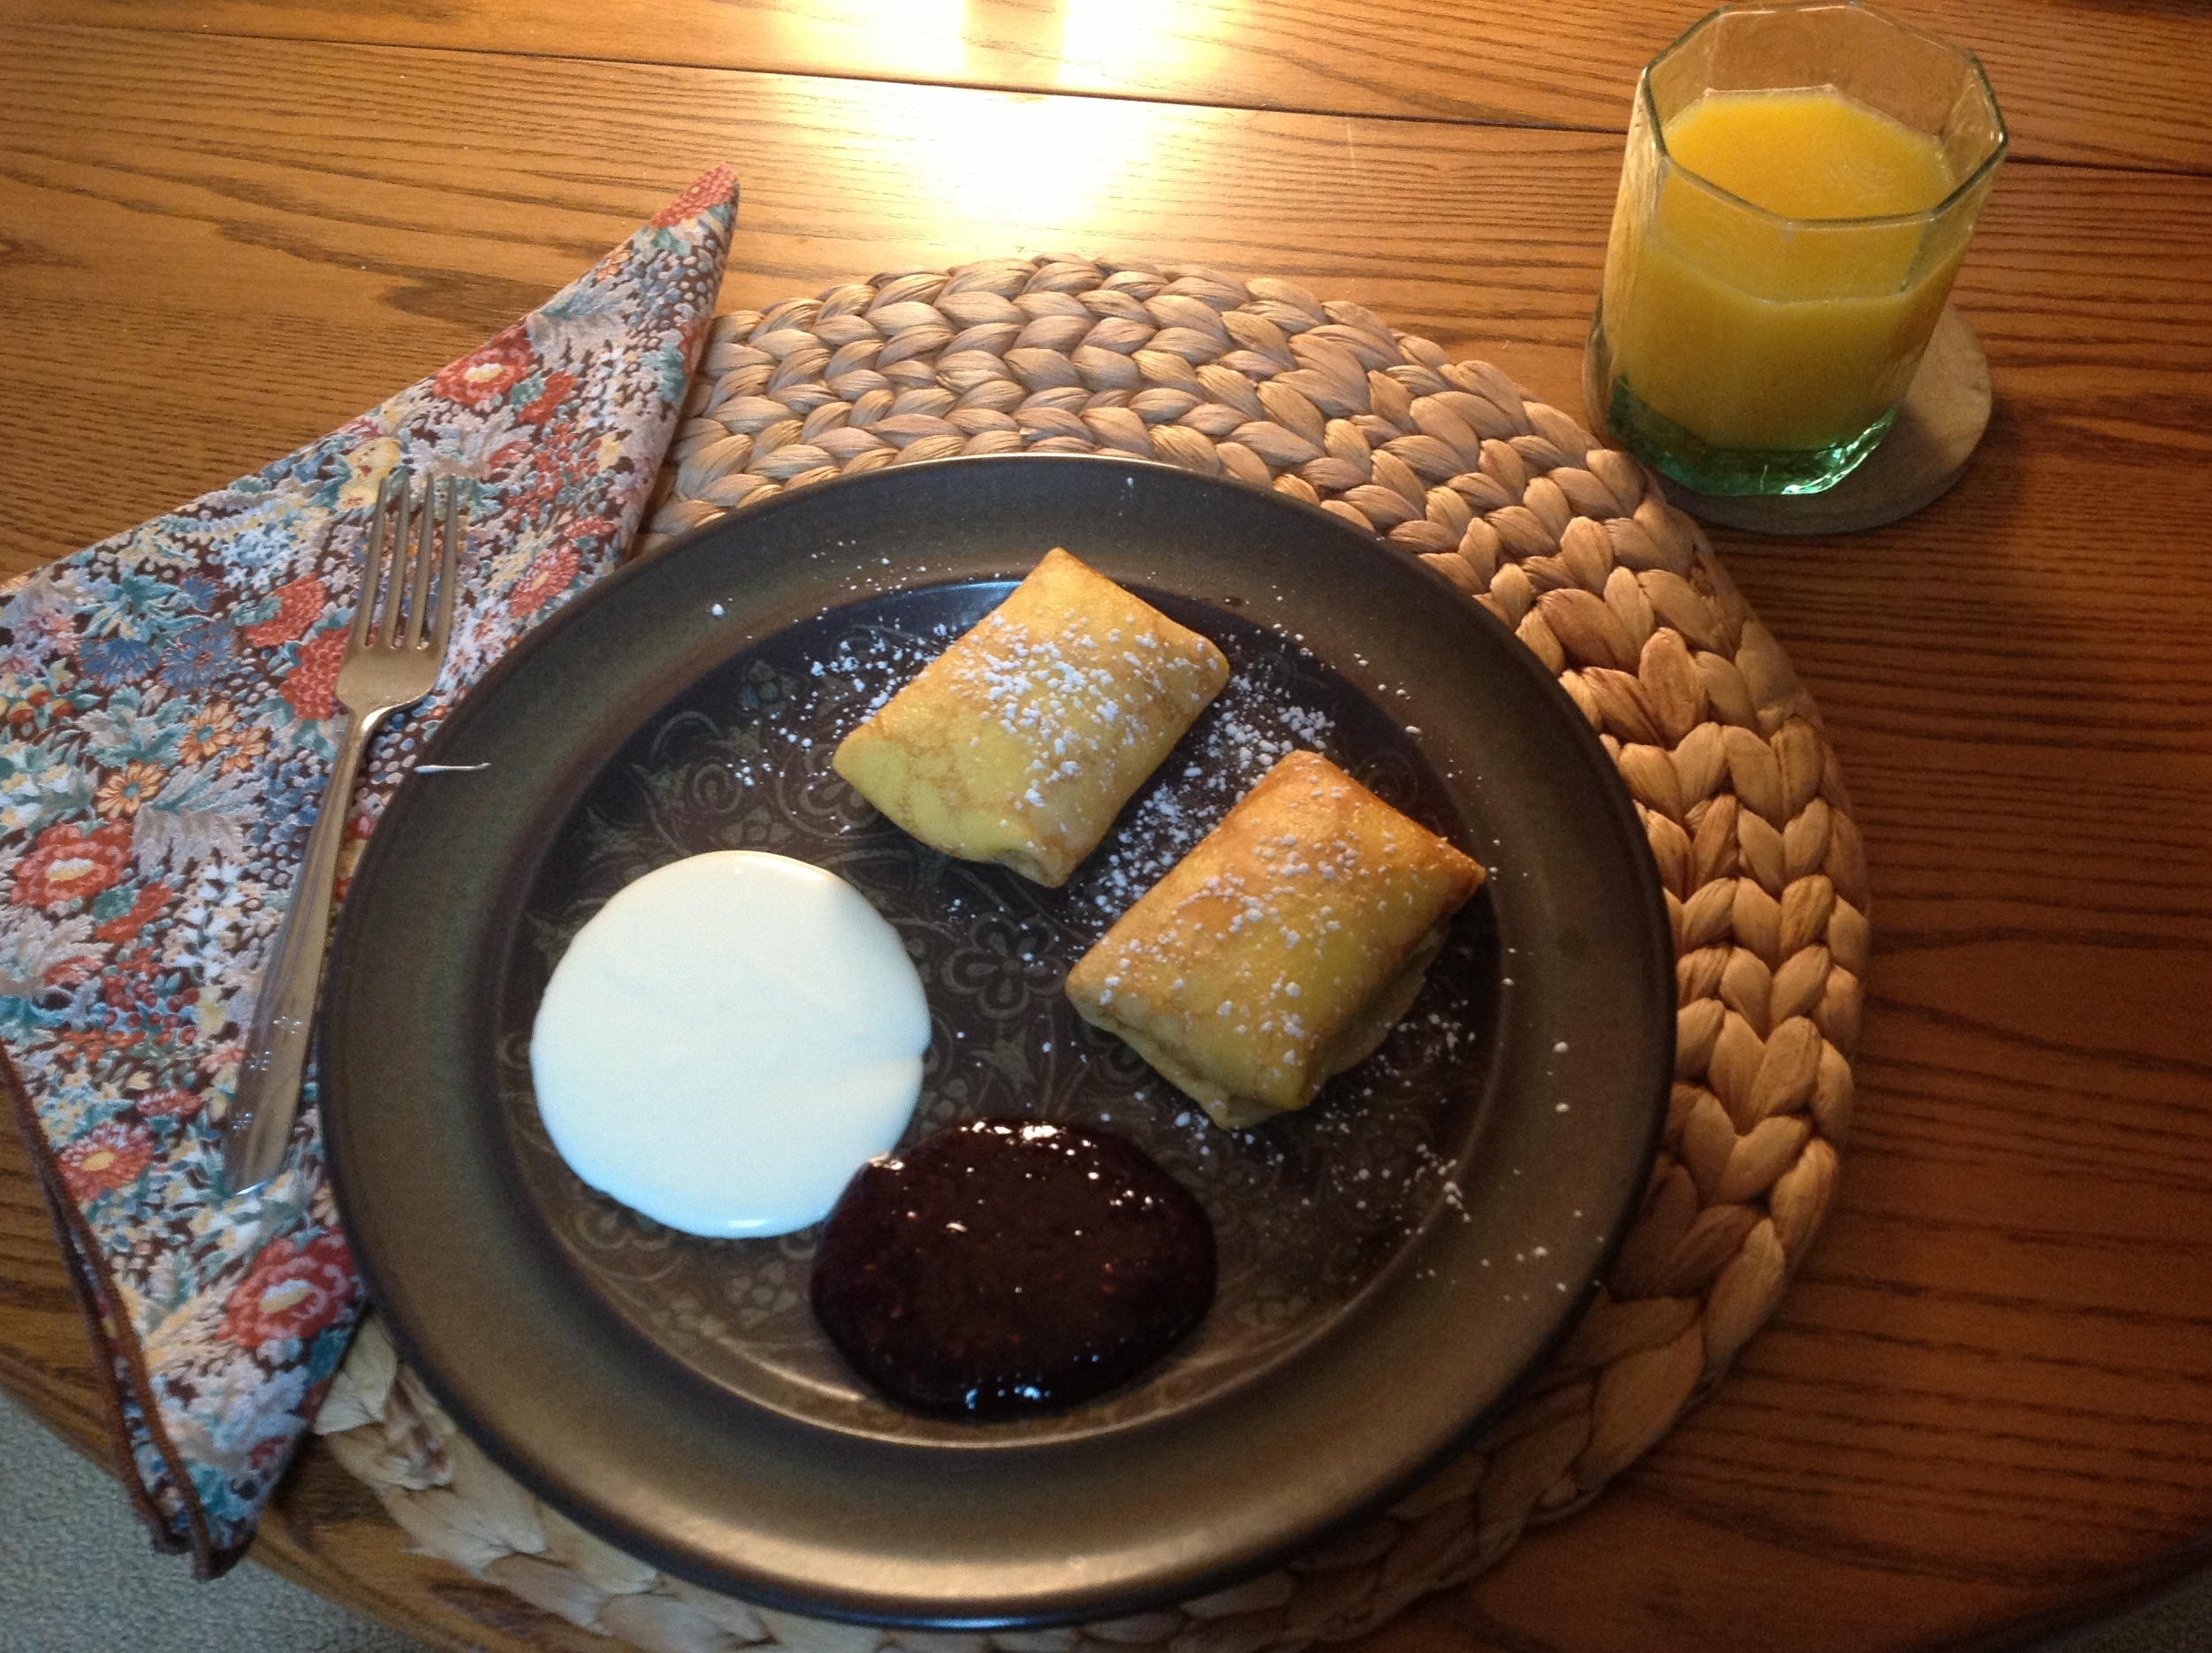
For months since our trip, I have been thinking about these breakfast crepes! Could I replicate them? My father (with his “can do” Lithuanian problem solving genes) instilled in me that I could do anything I put my mind to, so I decided to give this a try. Here’s a photo of my most recent result.
Once I decided to try to make them, the next step was to collect some information. I pooled the recipe advice given by my cousin, Egle, with that from Rivastar, and from my own cookbooks and a Google search, and synthesized a recipe from all the variations of approaches, ingredients, and proportions.
I shopped for the ingredients not found in my pantry, and on a sunny, winter morning created the first test batch of crepes. This first result was encouraging! I’ve now made the breakfast crepes three times. Each rendition dabbled with a few variations of this and that.
Voila, below photo shows the result of my beta recipe. The crepes were excellent, but Rivastar’s were a bit better. Hmmm, what to do! Maybe crowdsource… UPDATE – Since January 2014 when this was first posted, input from readers has been helpful. I have made the crepes several more times, so this recipe is the result of input plus fine tuning the ingredient proportions.
If you are familiar with Lietiniai su varske, I hope you will comment either below or on the contact page. Give me your thoughts about how you make these breakfast crepes. One reader told me he adds a little pureed apple and banana to the crepe batter. I did try that strategy with pancakes, reducing the milk/water a little. They were delicious.
BERNICE’s Lietiniai su Varske (serves 4)
CREPES (makes 11-12 crepes)
1 rounded cup flour
1/4 tsp. salt
1/2 tsp. baking powder
1 T. sugar
1 cup milk (whole milk works best)
1/3 cup water
3 T. melted butter
3 jumbo eggs, at room temperature
FILLING (for 8-10 crepes)
8 ounces of farmer cheese
1 egg
2 tsp. vanilla sugar
ACCOMPANIMENTS
8 oz. creme fraiche
2 -12 oz. jars of jam, preserves, or conserve (to serve 8) – red raspberry, blueberry, or blackberry all great choices
1/4 cup Confectioner’s Sugar
2-3 bananas (optional)
EQUIPMENT
Blender, food processor, or good capacity chopper
Fry-pan with a 7-8 inch bottom
PAM regular, or comparable cooking spray
1/4 cup measure
Wax paper
2-3 inch metal spatula
1 baking dish or pan (I like glass, pottery, or ceramic best)
Confectioner’s sugar shaker or fine, small strainer
STEP 1: Preparing the crepe batter
In a blender, food processor, or good size chopper (I use my Black & Decker SHORTCUT) combine the flour, sugar, baking powder and salt. Process just a little, to mix. Then, line up your measured ingredients near you and, with the motor running and via the feed tube, add the rest of the crepe ingredients one at a time: milk, water, butter, and eggs, also one at a time. Process just until smooth, about 30 seconds. You will see some air bubbles at the top.
NOTE: If you do not have any of this equipment, you can make mix the crepe batter using a whisk. If so, start with the eggs, and gradually blend in the other ingredients.
TIP: Prepare this crepe batter the night before and store it in the refrigerator in an air-tight container. Let the batter sit for at least 15 minutes — whether you make your crepes right away or the next morning. Whisk the batter briefly just before you begin to cook the crepes.
STEP 2: Bring the filling and accompaniments to room temperature
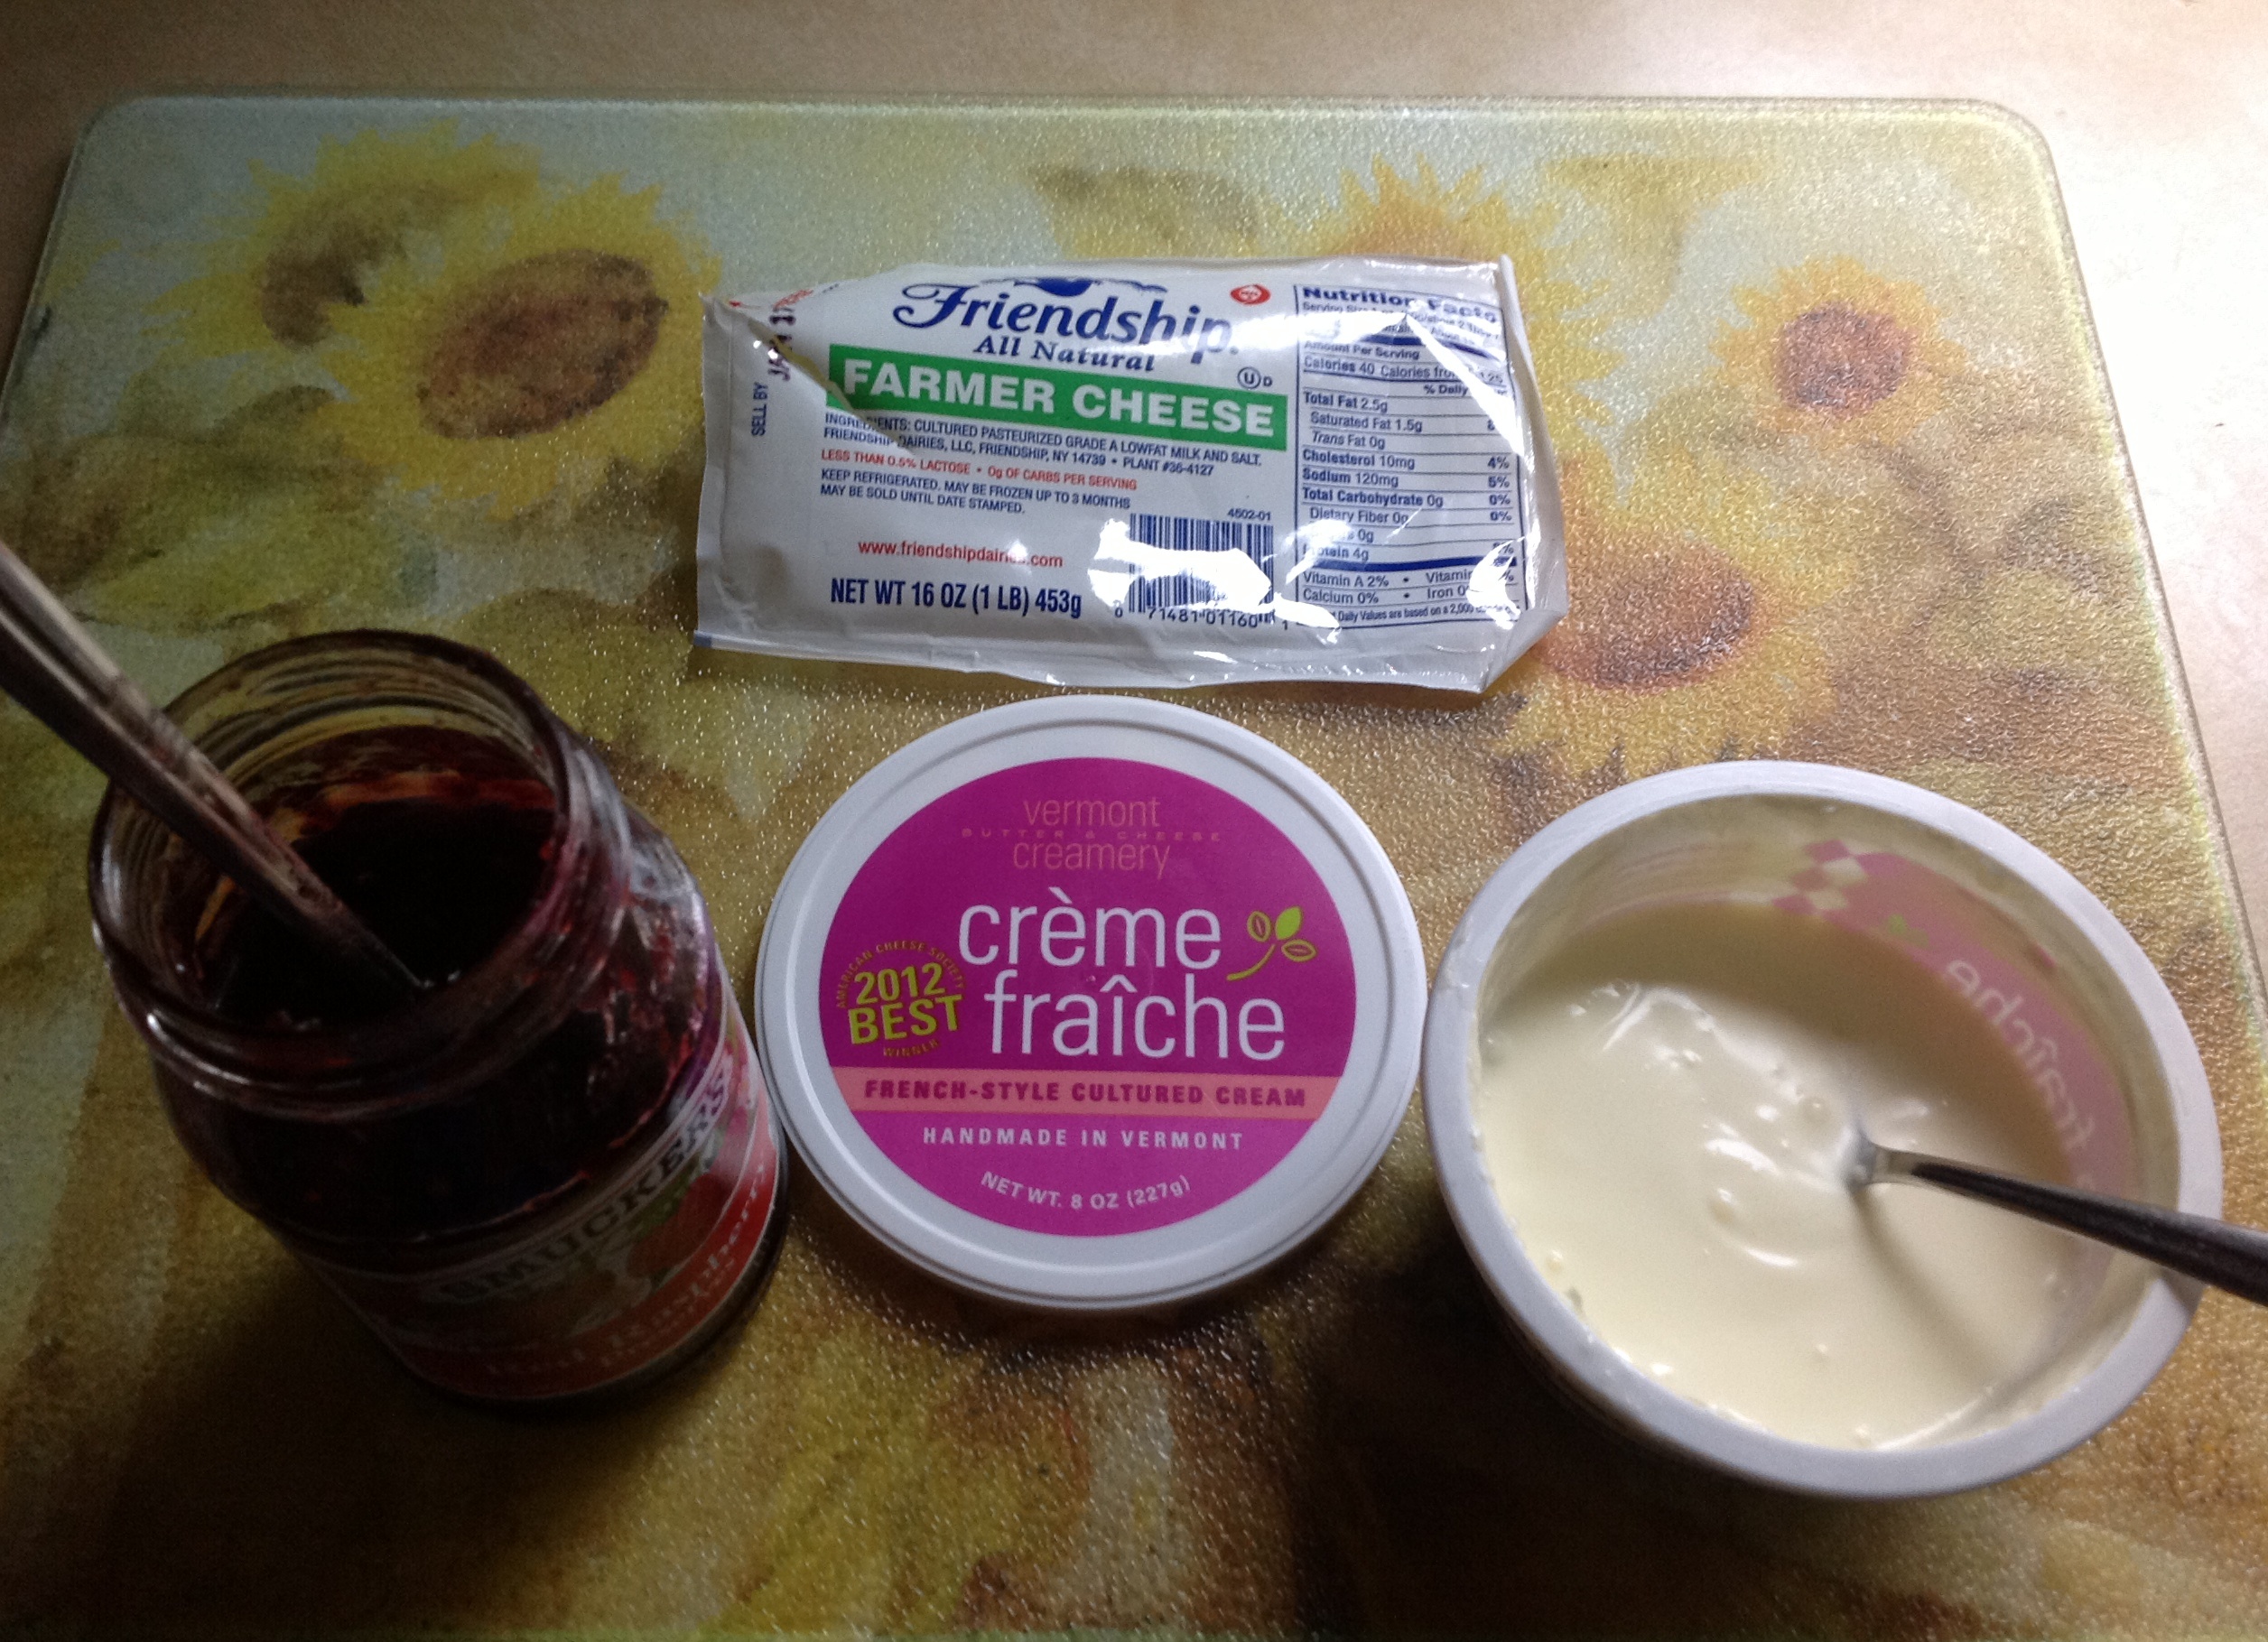
Prior to cooking your crepes, transfer the creme fraiche, the farmer cheese, the jam, and an egg from your refrigerator to a work surface. Here are the brands I used and liked: Friendship, Vermont Creamery, Smuckers, and Nervous Nellie’s Jams and Jellies, shown in a photo below.
In the photo below, you can see the 16-ounce block of farmer cheese (Friendship brand) that I bought and split for use in the second and third recipe test.
Put 8 oz. (or half this block shown) of the farmer cheese in a medium bowl and break it up with a fork. Set aside.
The first time I made these crepes, I bought a fine ricotta cheese, thinking this might work as the filling, even though I suspected it wouldn’t be quite as good. My instincts were right! So, do locate some farmer cheese. It is plentiful in Lithuania (as it is a staple and export) and is available in the U.S., though not everywhere. I bought mine at Whole Foods Market and my sister told me Trader Joe’s carries it.
STEP 3: Cooking the crepes
Heat a heavy 7-8 inch non-stick skillet over medium heat. The cast iron frying pan that I’ve had forever worked just fine. When the pan seems hot enough, spray it lightly with PAM, or comparable light oil. If you would rather pour some bottled oil, like Canola, make sure the pan has only an oil sheen before you make a crepe, not puddles of oil. (Wipe up any excess quickly with a paper towel and throw the paper away immediately. Please don’t leave paper anywhere near your stove.)
While you wait for your pan to heat, tear off 8-10 pieces of wax paper, each about 10 inches wide. Set aside in a stack on the counter. Next, check the frying pan handle. If it is one that retains heat, wrap a pot holder around it.
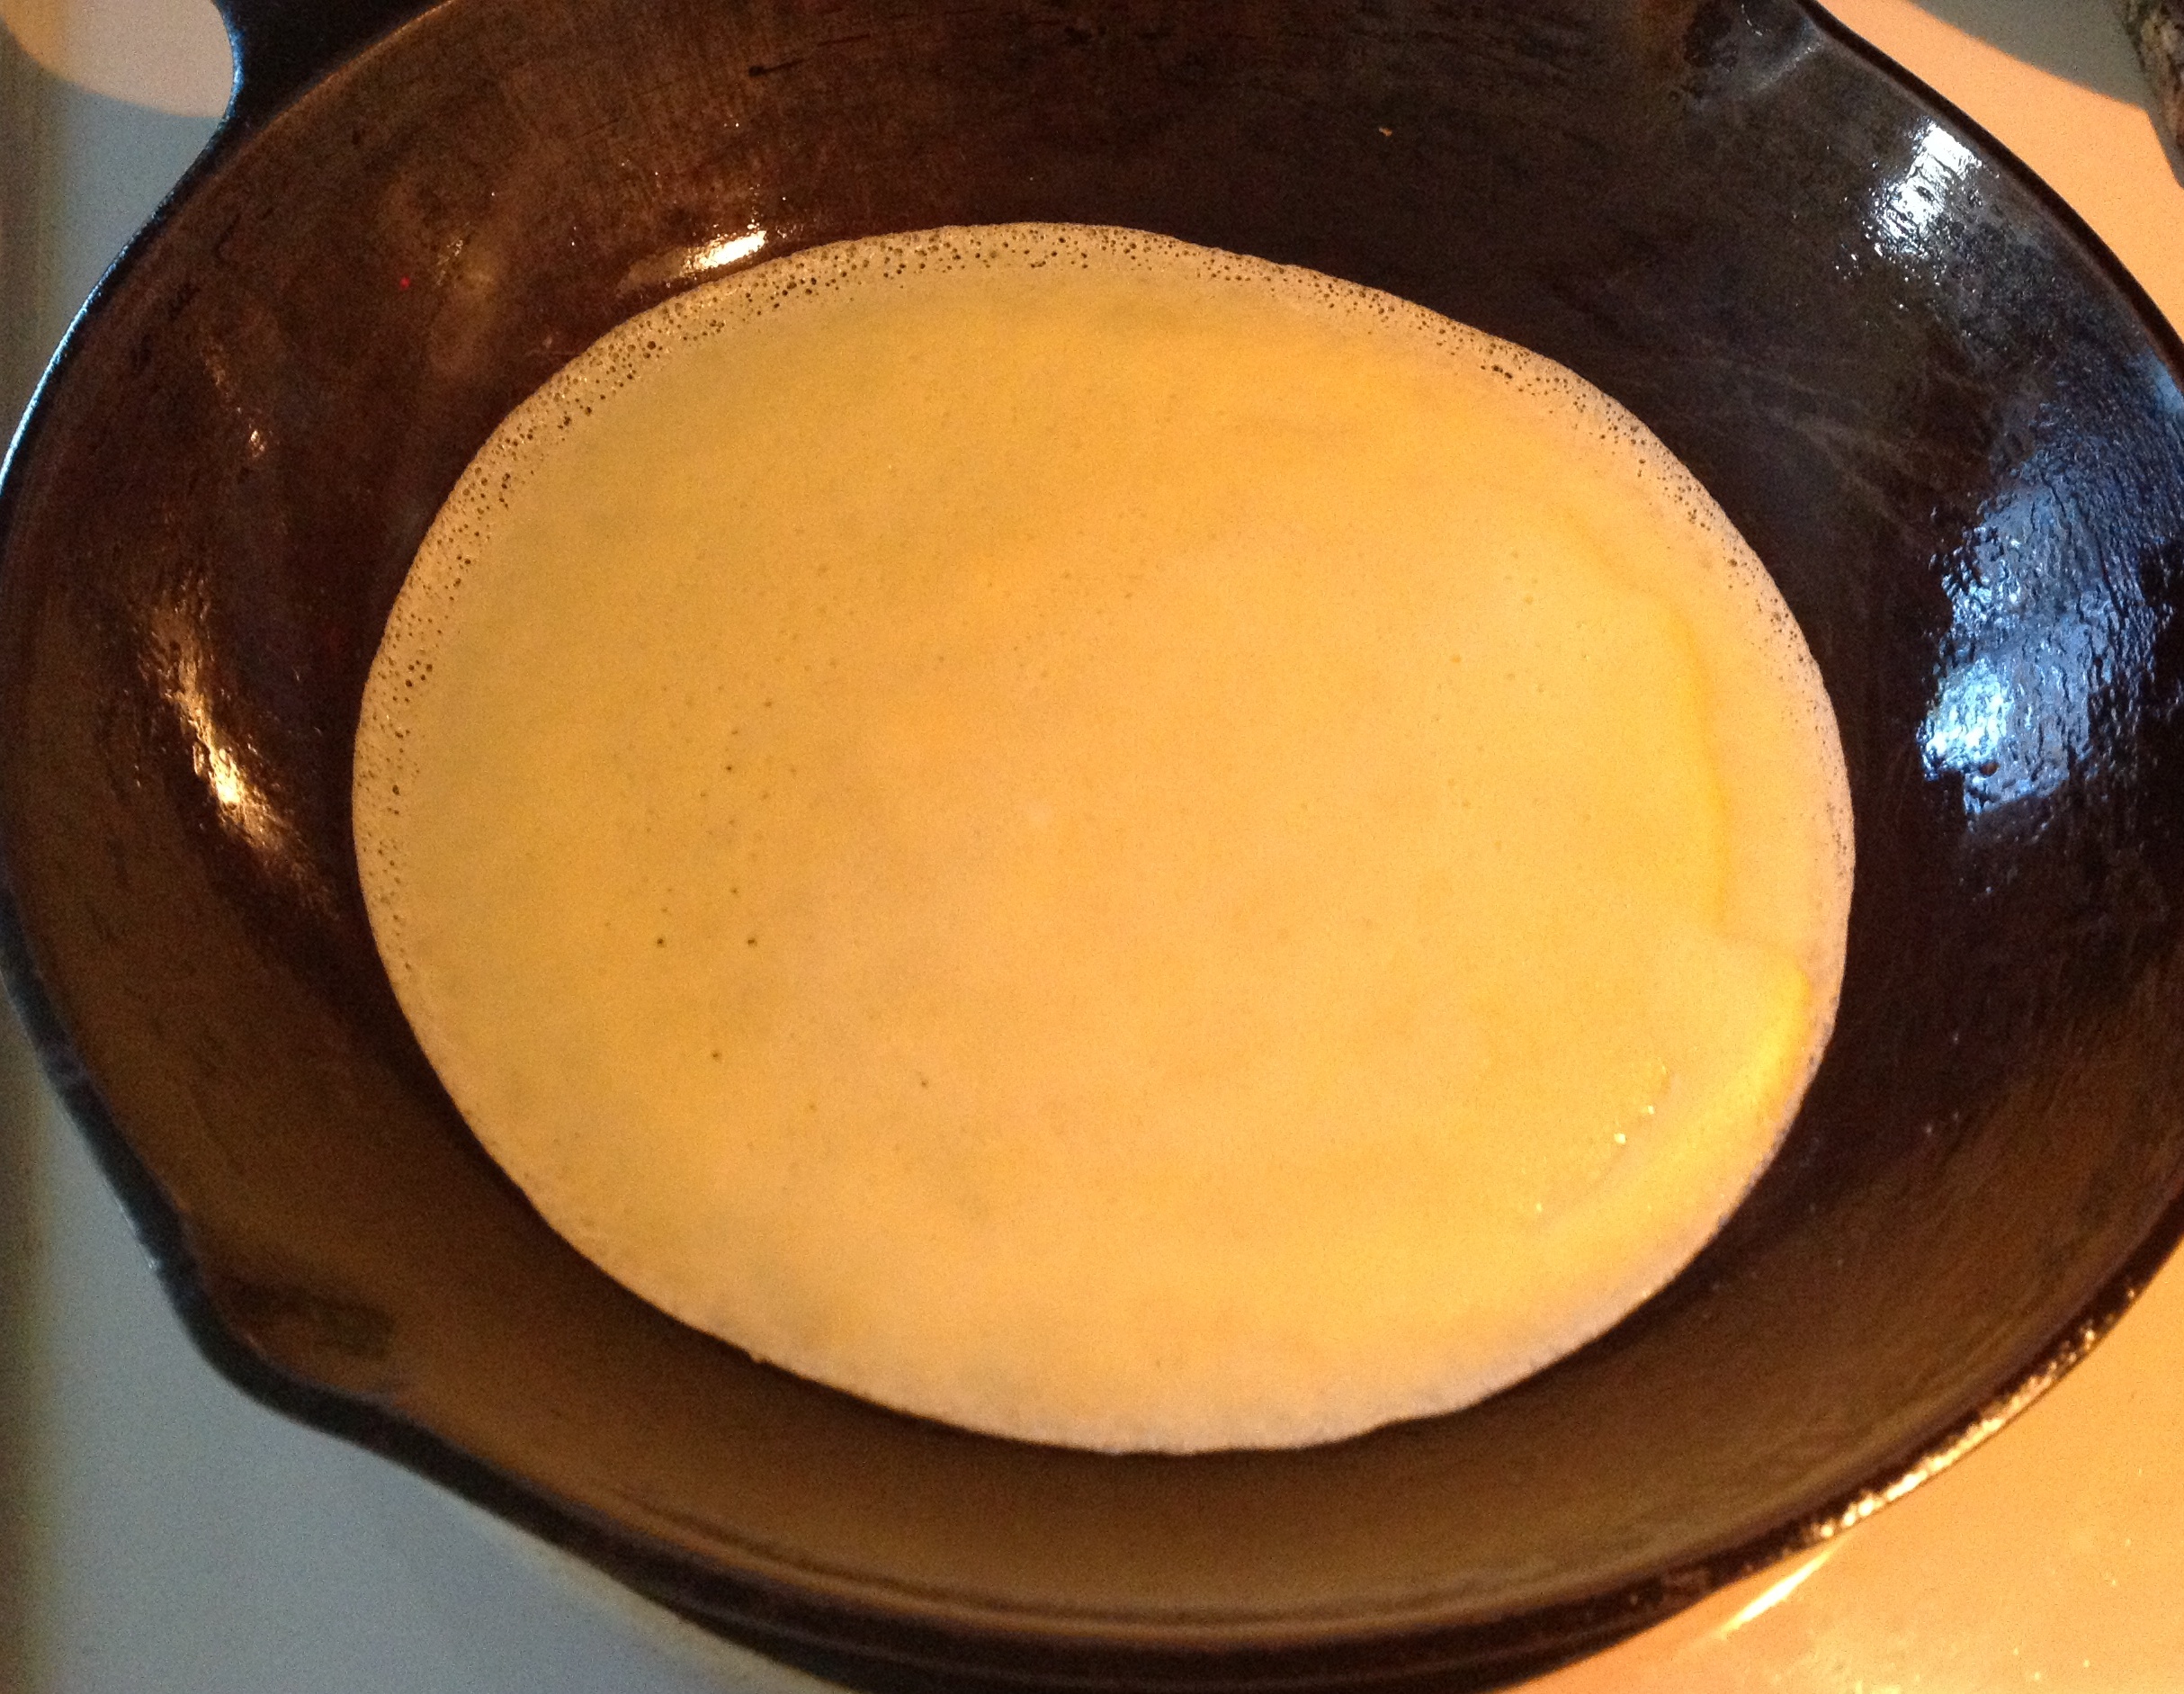
Now, with one hand, lift the pan off the stove ring. With the other hand, dip a 1/4 cup measuring cup into your crepe batter, filling it just short of full. As you pour the measure of batter into the center of the pan, tilt and then slowly turn your pan so that the batter now swirls around and around, working its way out from the center and expands outward until filling the 7-8 inch bottom of your pan completely. Return the pan to the stove ring and watch the crepe cook for about 1 minute.
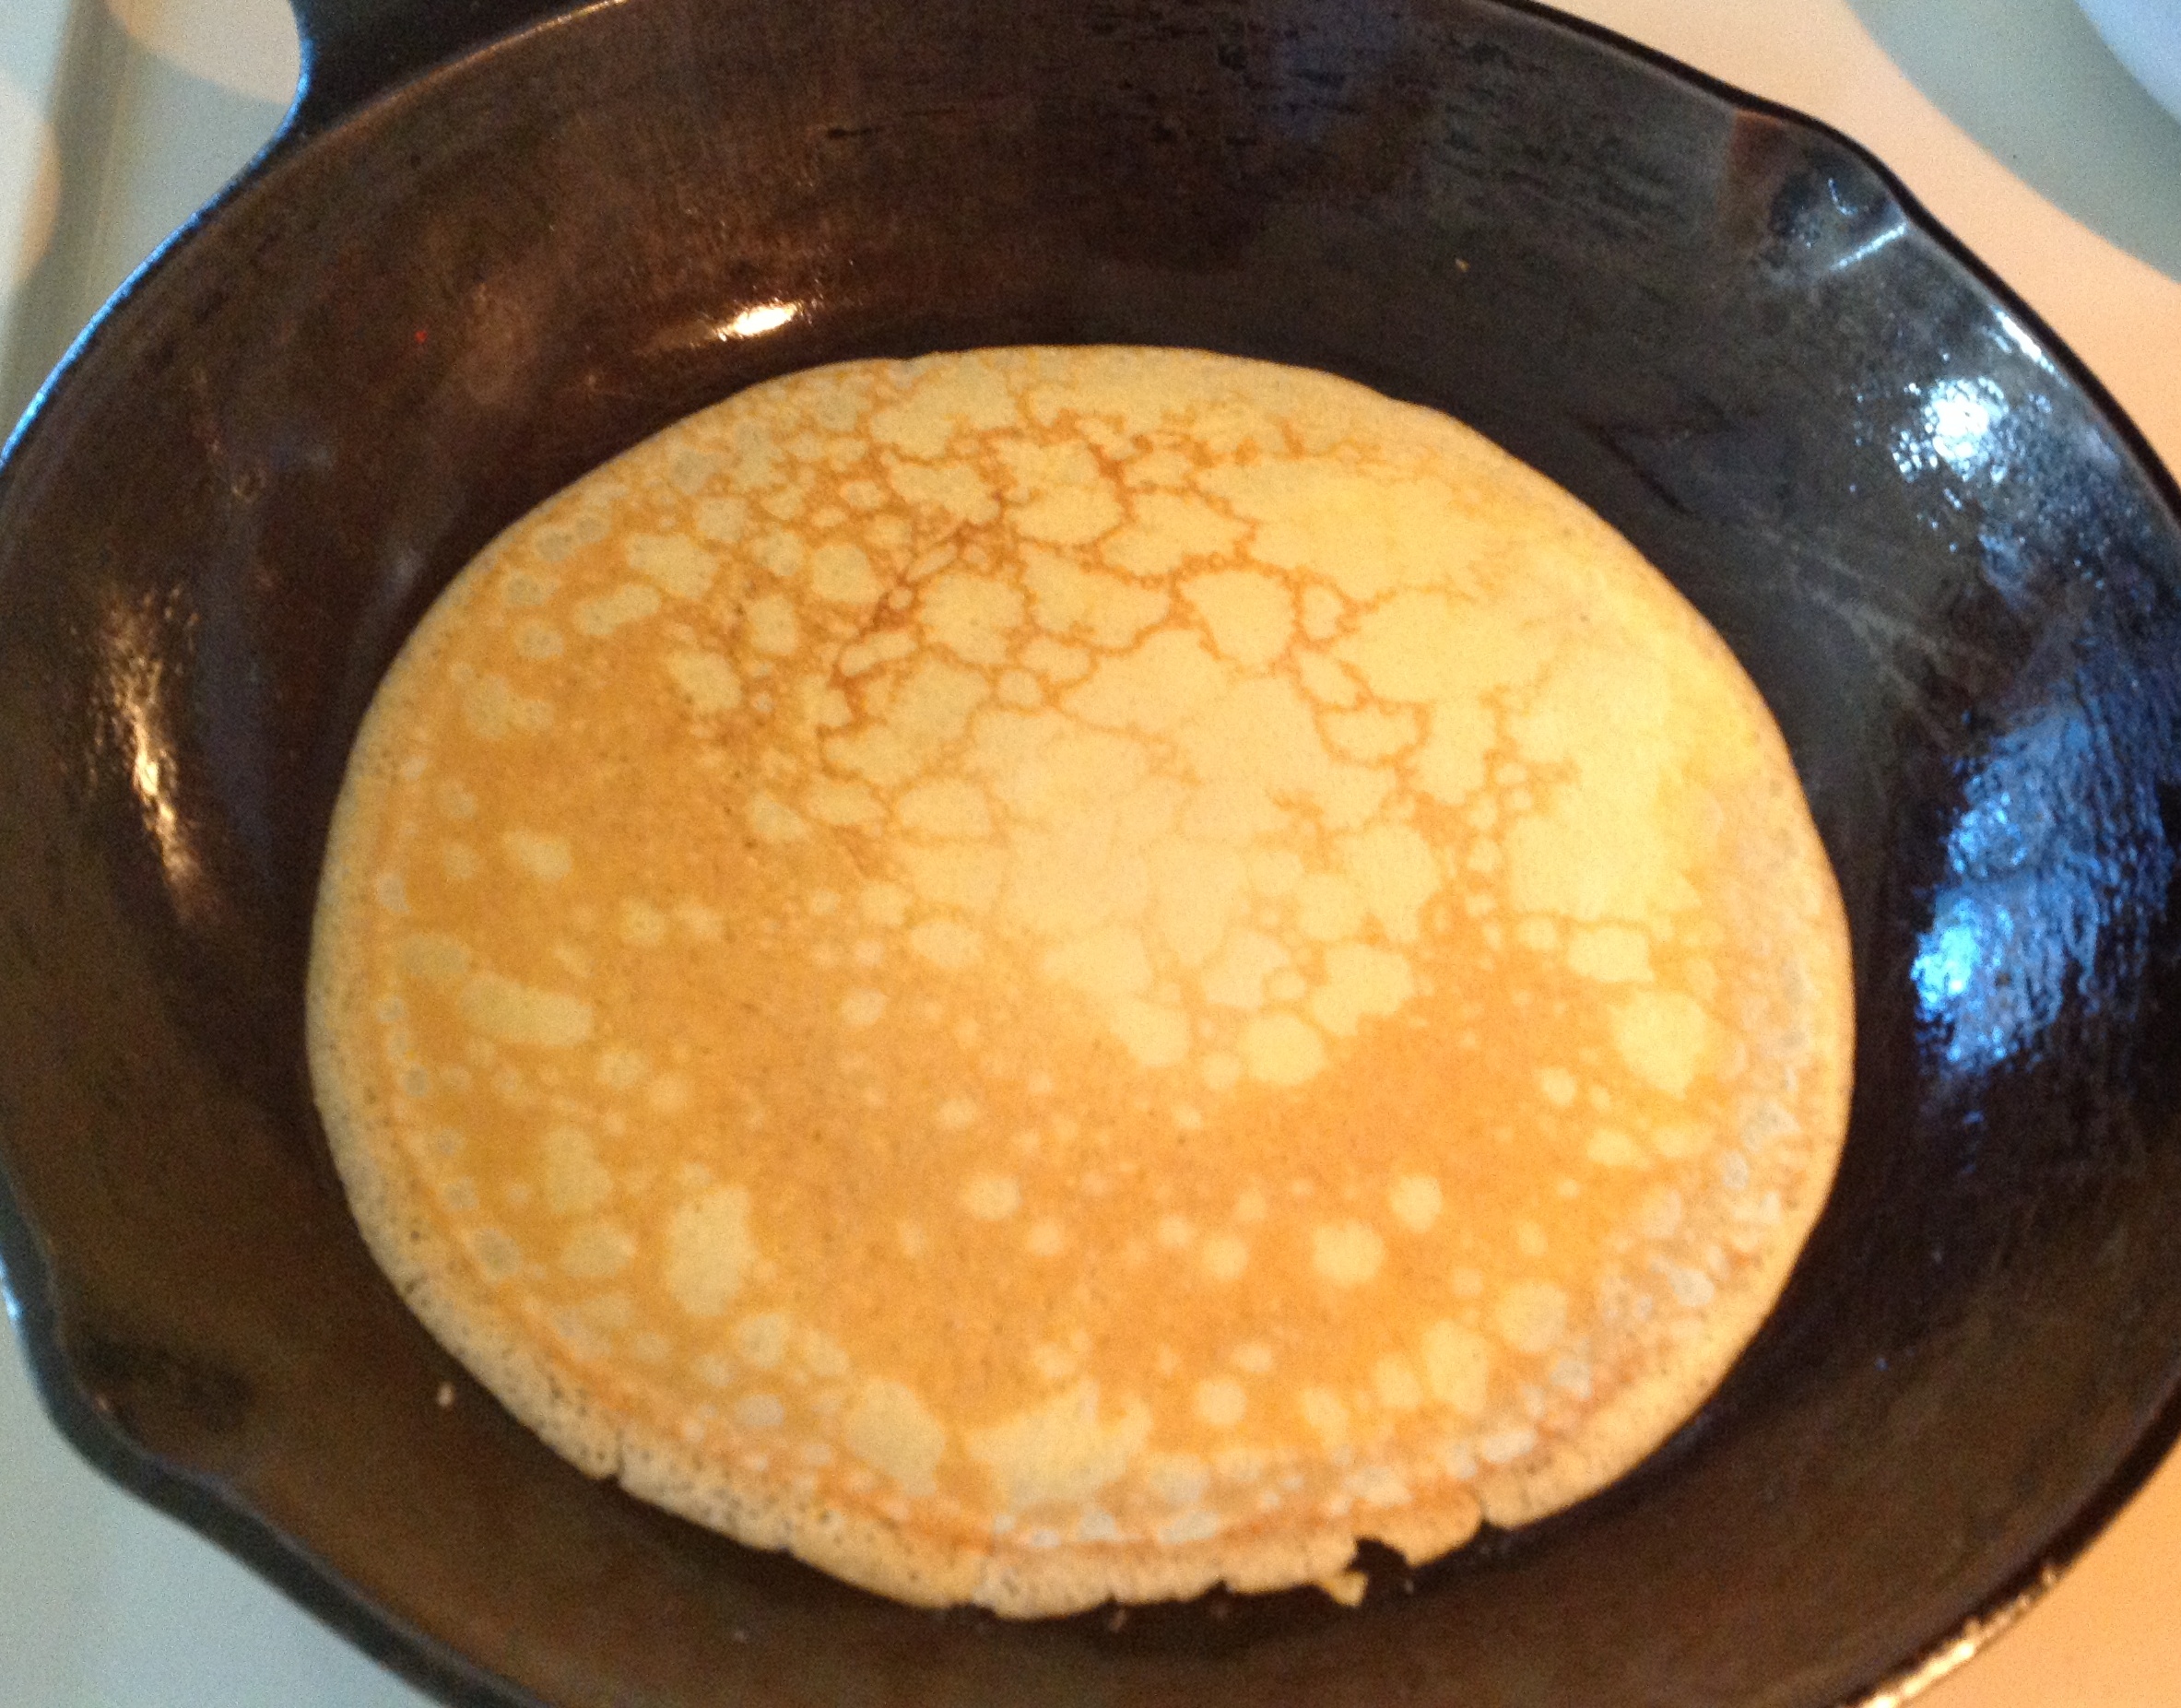
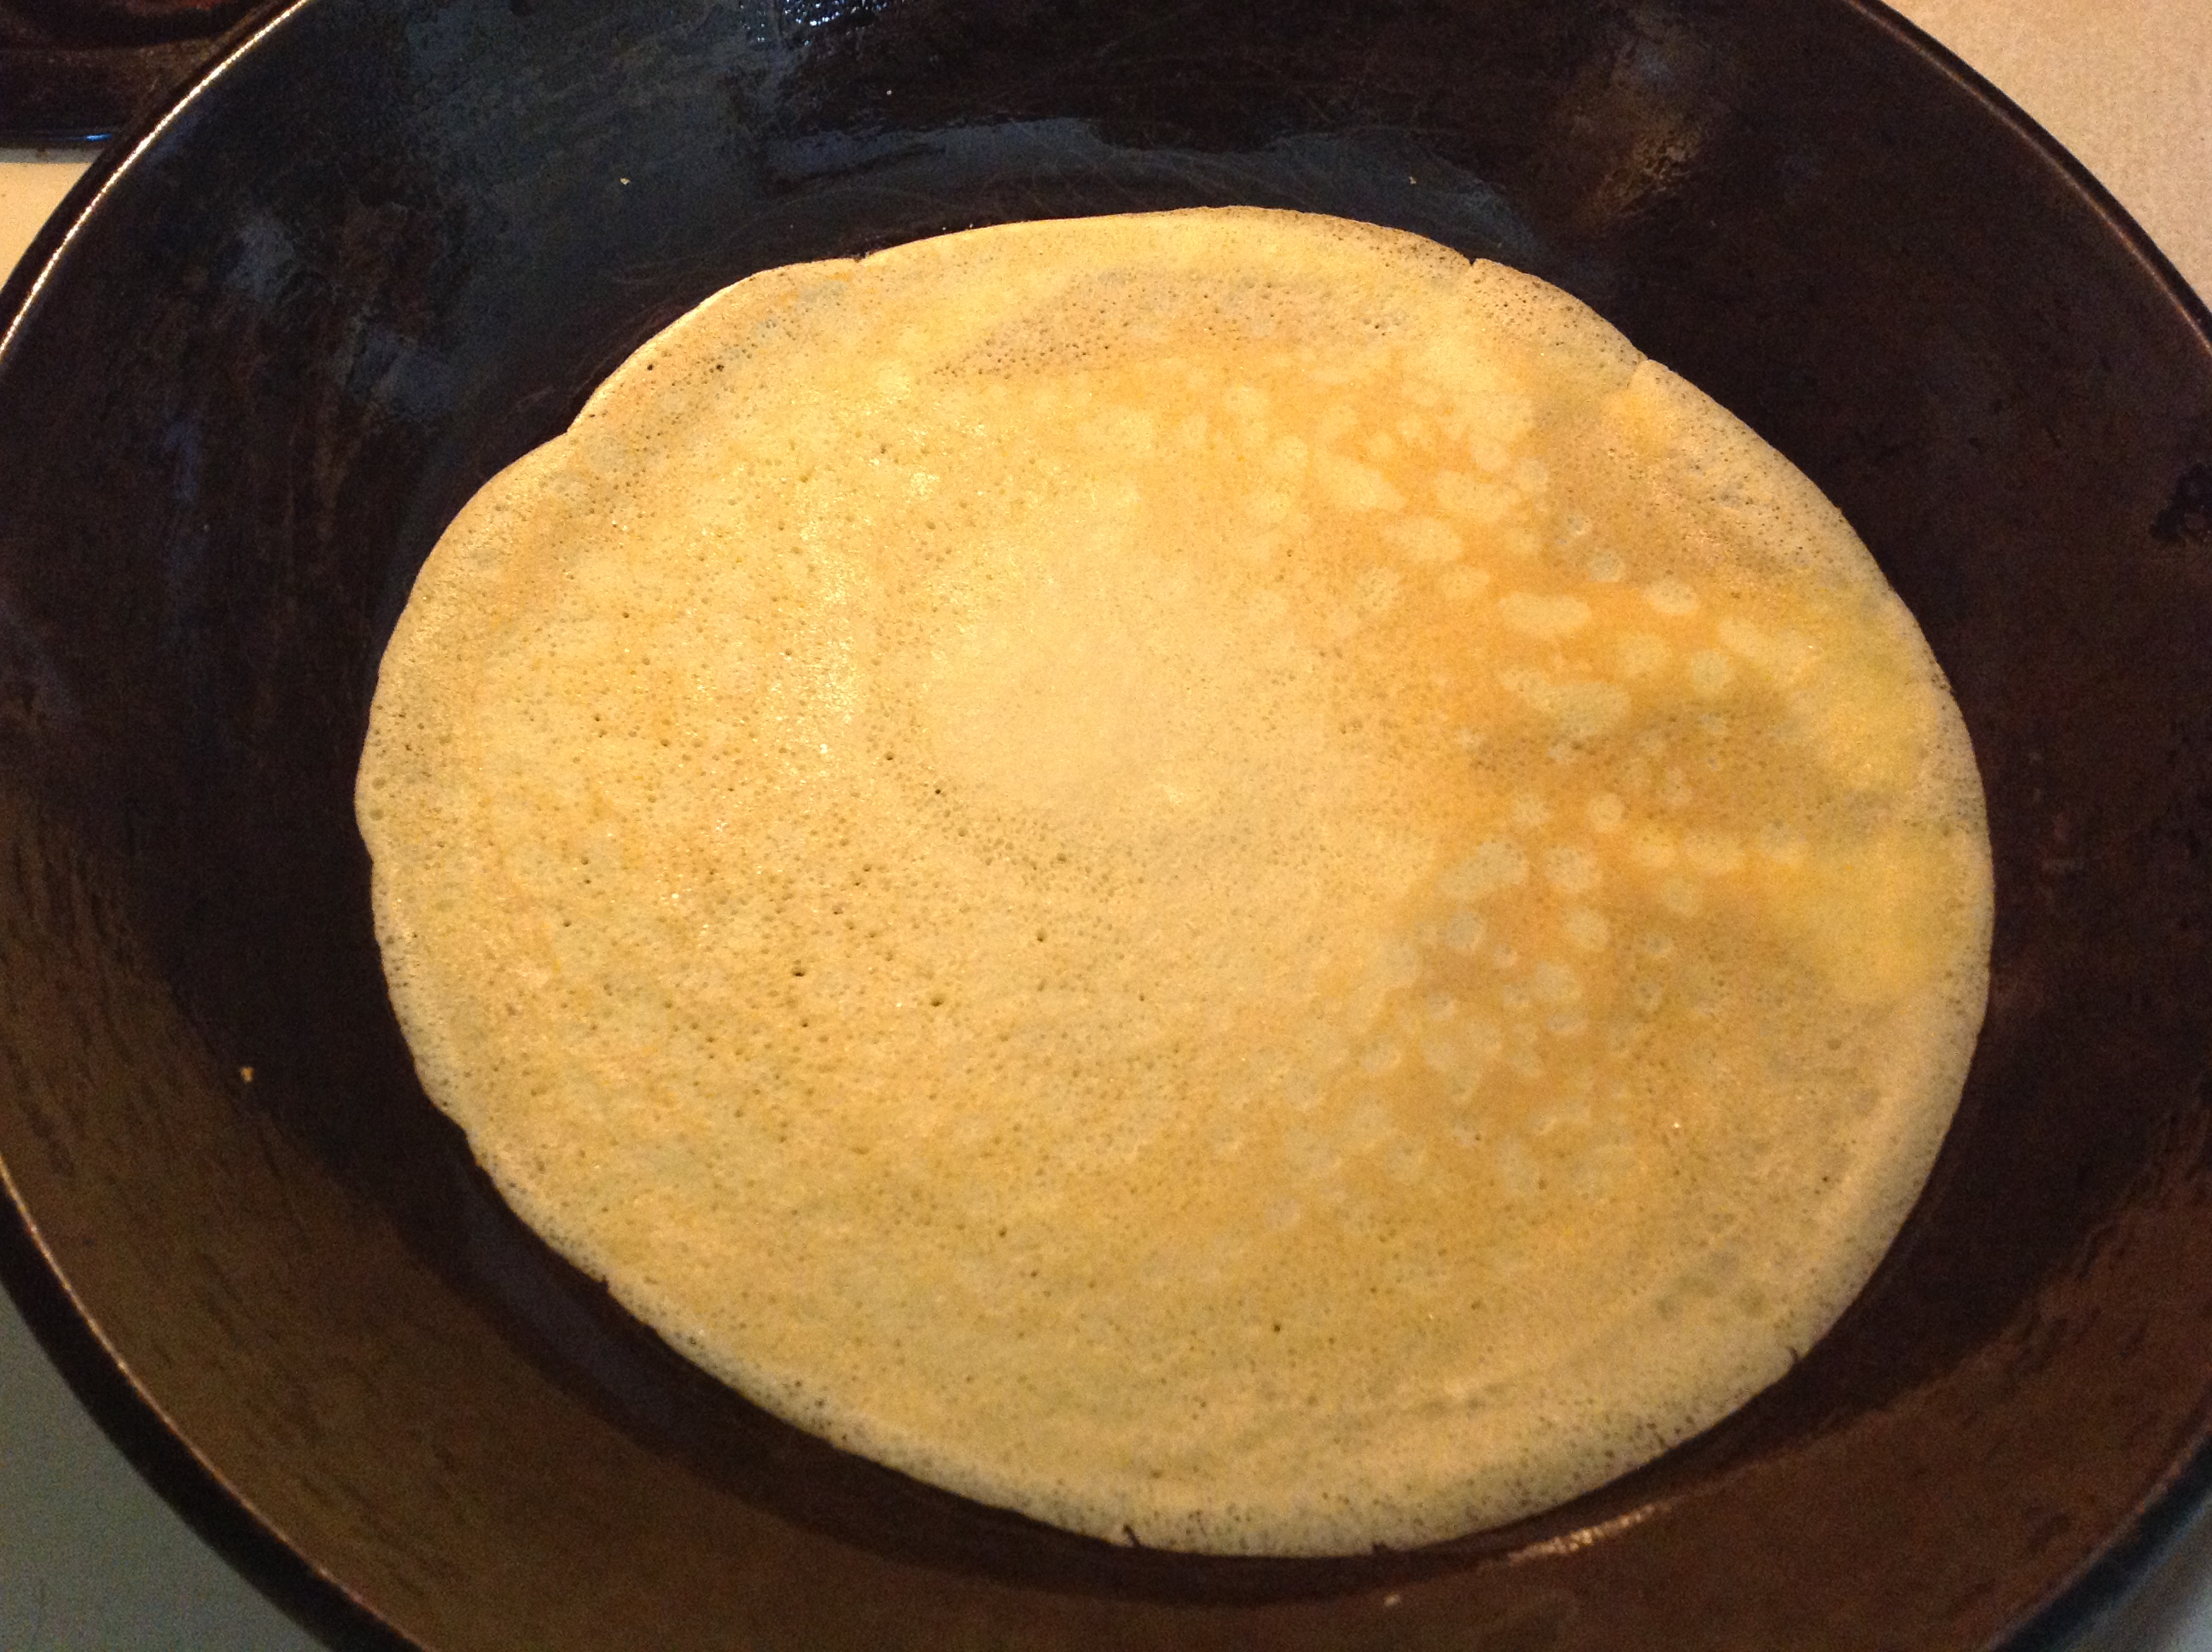
The top will dry (see above photo). This nice crepe is just about ready to turn over. When you can easily slide a thin spatula underneath, check that the browning pattern is what you want, and if so, flip the crepe. Below is a flipped crepe with the type of browning pattern I like to see.
If you prefer a lighter, more dense pattern, remove your pan from the heat, turn the heat down a little and wait (if you have an electric stove) a few minutes before you return the pan to the heat and begin again. Here’s an example of a lighter pattern.
After you flip the crepe, cook side 2 for about 15 seconds. Using the spatula, transfer it to a piece of wax paper, flipping it so that the cooler side (first side cooked) goes down against the wax paper.
Stack the crepes as you cook them, allowing each crepe to cool a little while you are making the next one. Just before your next crepe finishes cooking, place a piece of wax paper on top of the previously cooked crepe.
If you have not made crepes before, the first one you make tells you whether your heat level is too hot, not hot enough, or just right. After a few minutes, when the top side is dry and you are ready to flip it, if the bottom (cooked side) of your crepe has almost no browning pattern and the edges are getting brittle, your heat is a little too low.
Alternatively, if, just after you pour the batter into the pan, the batter is jumping around the pan with big air bubbles popping or the batter spread so quickly there are obvious holes, the heat is too hot, and there may be too much oil. Adjust and continue when you think your heat is good. Of course, this varies with the type of stove and fuel source, of course.
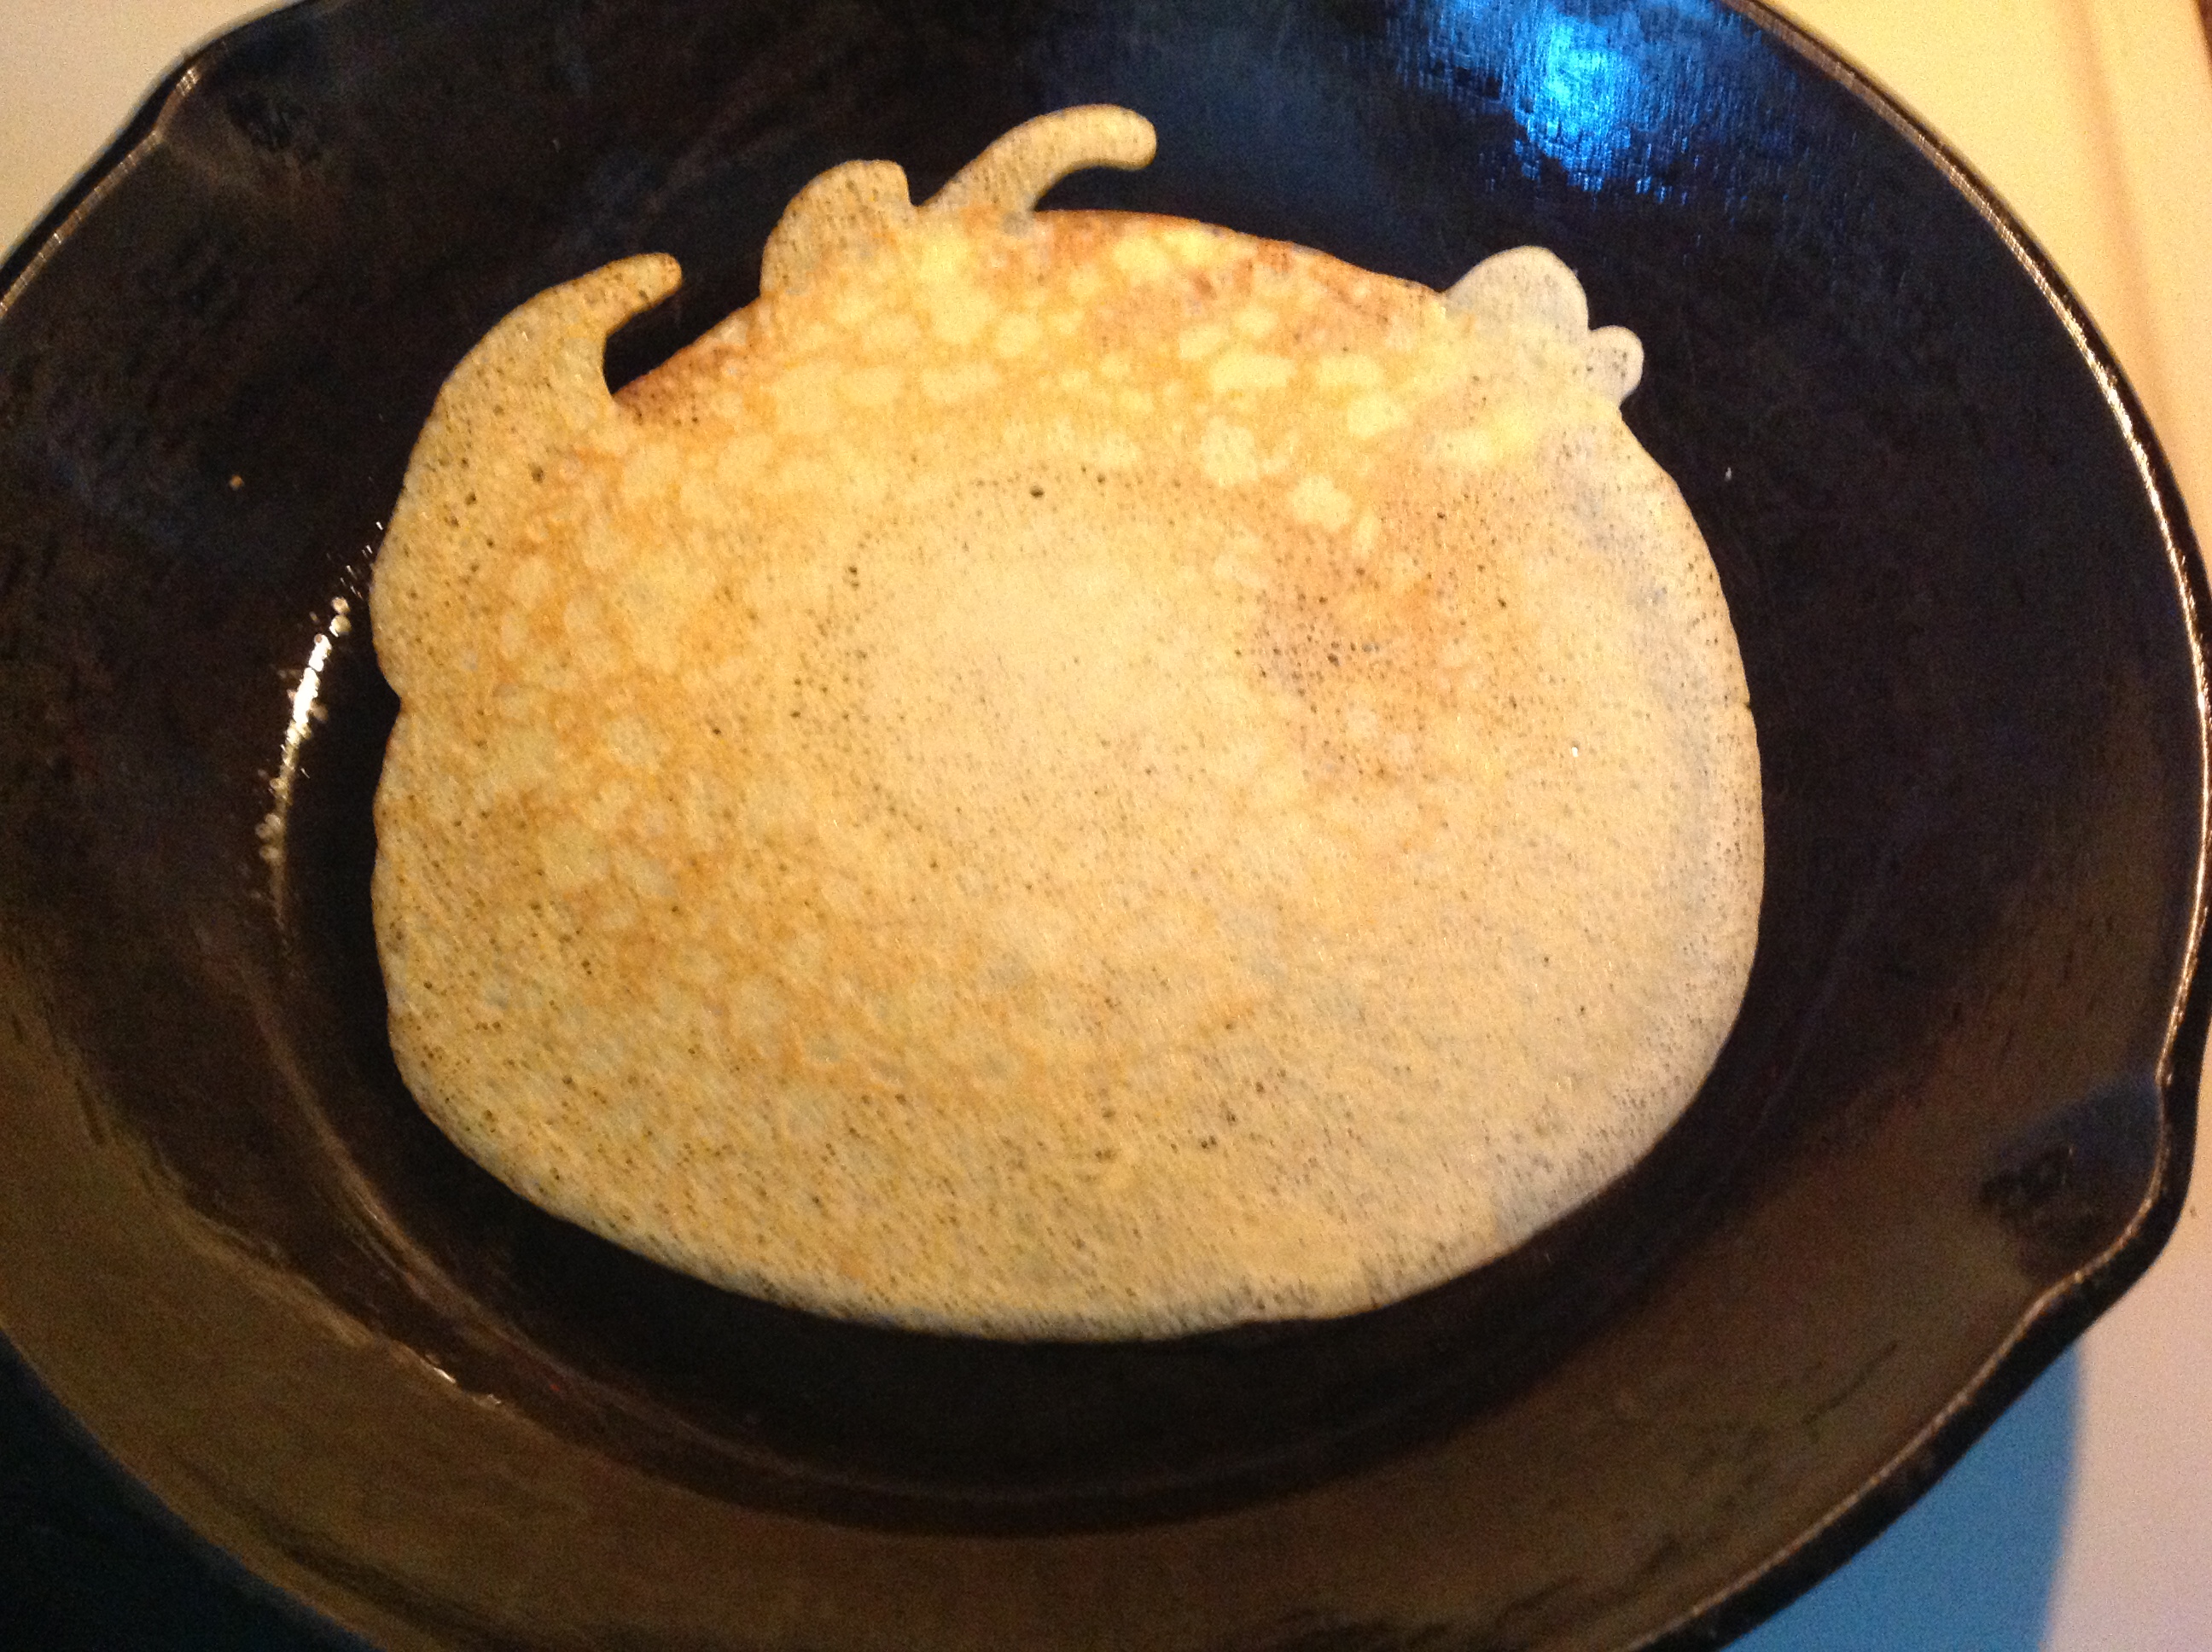
It can take a few crepes to get the hang of the “turn and tilt action” that spreads the batter evenly across the bottom of the pan. If your first crepe resembles the one below, don’t worry! I promise your crepes will improve. This batter makes about 12 crepes —more than you need for the amount of filling, so relax and practice! Just before you fill them, you’ll be selecting the best 8-10 of the cooked crepes.
TIP: Don’t get so comfortable while cooking your crepes that you get distracted doing something else. It is easy to overcook the crepes. They might end up slightly brittle when you go to fold them, especially on the edges. I had a few like that myself (one of these pictured below), because I did not take my own advice! Tell me, why do we always think we have to multitask?
STEP 4: Finish preparing the filling
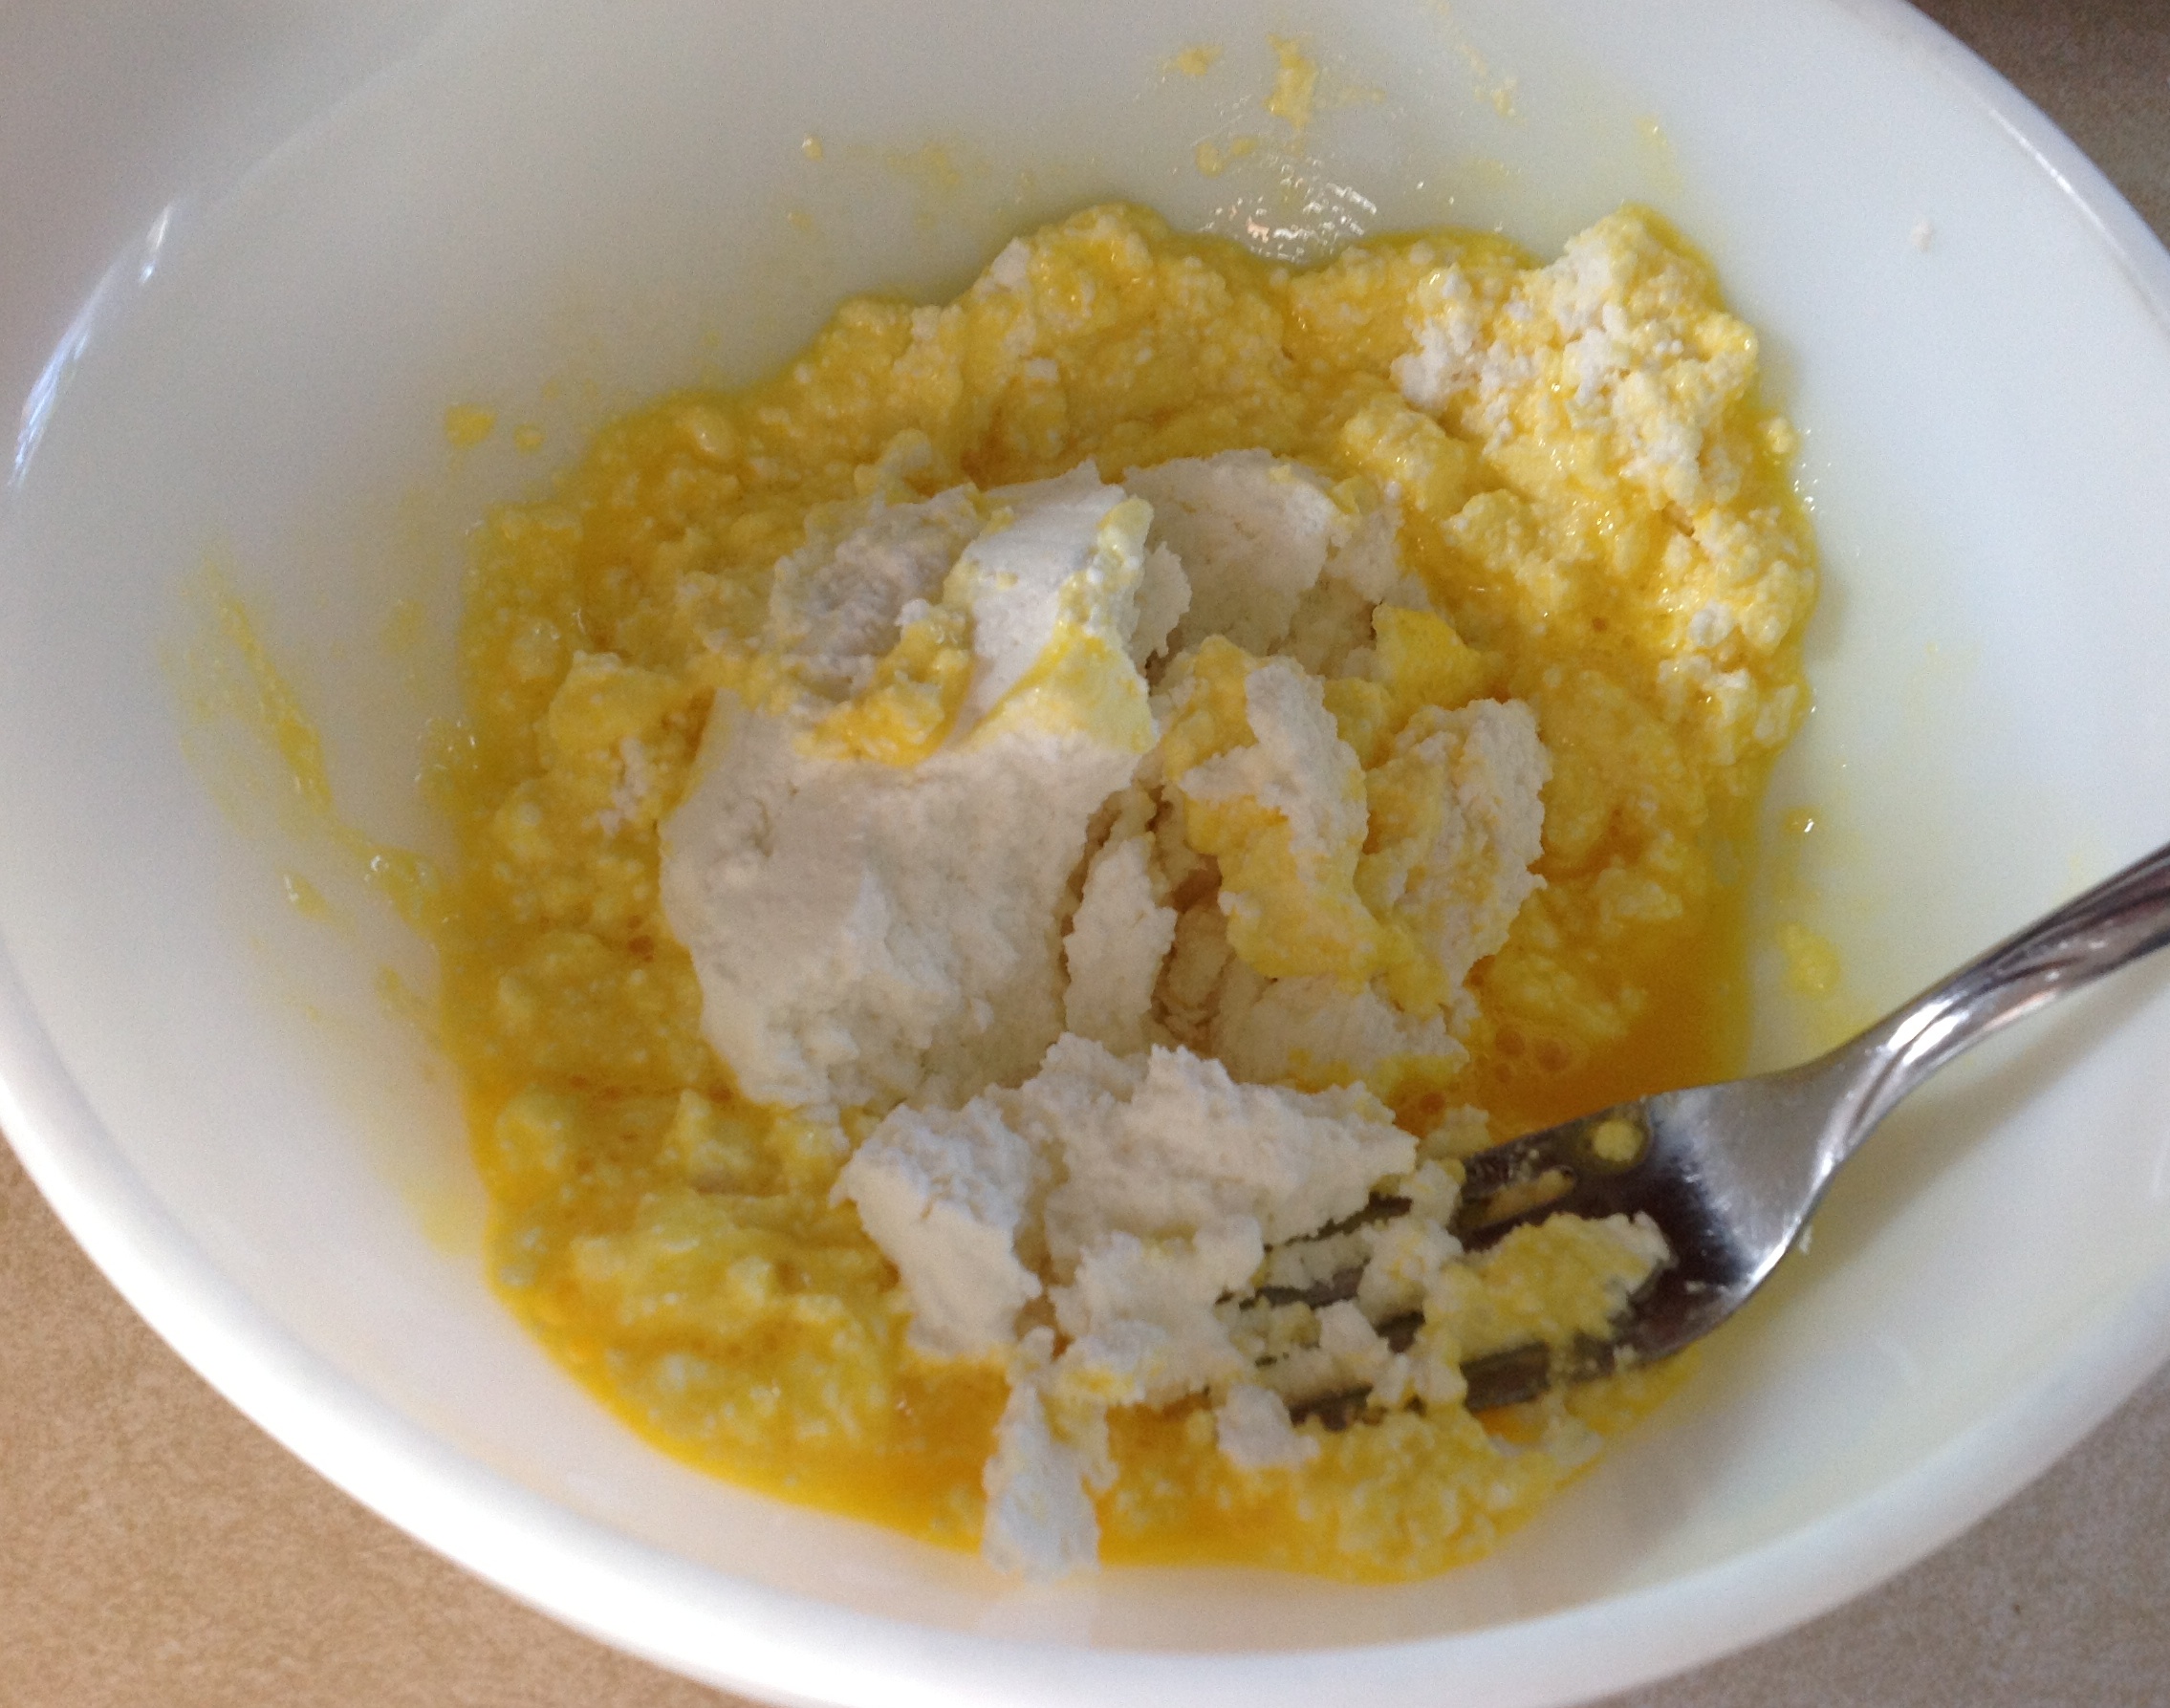
Before you begin to fill the crepes, use a fork to blend an egg and the vanilla sugar with the farmer cheese.
Rivastar indicated they also add a little vanilla sugar to the cheese/egg mixture. I tried that and it did improve the taste.
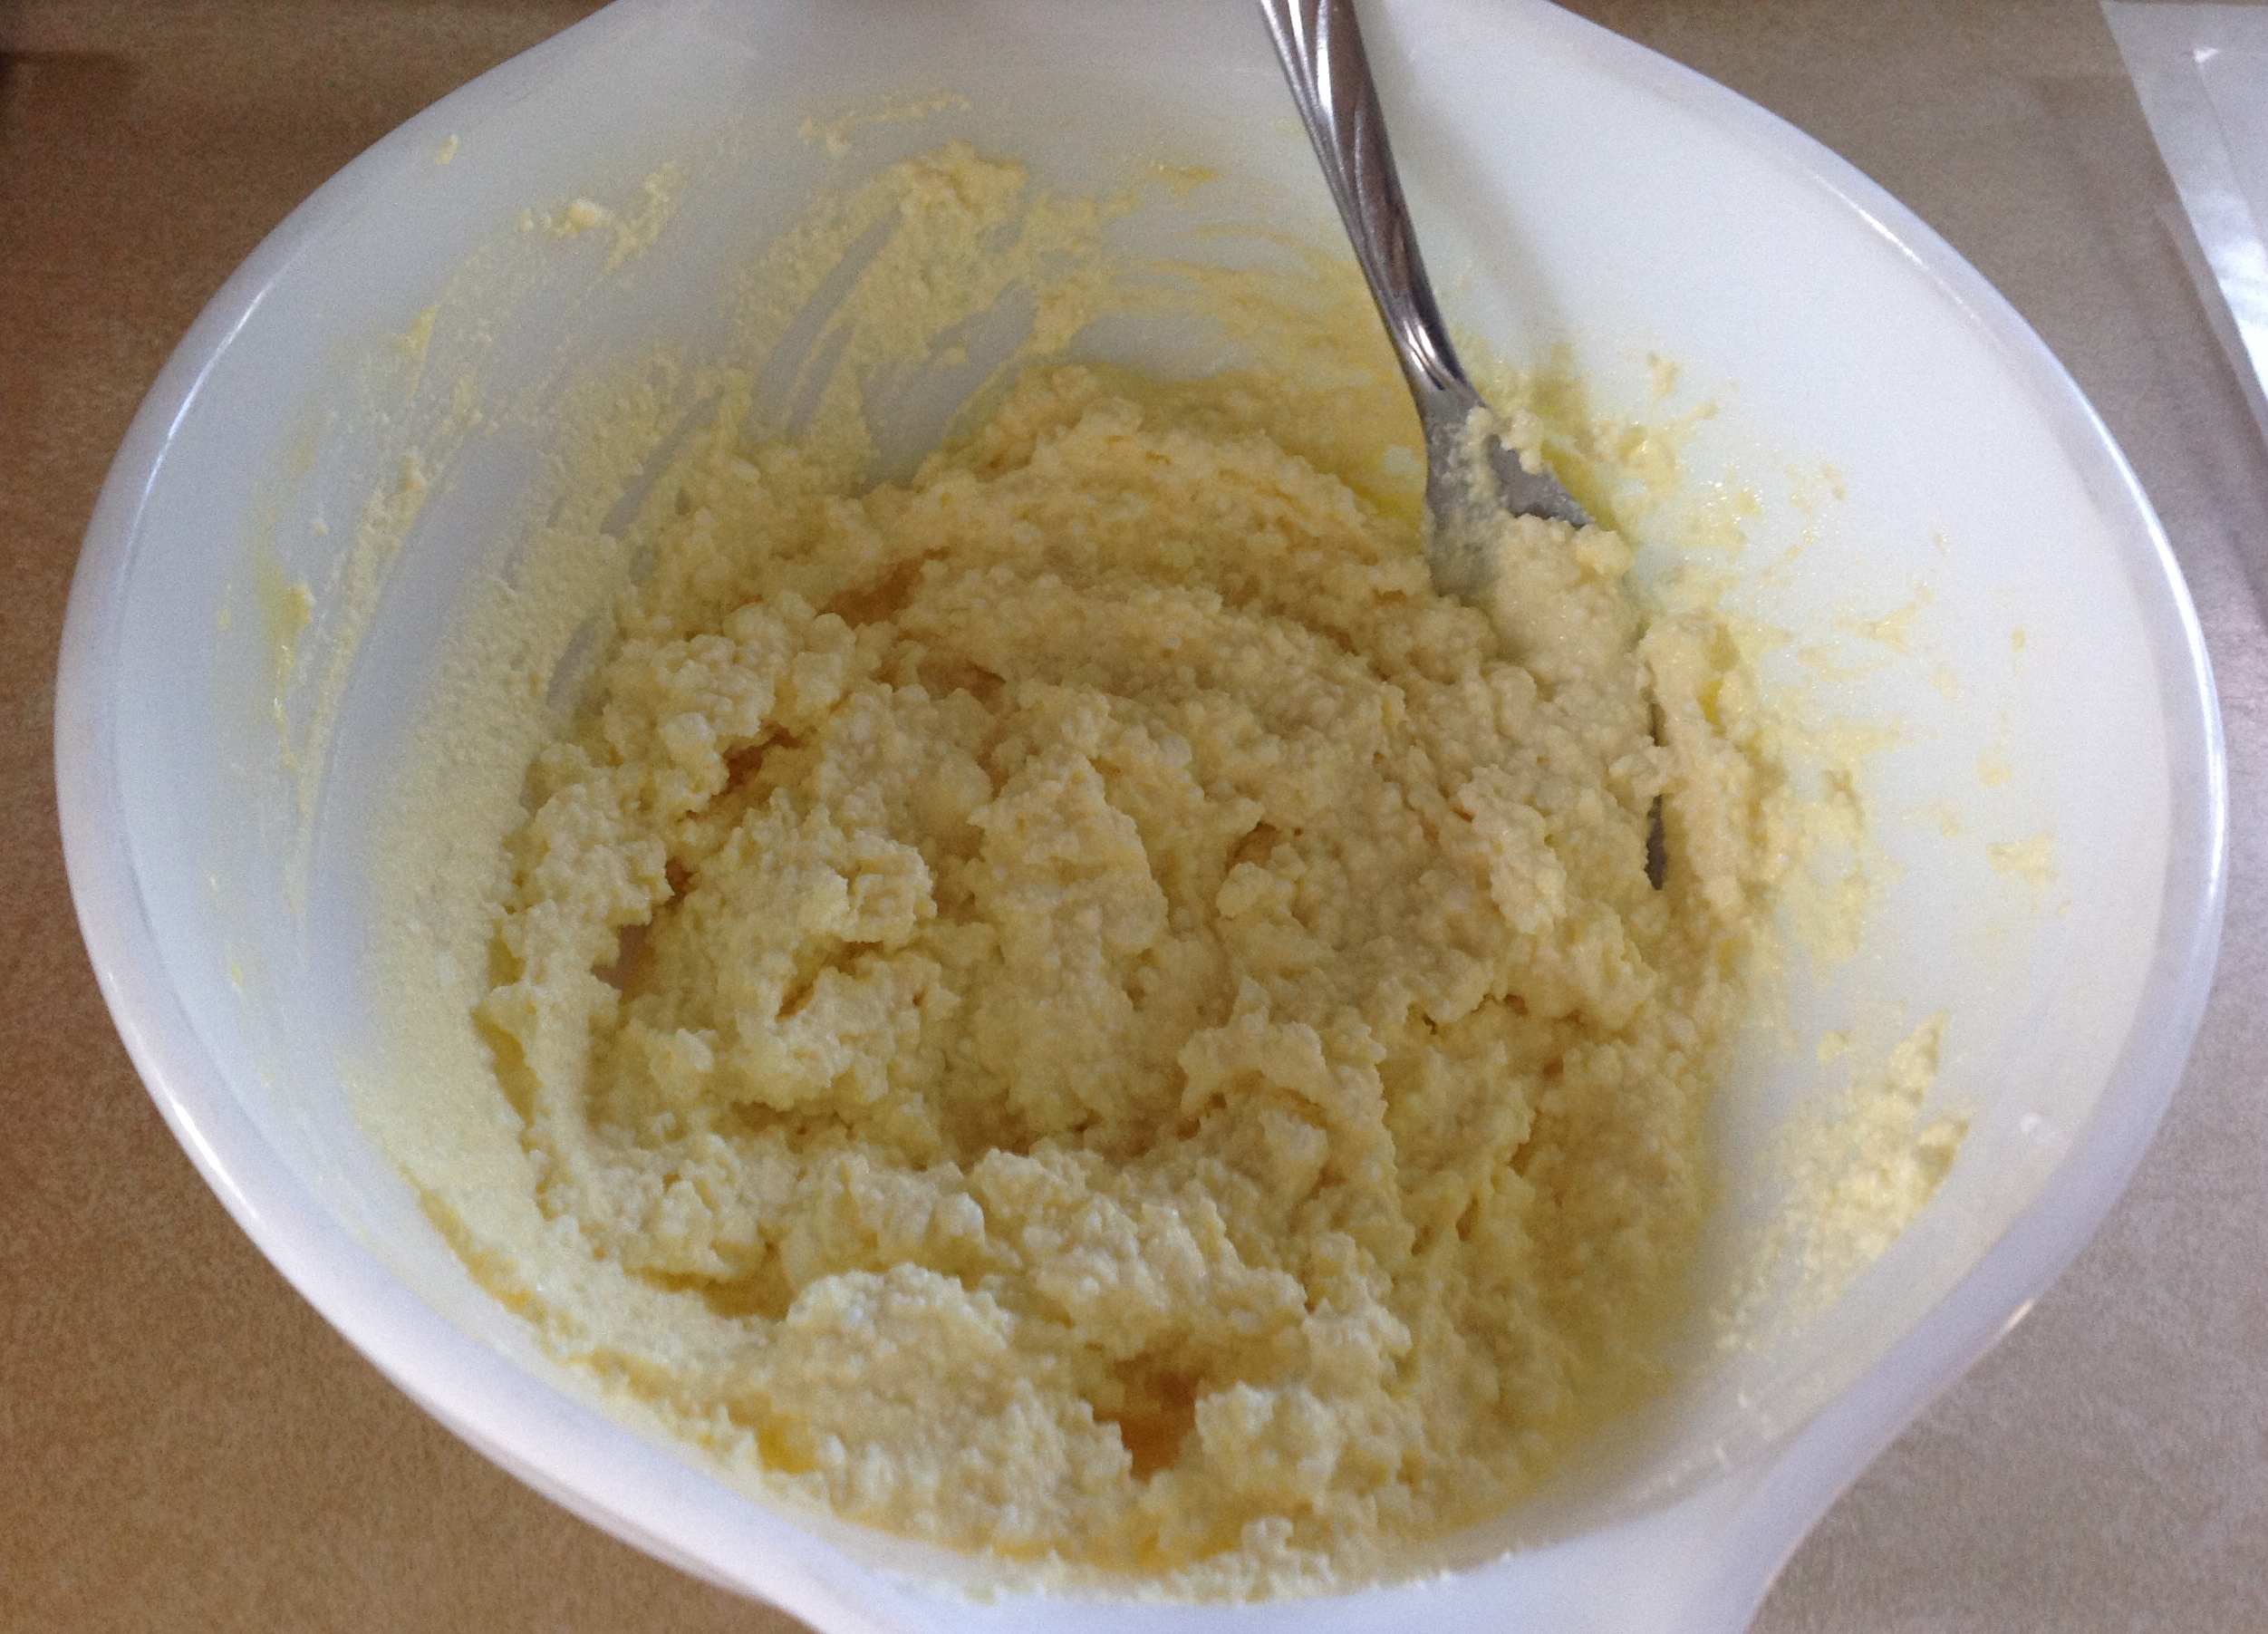
Here’s a photo of my blended farmers cheese filling mixture.
STEP 5: Filling the crepes with the cheese mixture
Go through the stack and gently lift each crepe off the wax paper, and set it back on its paper. They can stick a little, and this step will make it easier to fill the crepes. While doing this, select the best 8-10 crepes for filling. At this point, you should have your best crepes in a stack and the not-so-perfect ones removed from your working area.
Preheat the oven to 350-degrees.
If you are concerned you won’t estimate the portioning of the filling accurately, draw lines with a knife to partition the cheese filling in the bowl, like you are cutting a pie. I usually fill 8 crepes, but you can try to get 10, if you want.
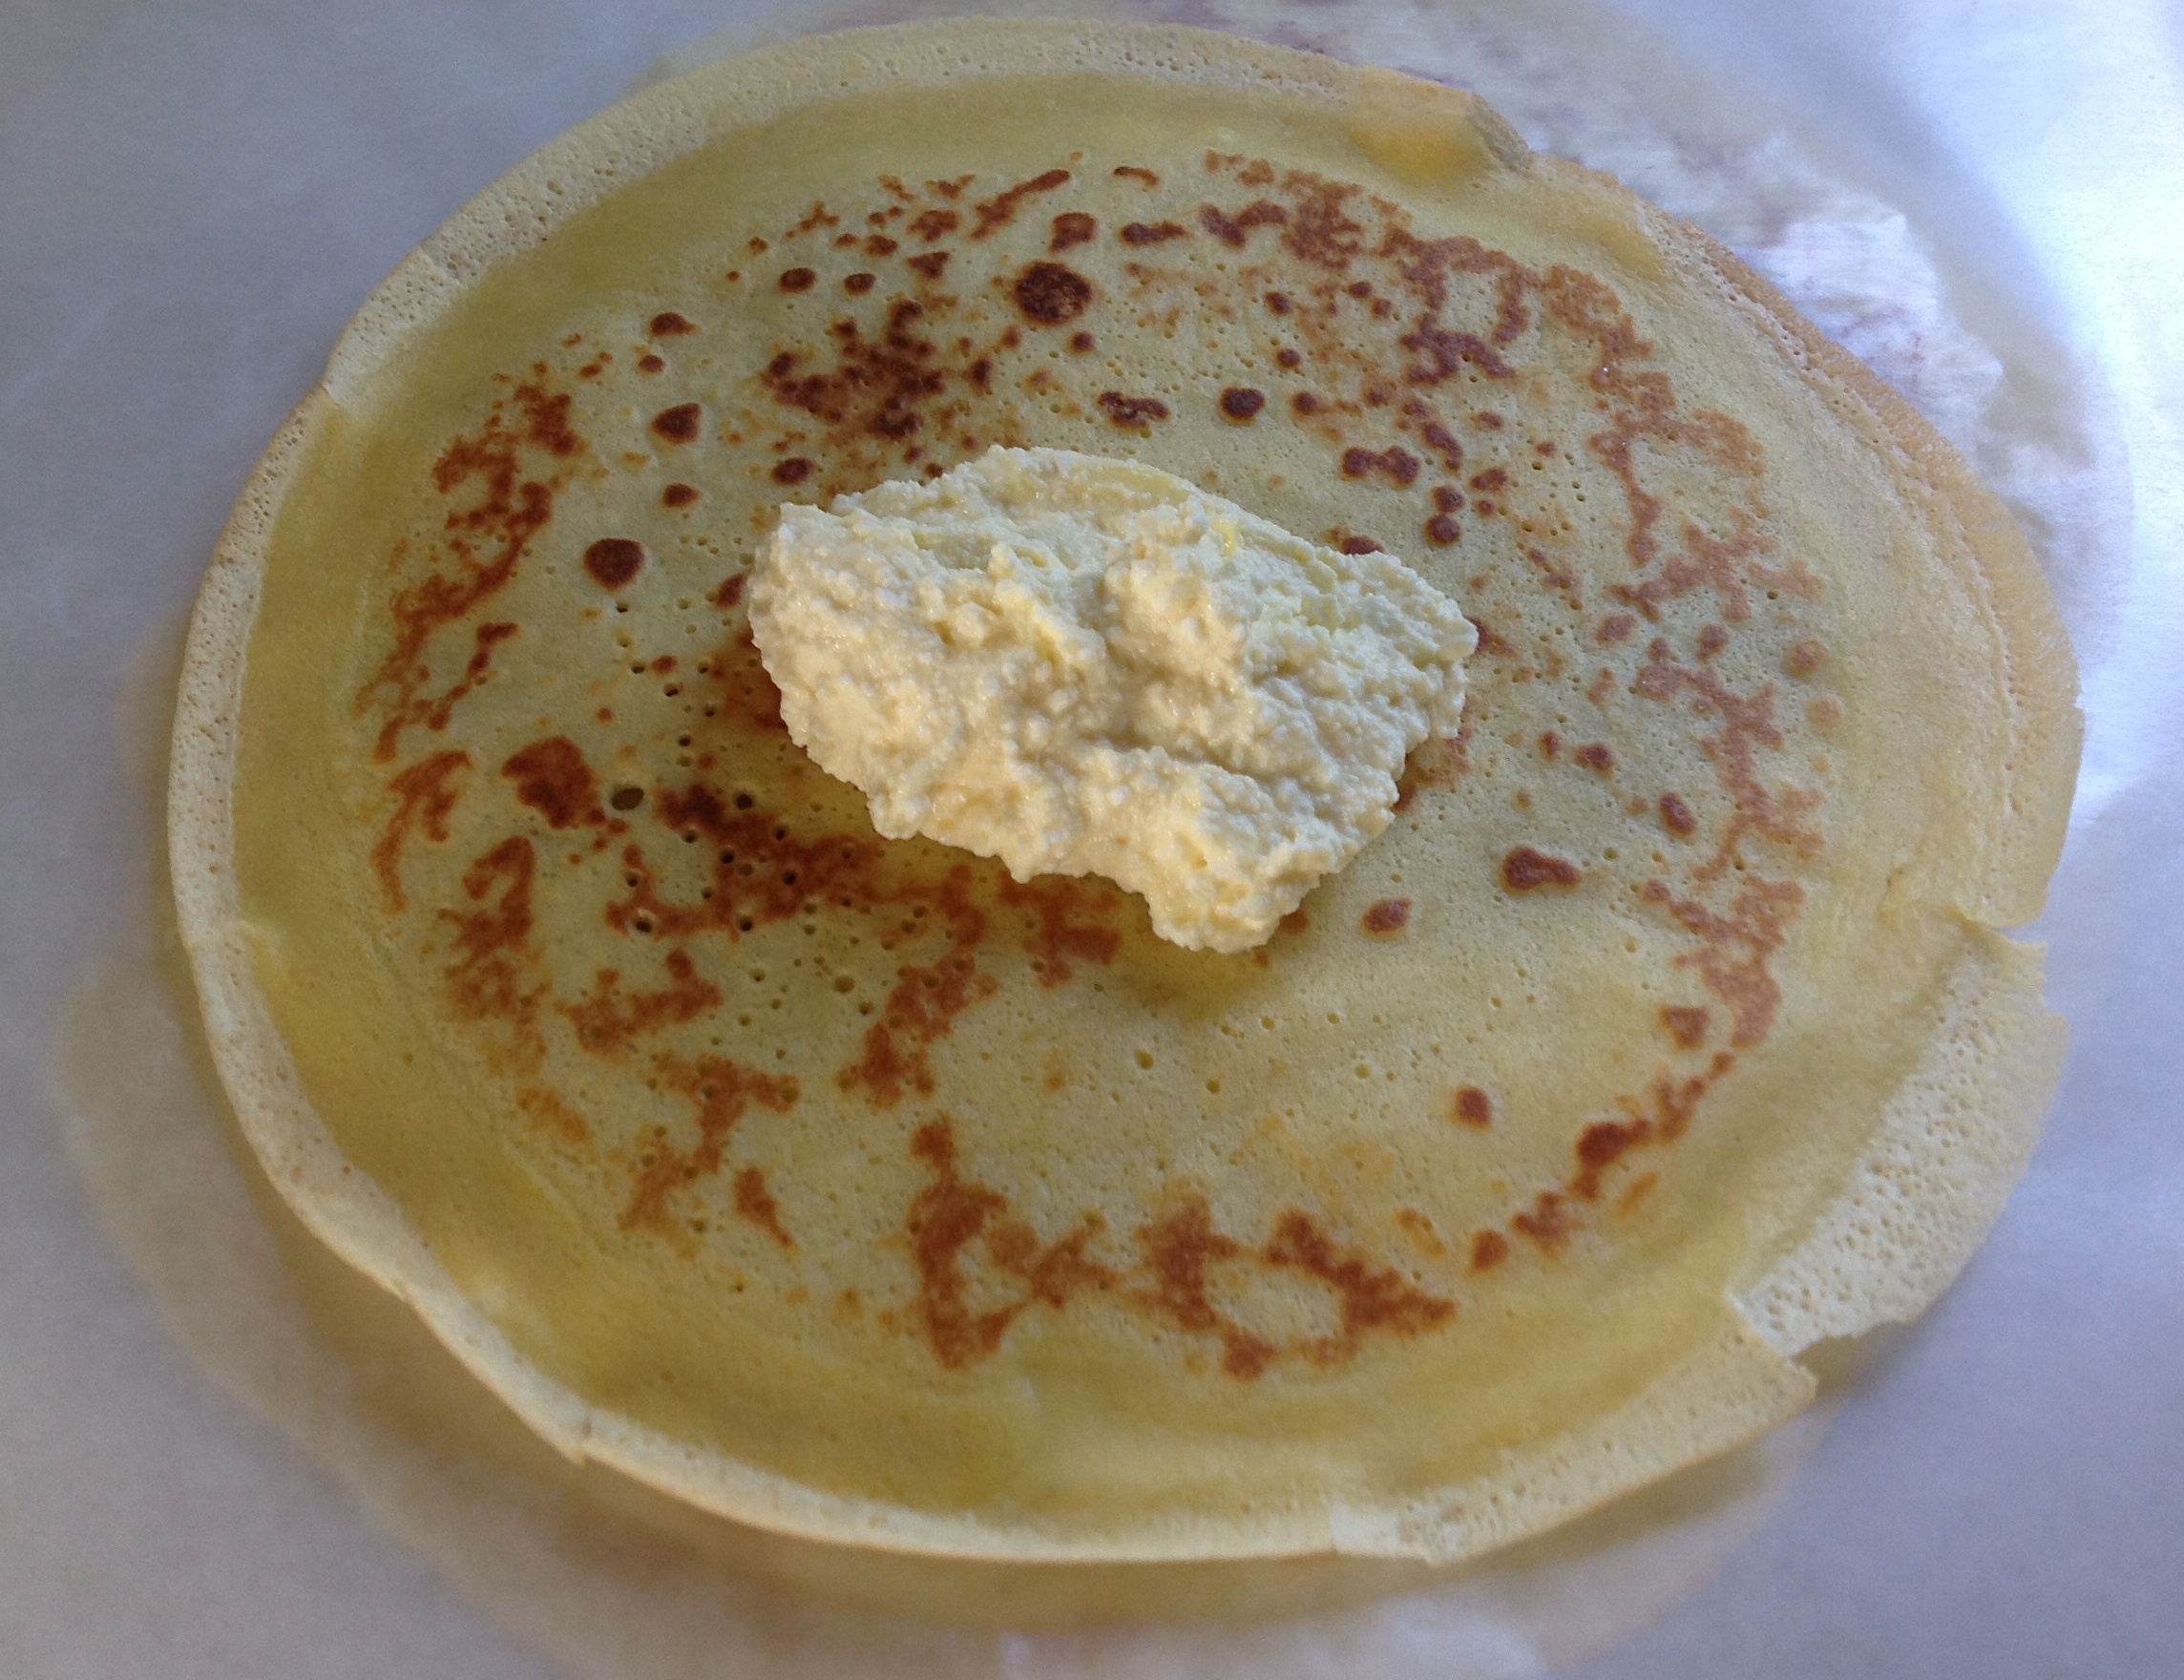
Scoop about 3 tablespoons of filling on the center of your first crepe. The generous amount shown below will make nicely plump crepes, but you won’t get more than 8 of them. So, use a little less filling if you want 10 crepes.
Do notice that I cooked the crepe above a little too long. Alas, probably distracted! See how the edges are thin and brittle and the inside is too browned… (Once you flip the crepe during cooking, you cook side 2 only about 15 seconds.) The good news is that some crepes, while not ideal, are still usable.
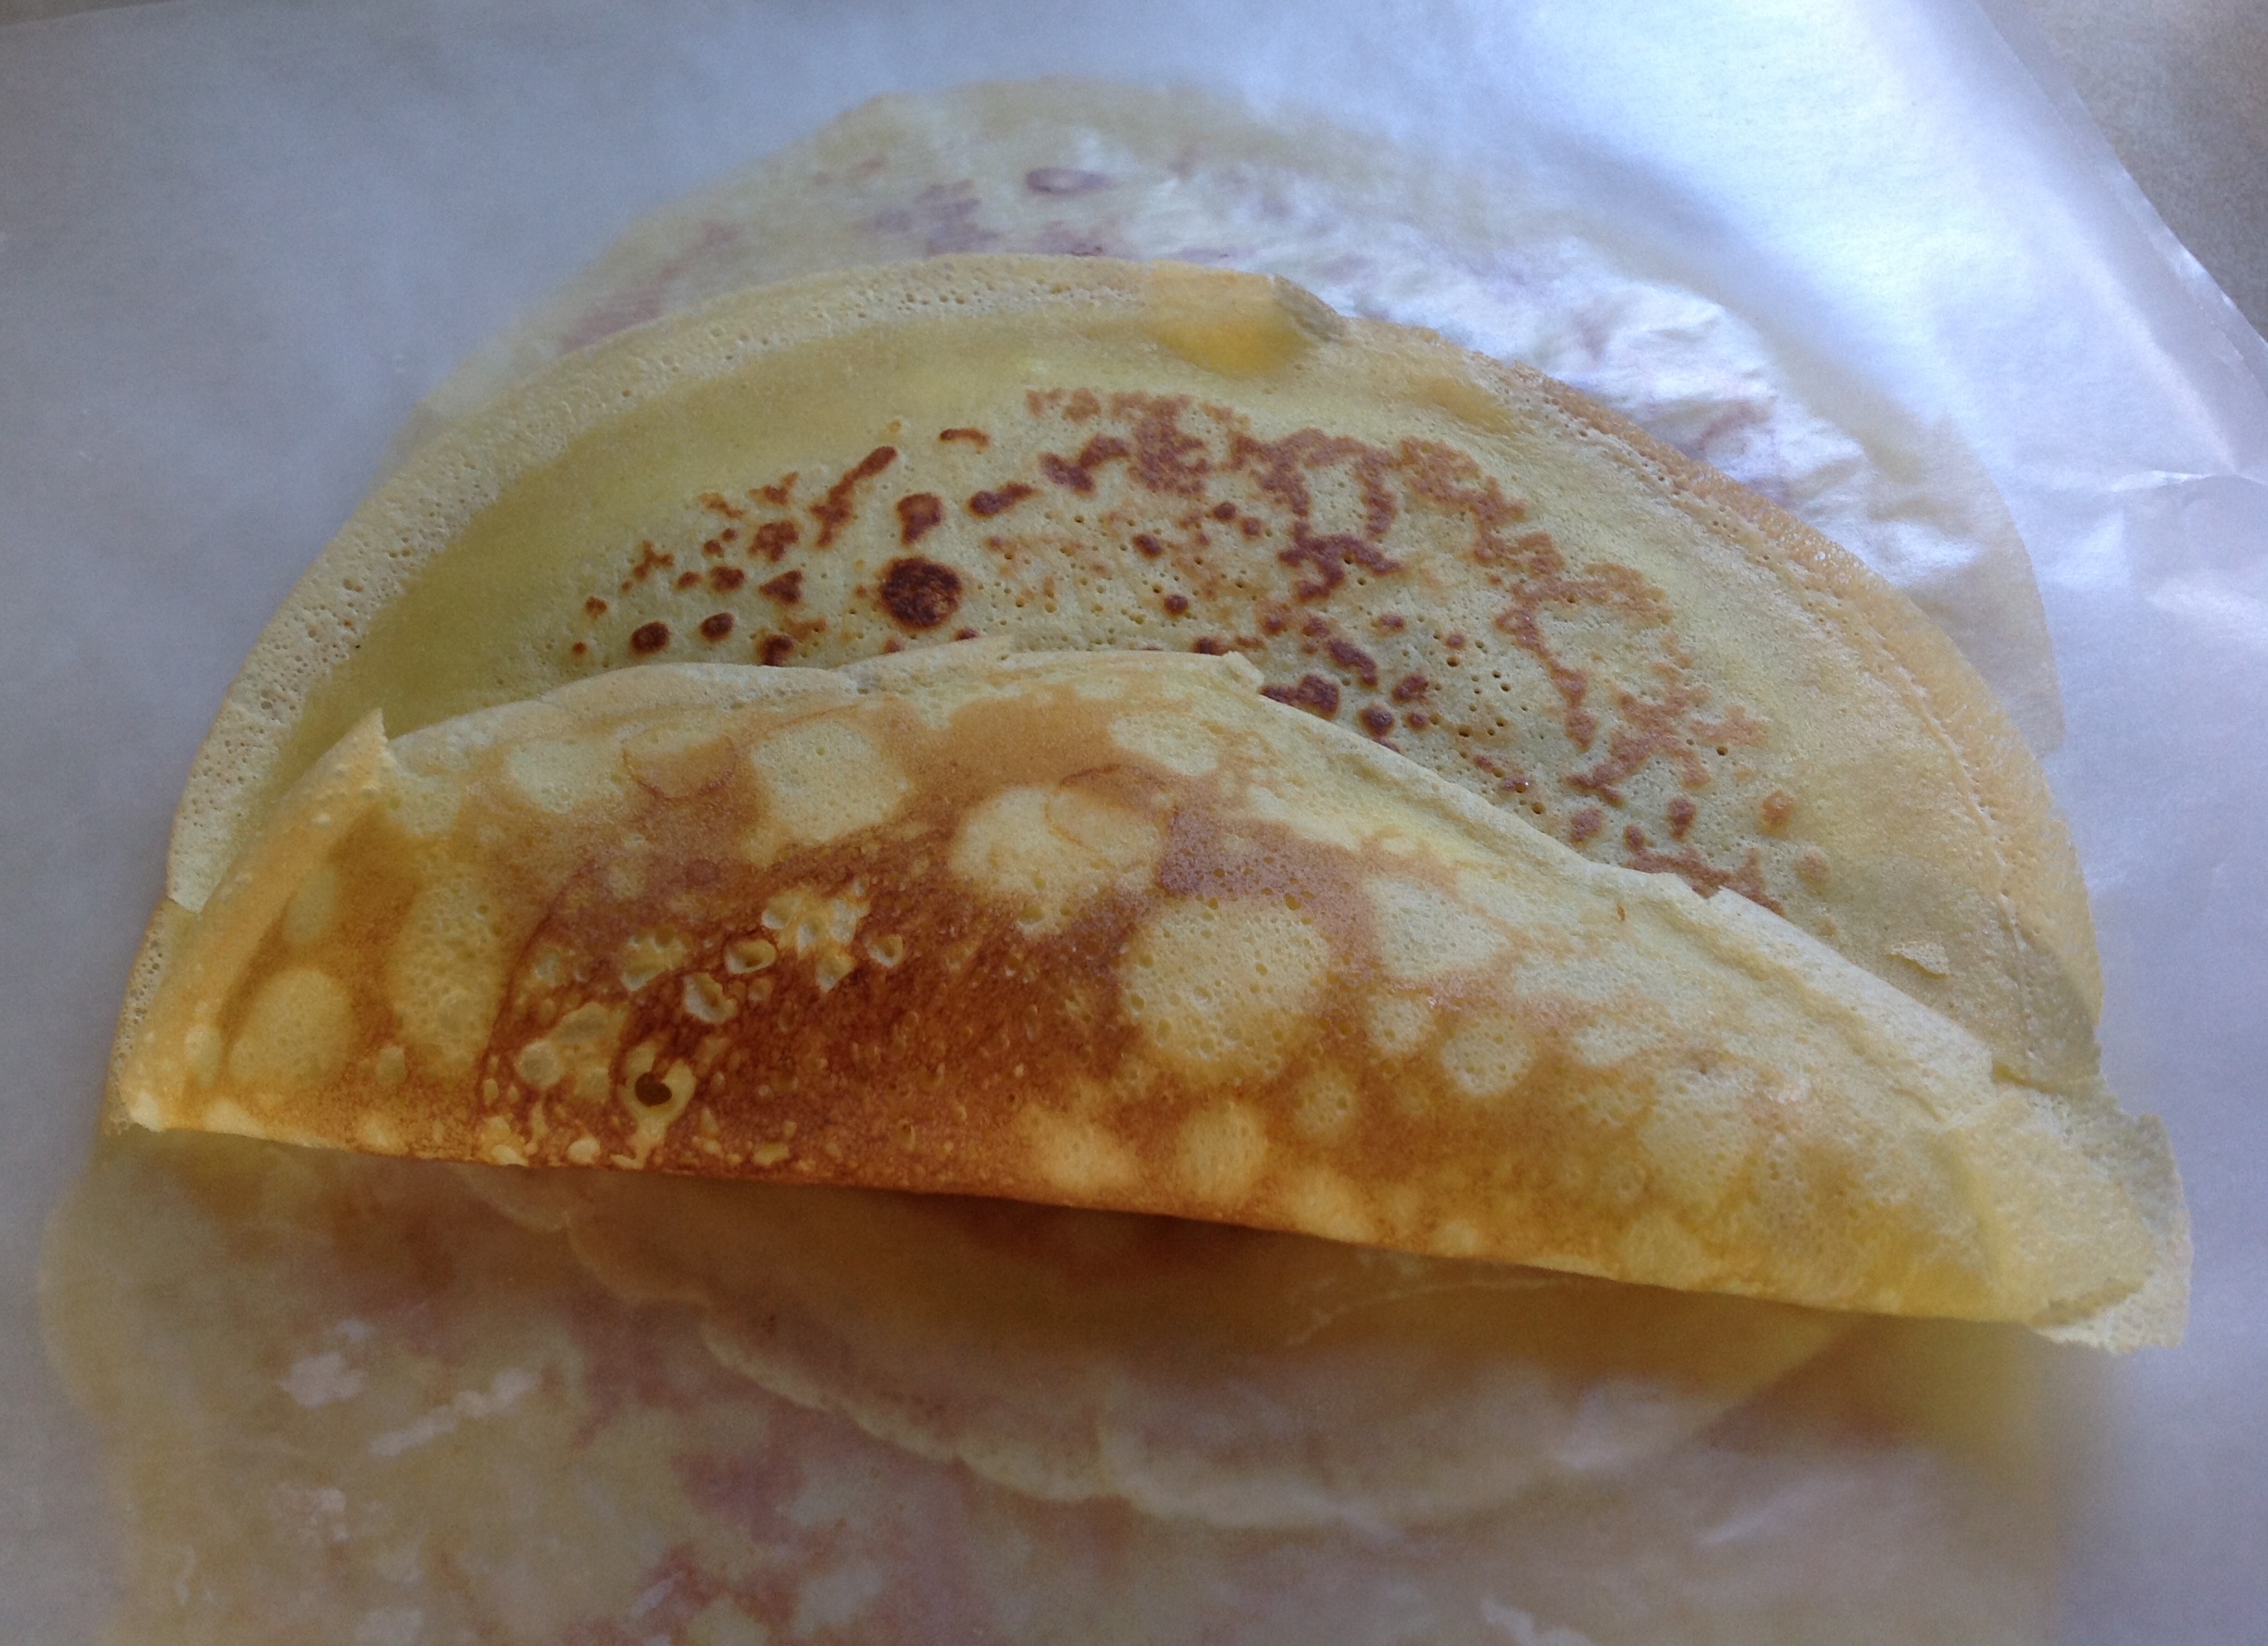
Next, fold over the first flap and gently press it down for even height and filling distribution.
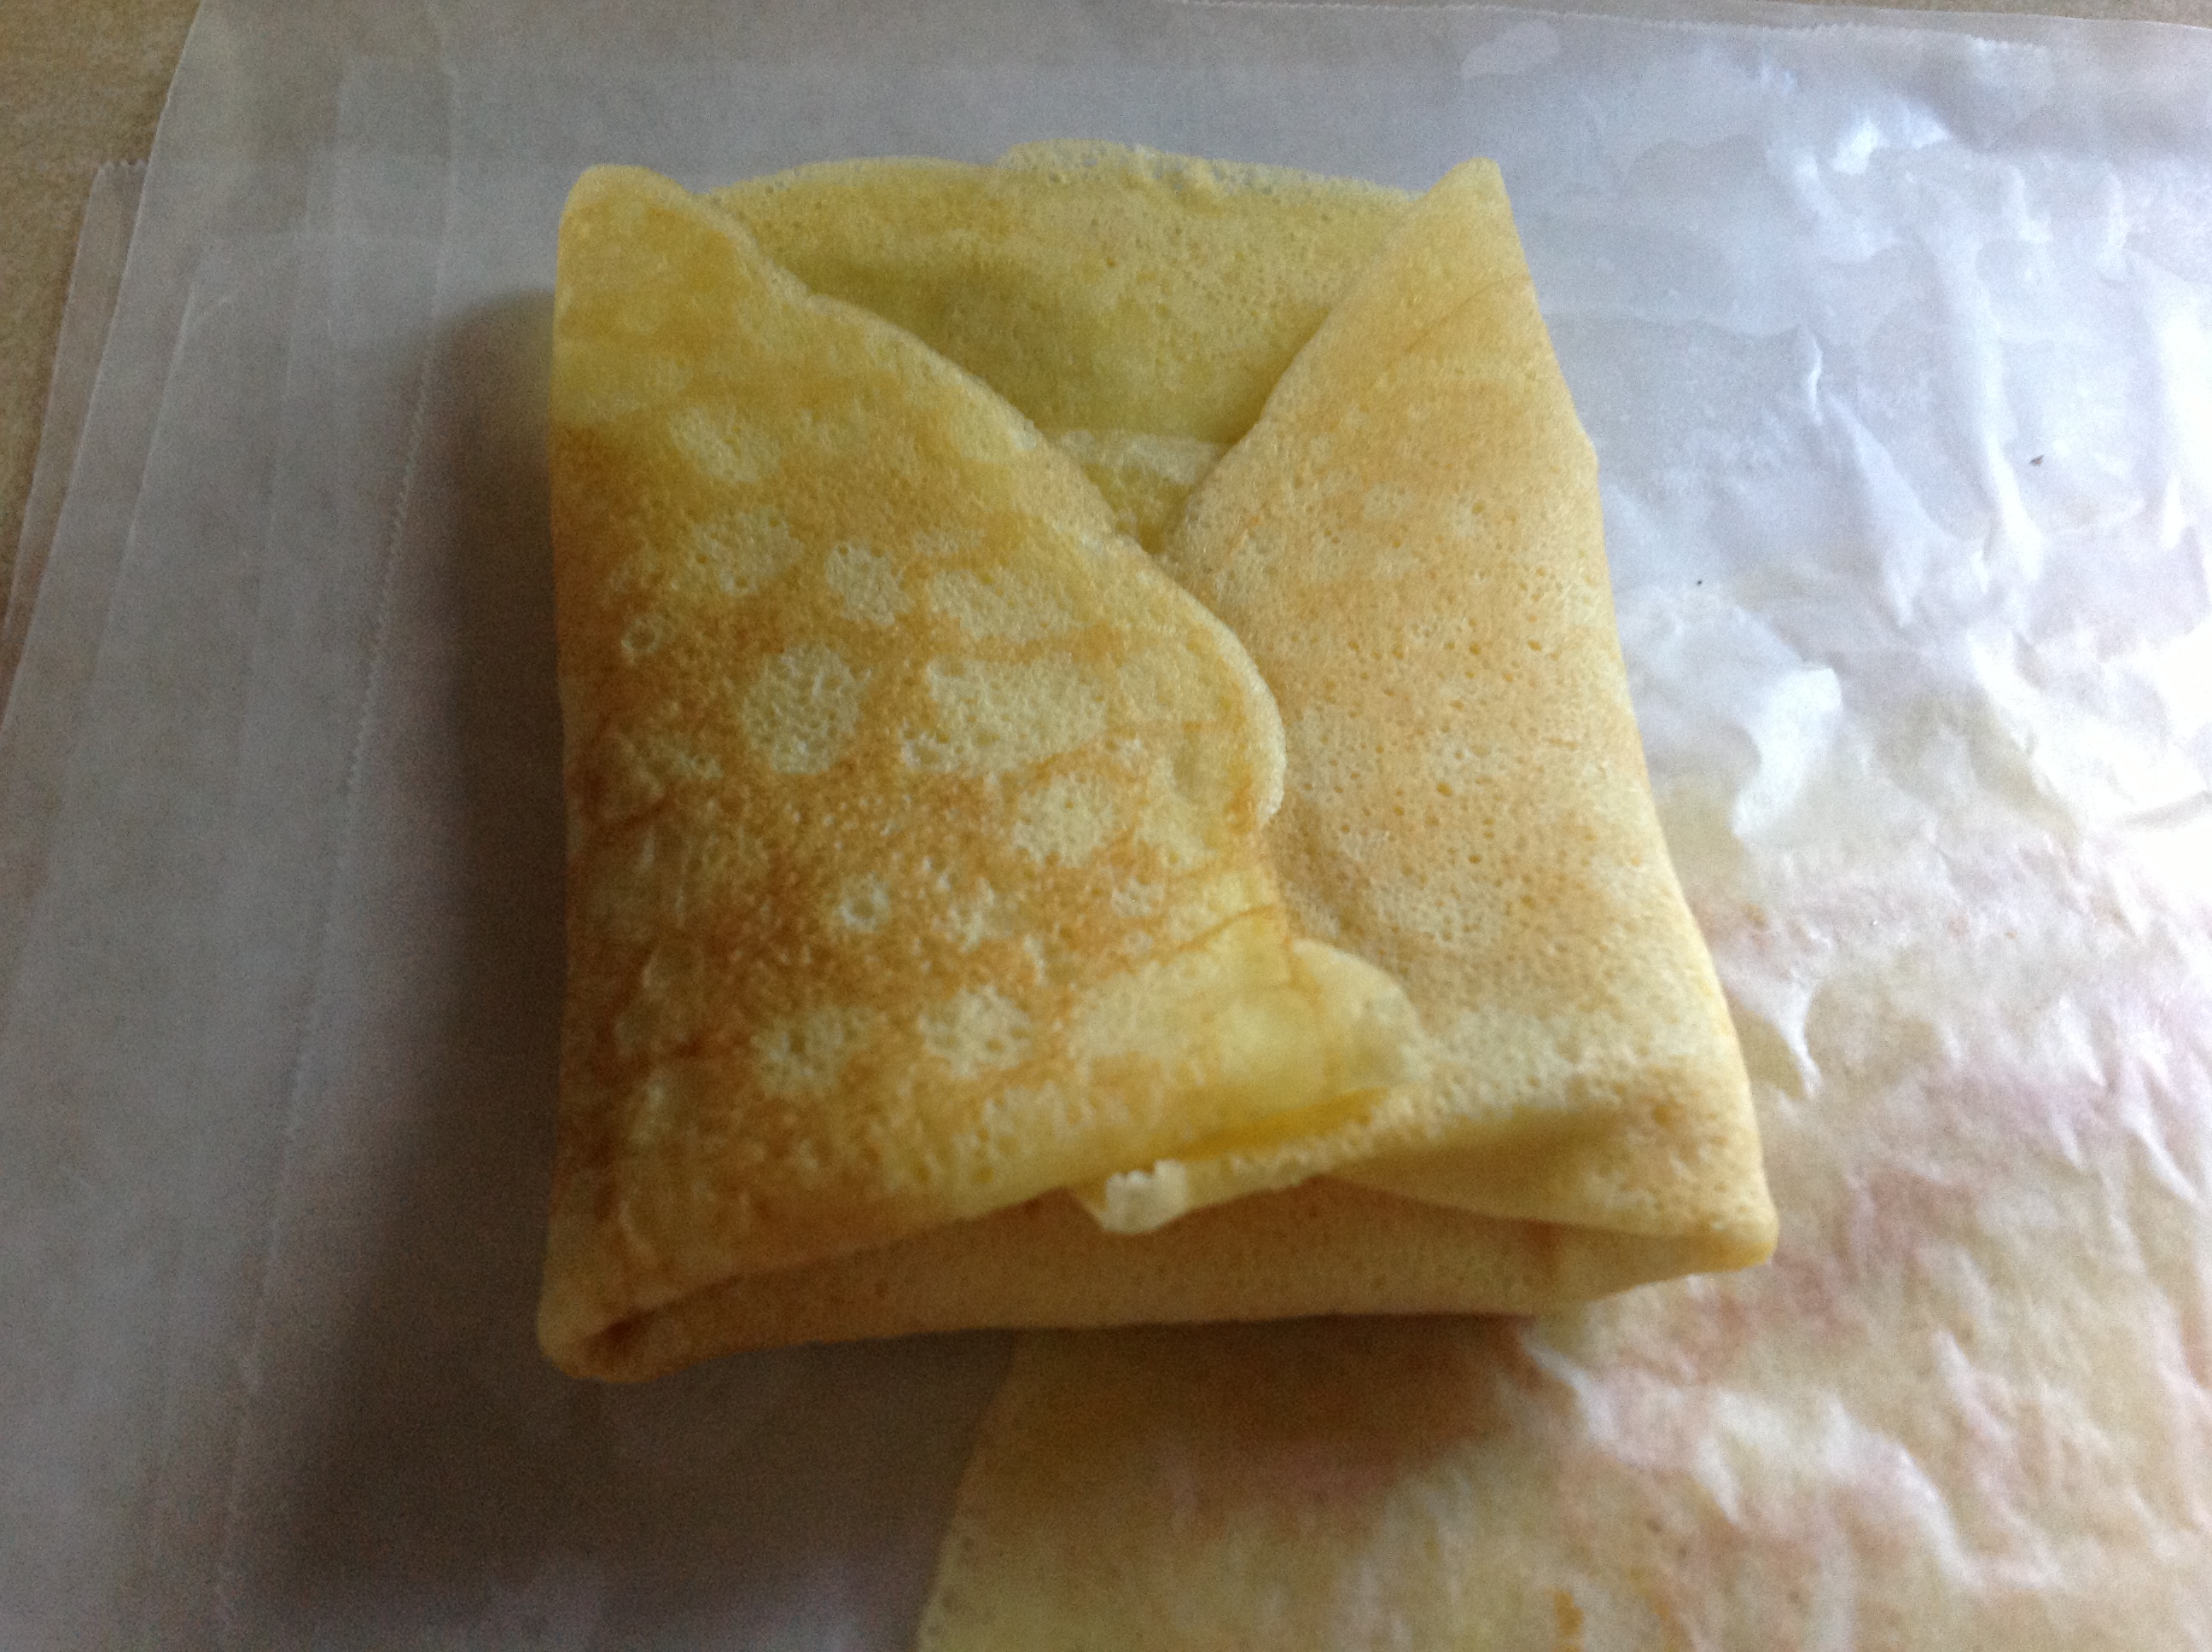
Then, fold over the two sides, tucking the side edges so you minimize their visibility later in presentation.
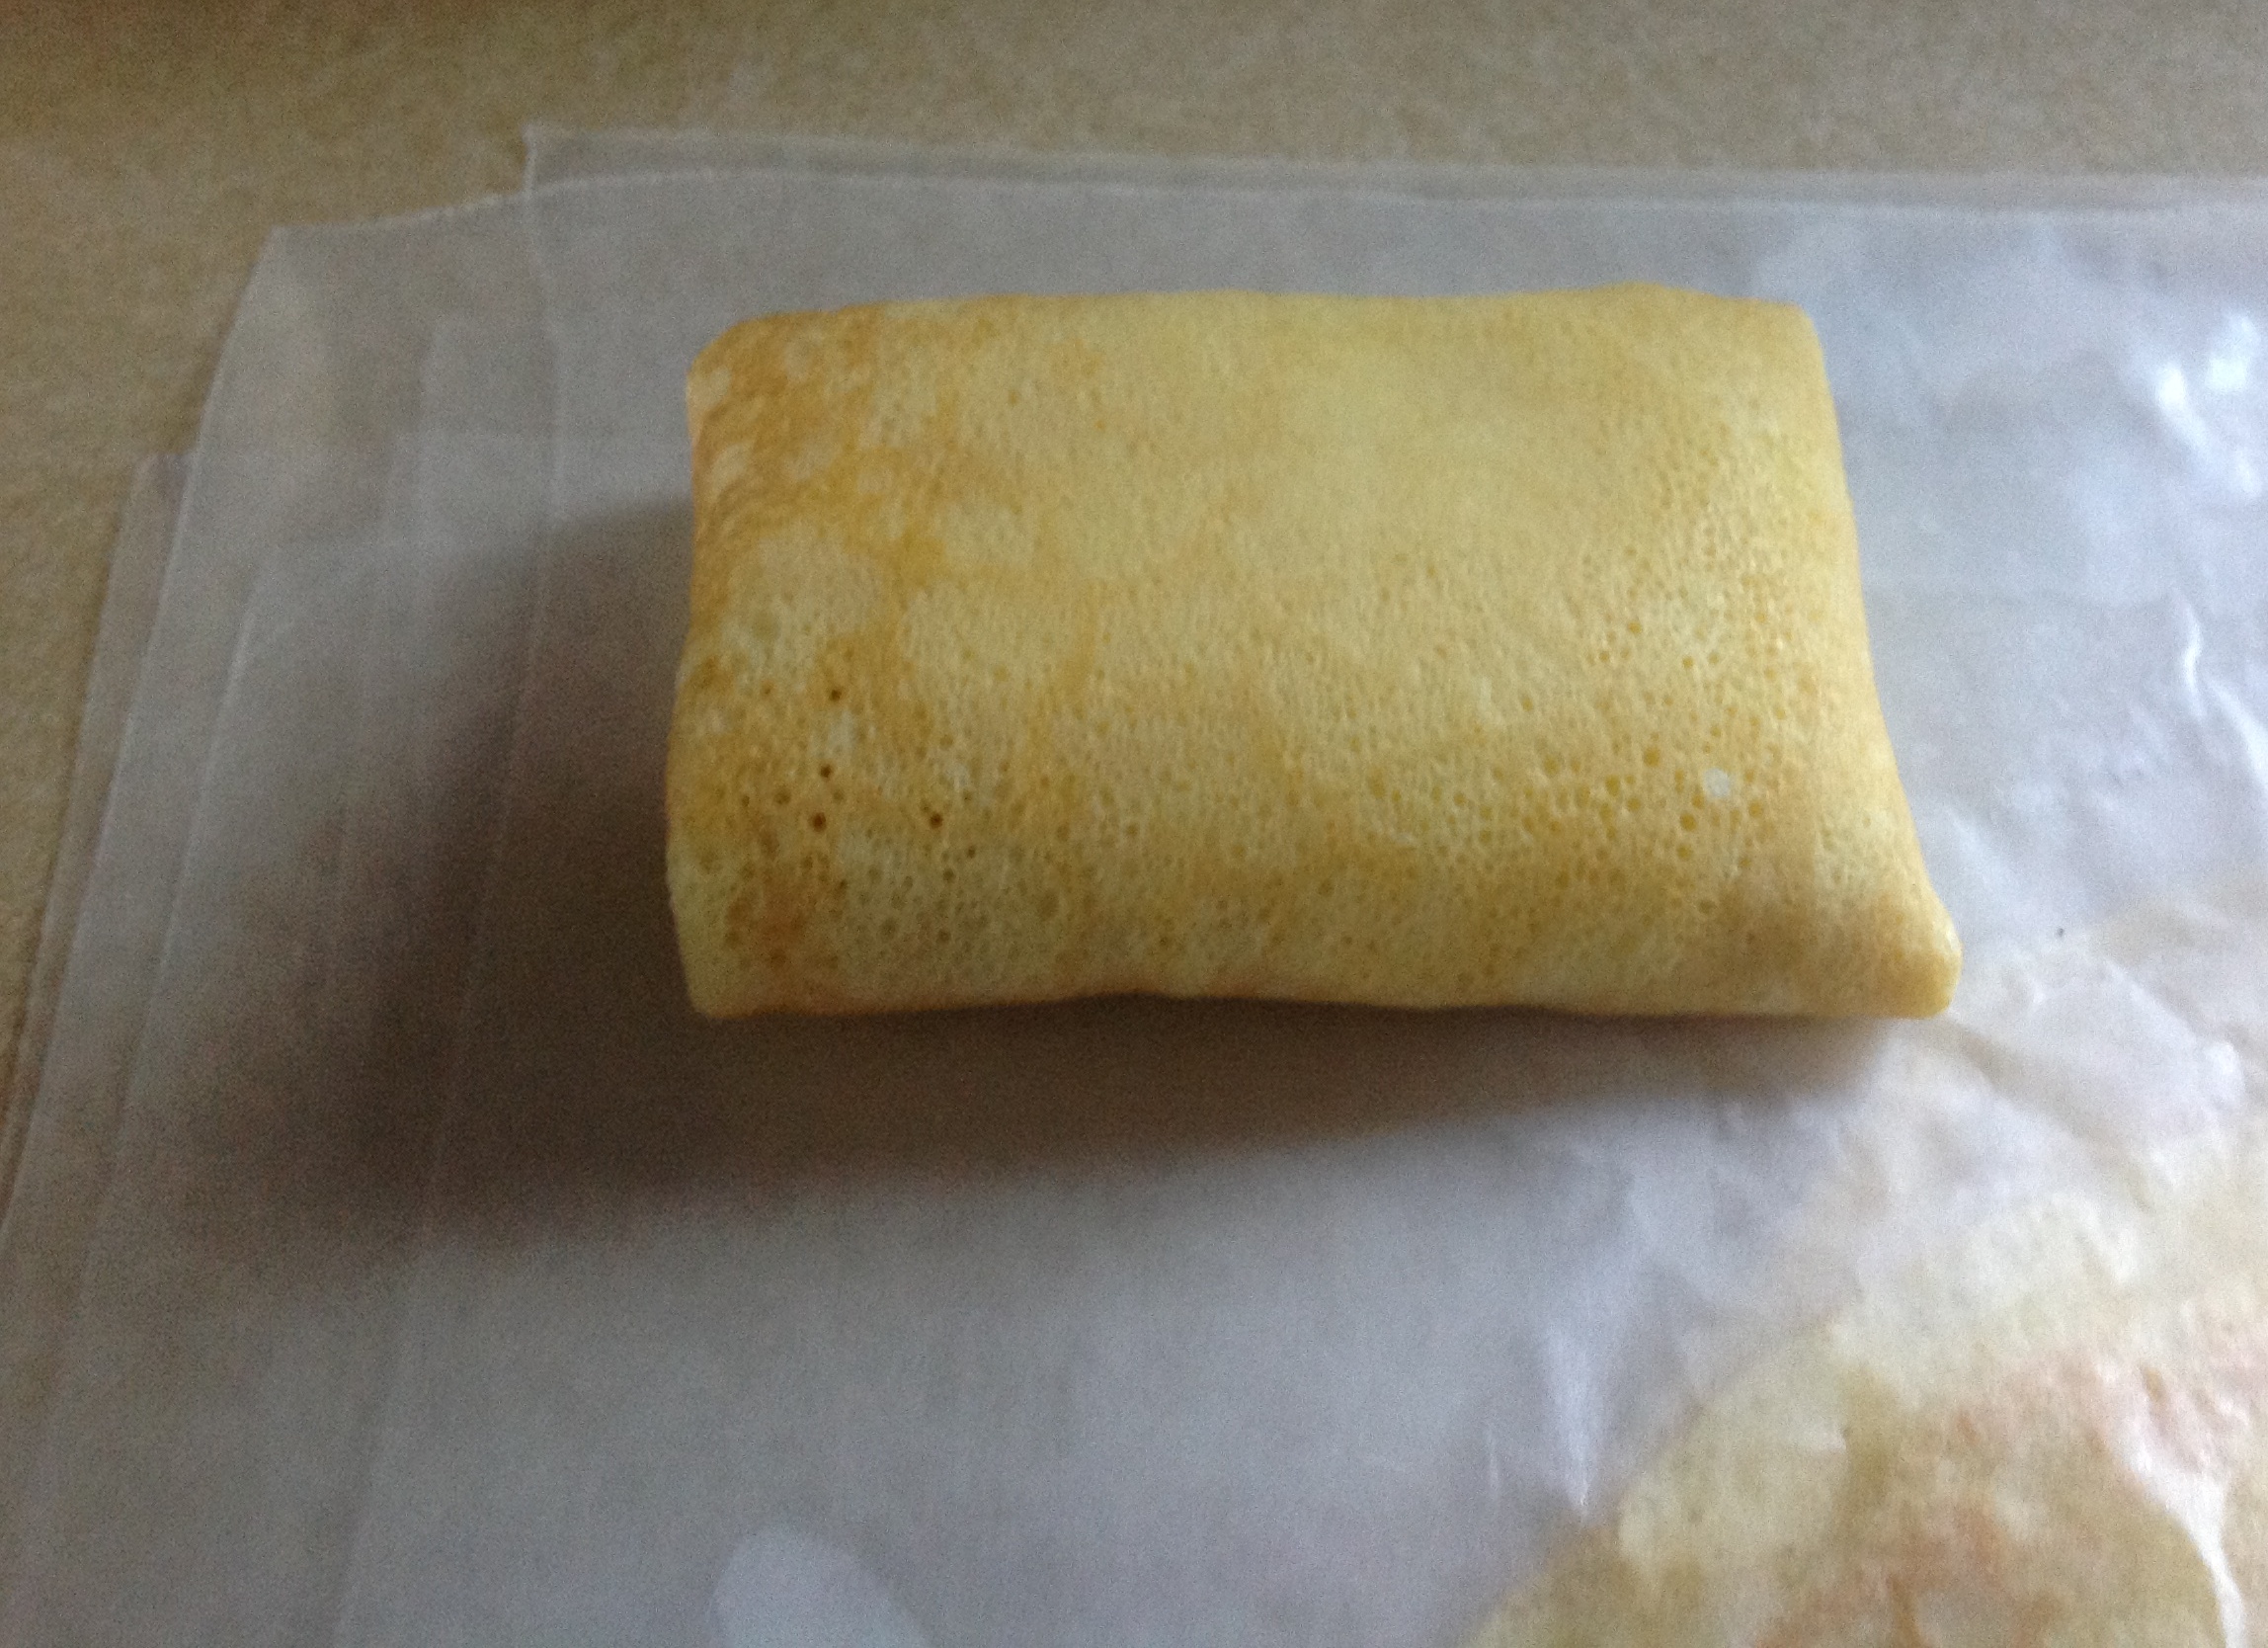
Finally, flip the crepe to make the final fold. See how you cannot see the edges of the folds?
STEP 6: Bake the crepes and serve
Spray some PAM lightly on the bottom of your baking dish. Place your 8-10 folded crepes in the dish, spacing them. Now, barely spray across the top of the crepes. Put the dish in the oven and set the timer for 20 minutes. In my oven, the top feels just nicely crisp to the touch at 25 minutes.
While you are baking the crepes, set up your plates with the accompaniments. Spoon some creme fraiche and jam onto one side of each plate. We liked red raspberry, blueberry, and blackberry/peach, but I would guess other flavors would be wonderful, too!)
Get your Confectioner’s sugar ready to sprinkle the crepes when they come out of the oven. (See the green handy-dandy sprinkler below. Inexpensive and available in most kitchen stores.) Make a pot of coffee or tea, put out some juice, if you wish, and set the table.
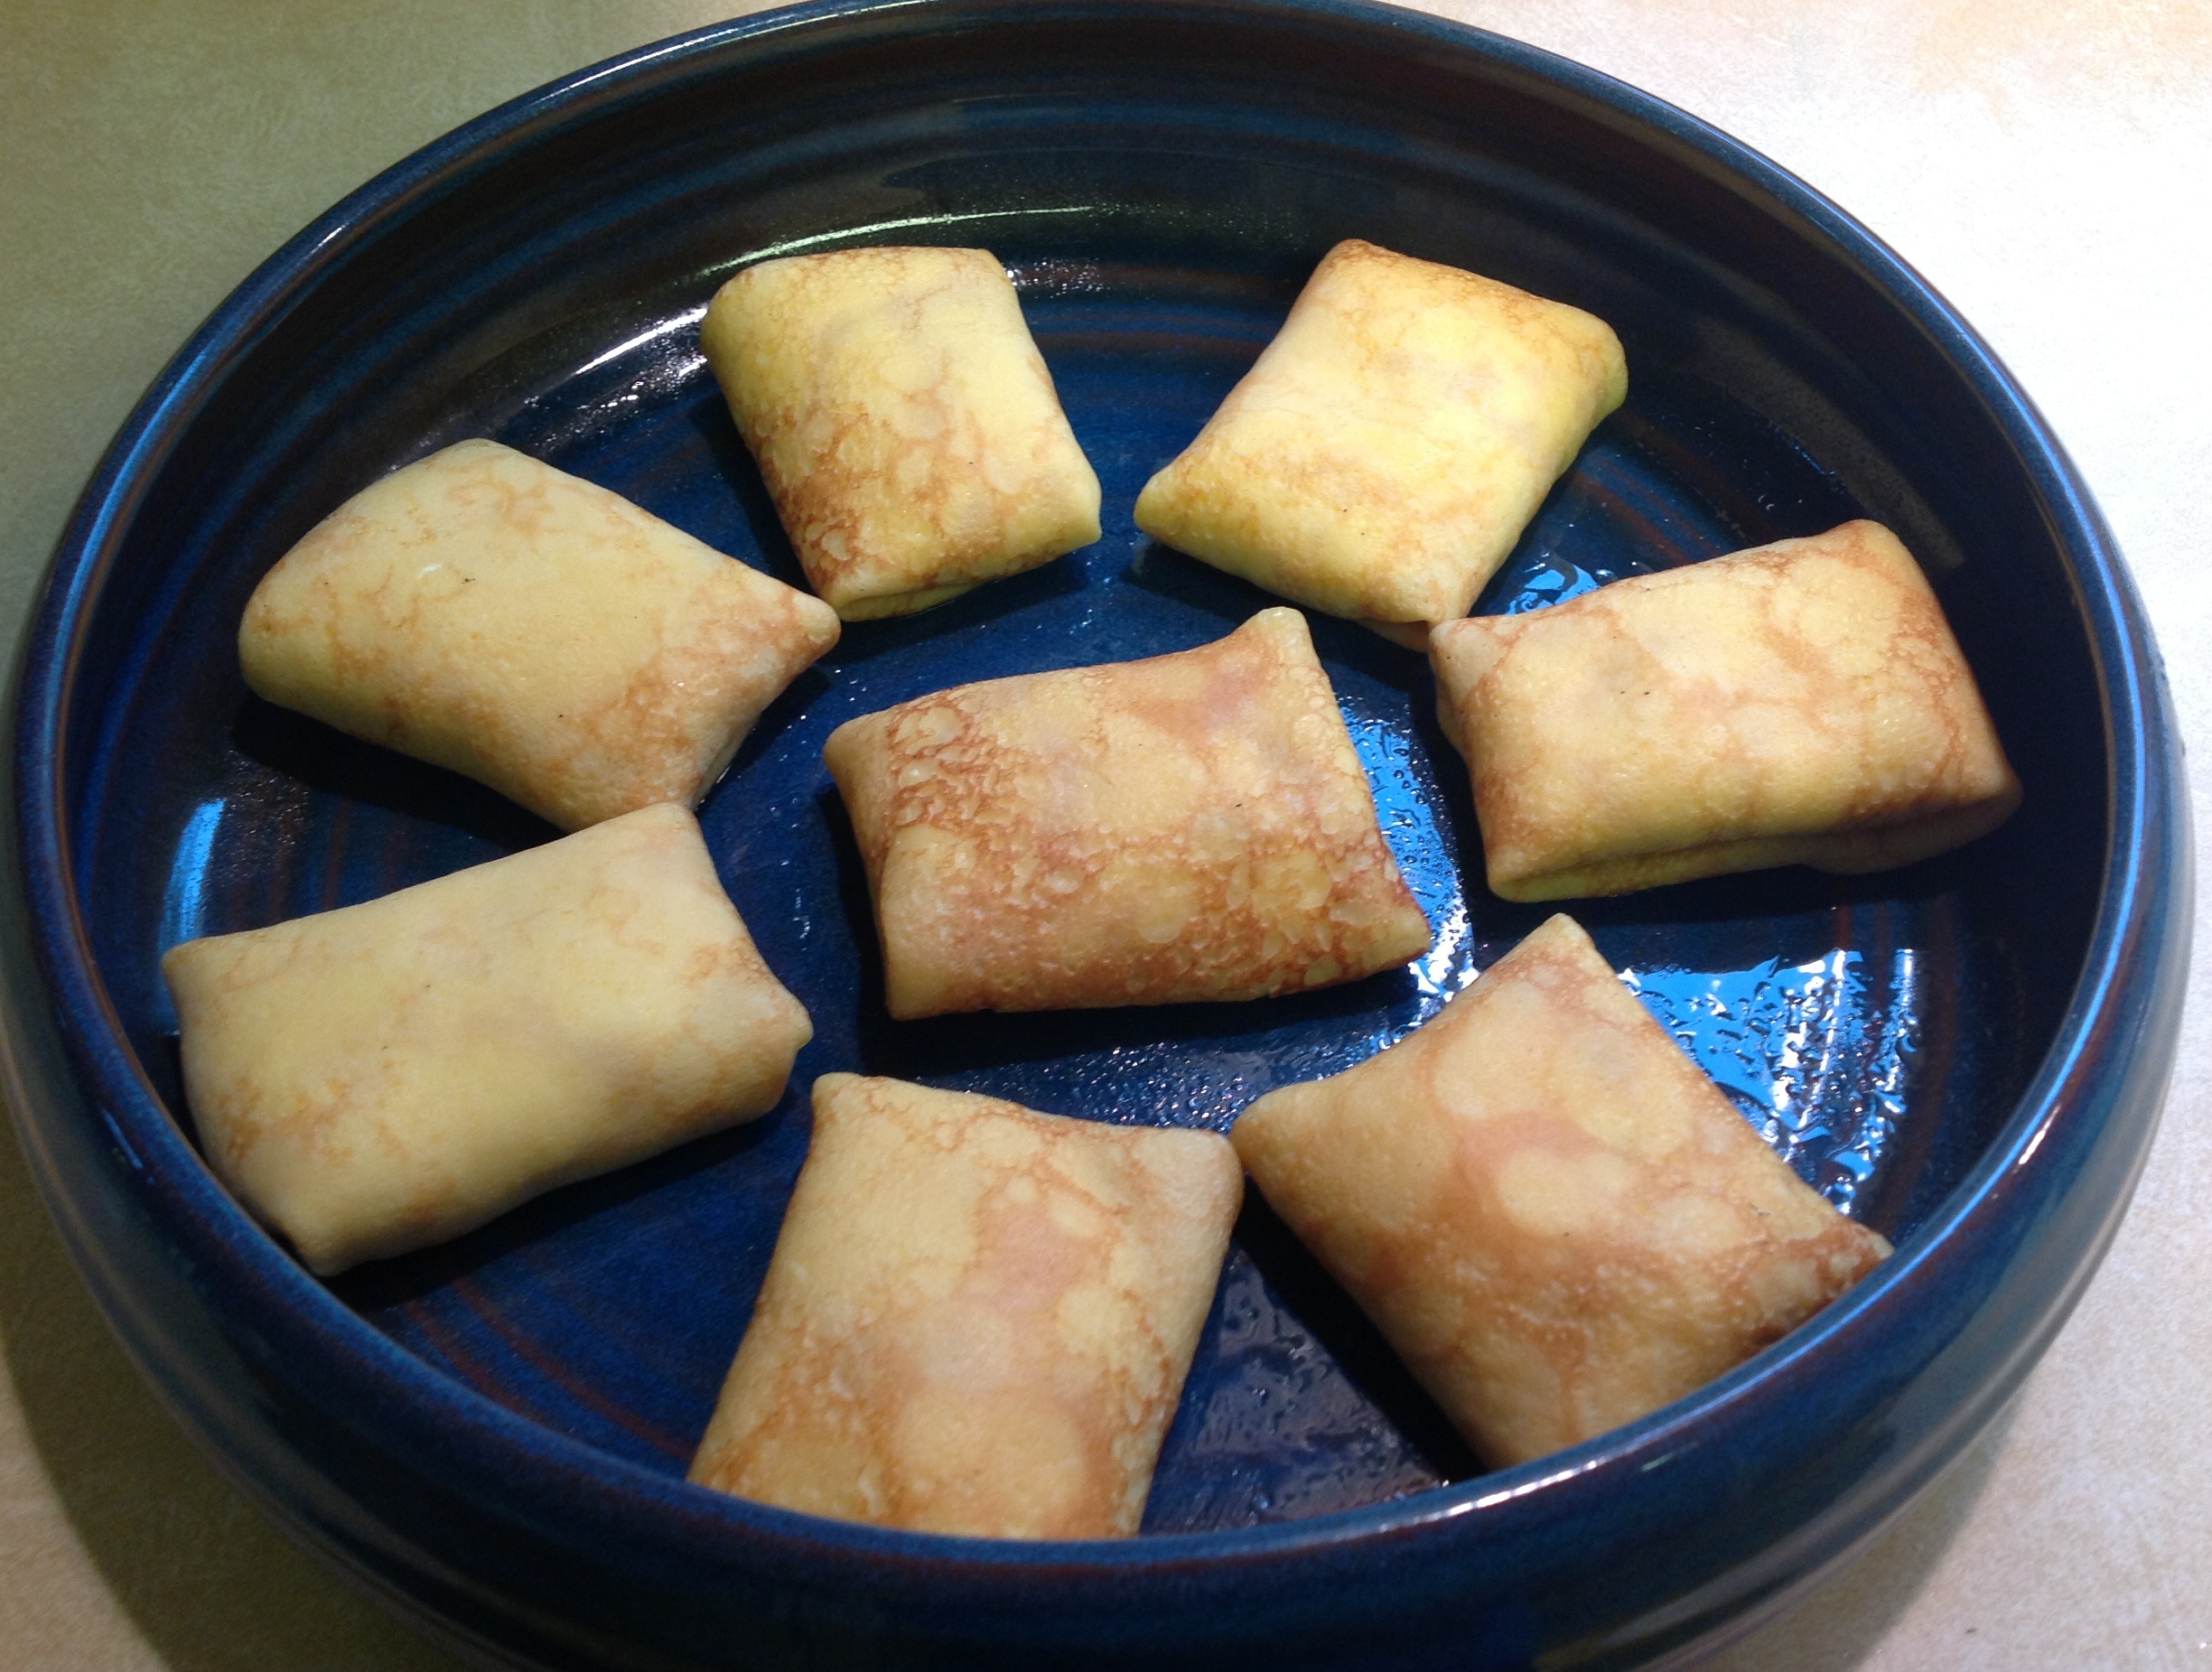
Remove the dish of crepes from the oven when the crepe top is very warm to the touch and the crepes are golden (this photo taken under my stove light, so more golden than actual!).
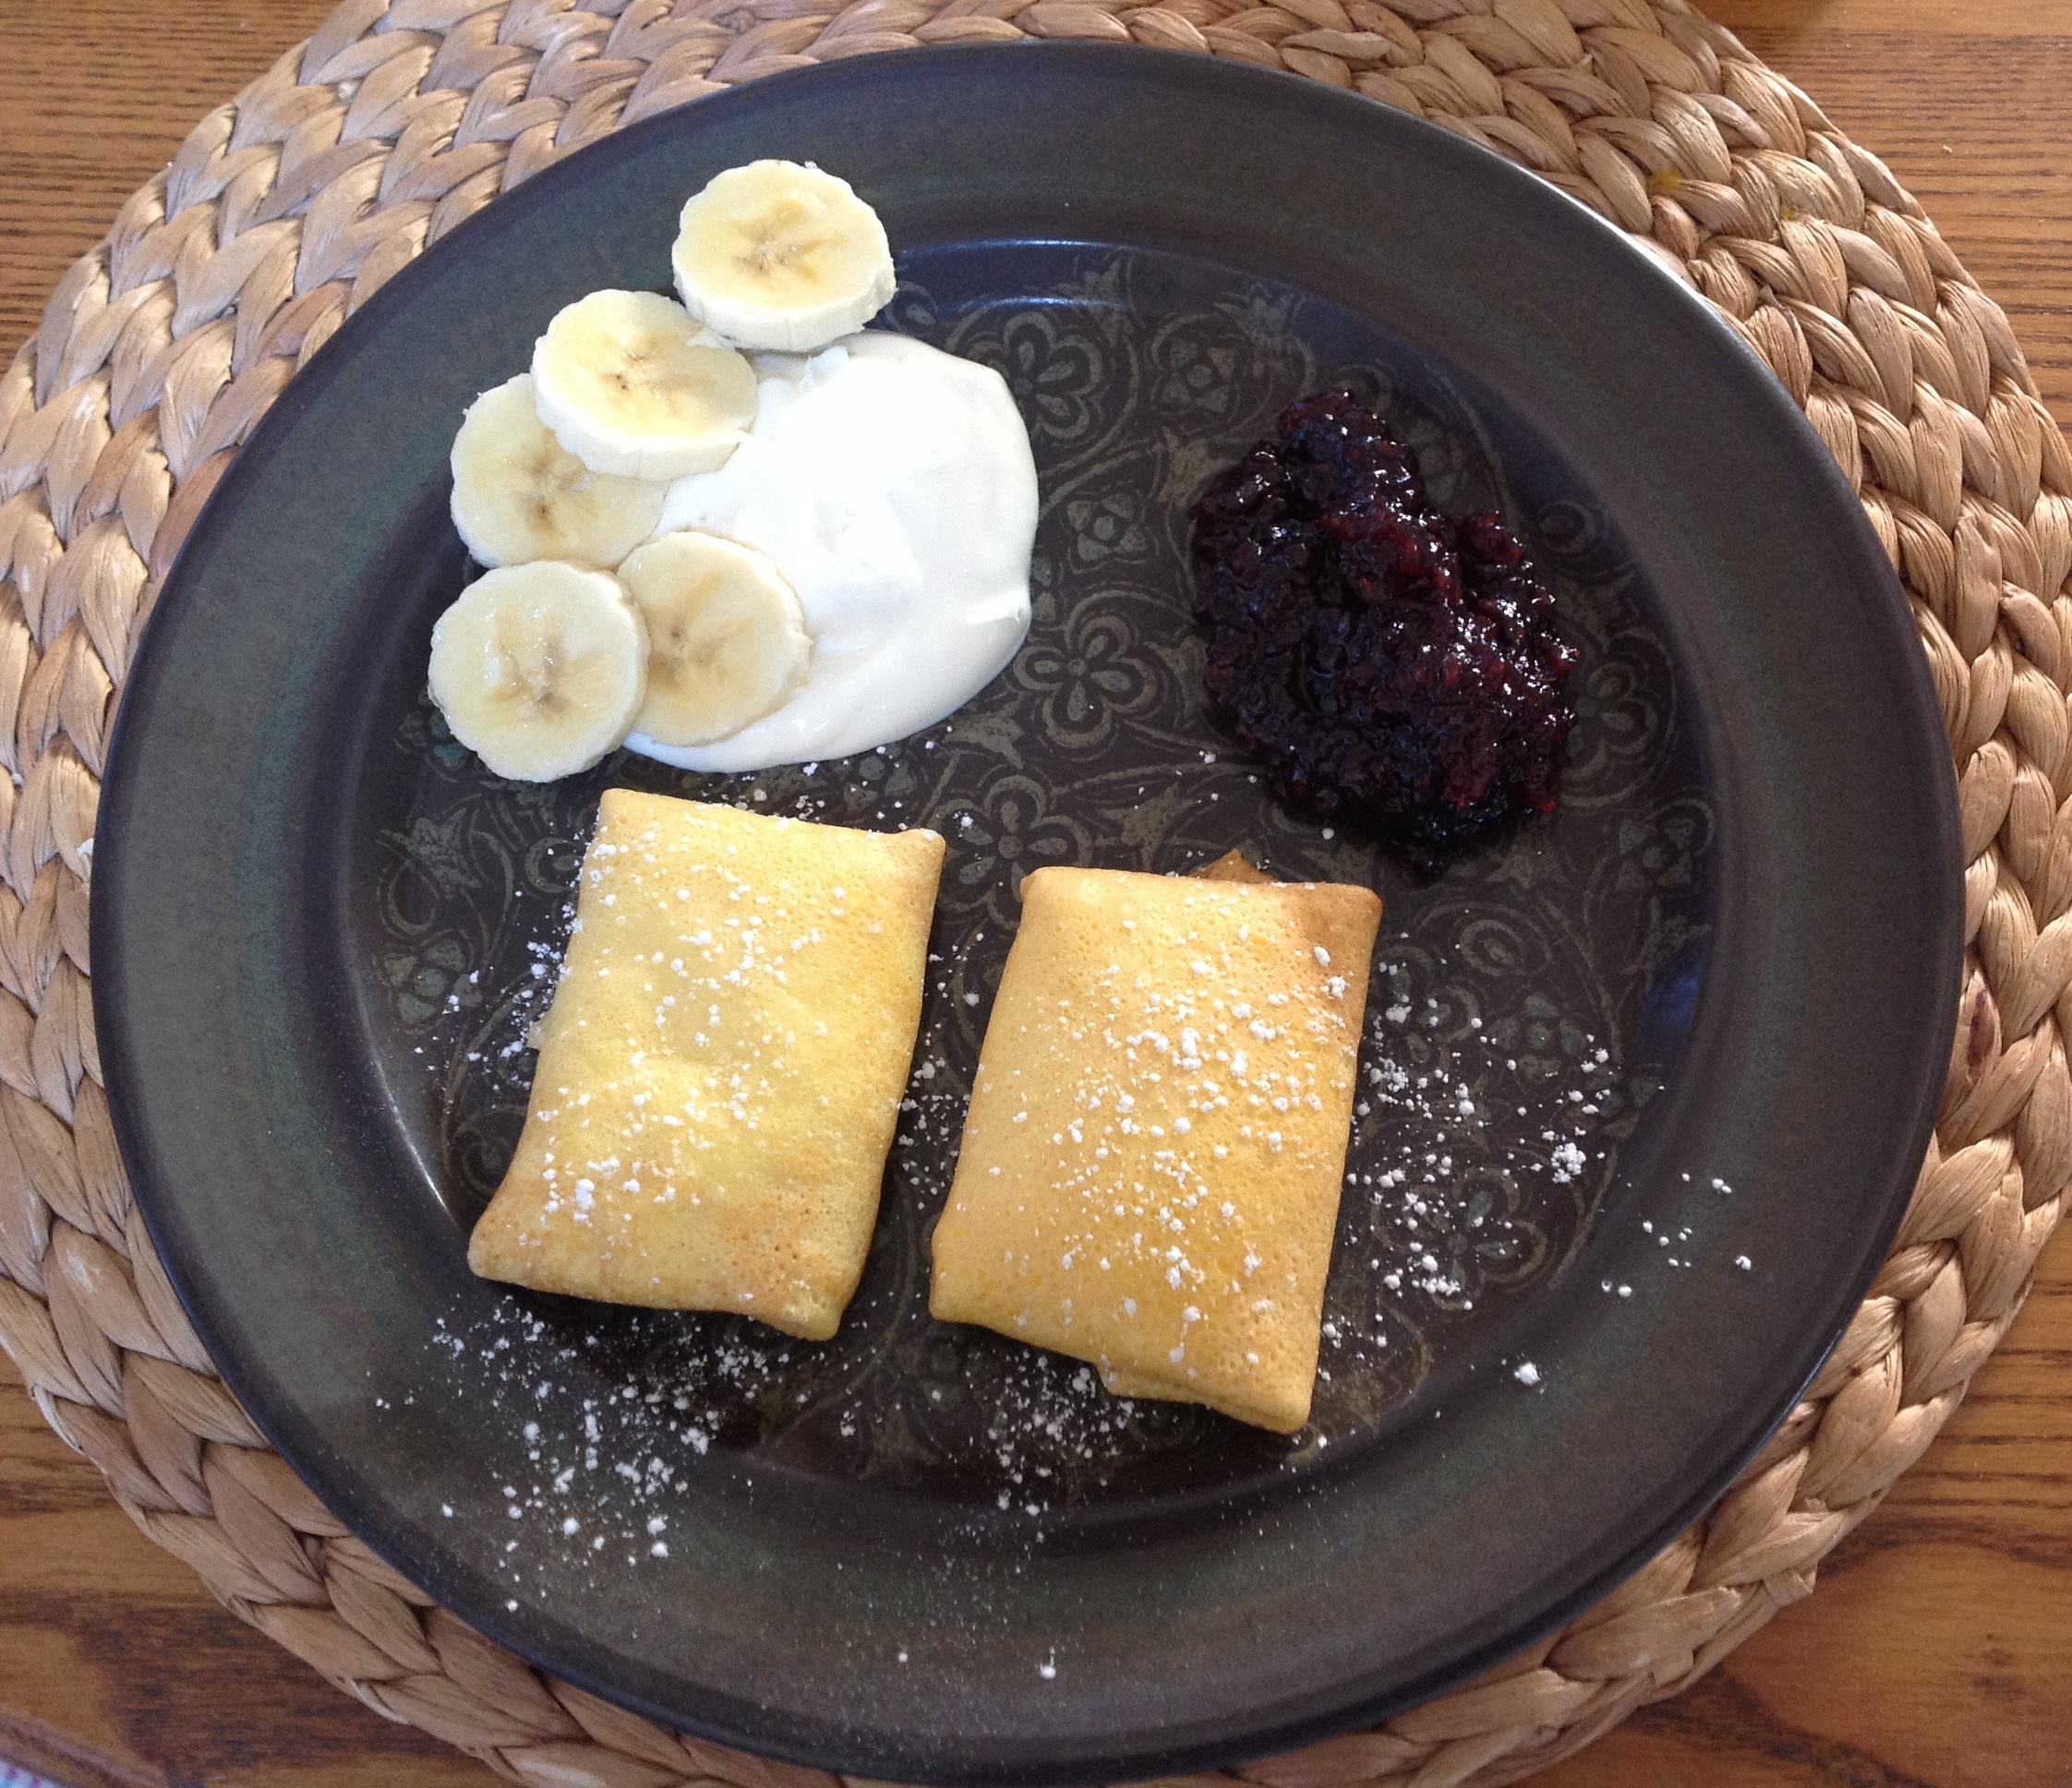
Place two crepes on each plate and gently sprinkle some Confectioner’s sugar over them. Add some slices of banana, if you like. Eat the crepes while they are warm and ENJOY!
This photo above shows the addition of sliced bananas and blackberry/peach jam from Nervous Nellies Jams and Jellies, Deer Isle, ME. We’re kind of partial to their jams! They make a delicious, and not too sweet Orange Marmalade that also might be a good choice here. Ah! Shall try next time. We so agree with my cousin, Egle, that the banana addition makes a very complementary addition!
For those of you who make these breakfast crepes or your own recipe, here are some of my questions.
1. In my memory, Rivastar’s fabulous crepes were light, but a little higher in the center where the fill sits, like the crepe had risen. Not as much as a pancake might rise, but with texture visible. However, there was neither baking powder nor yeast in Rivastar’s general recipe. I am told one cannot fold the crepes unless they are thin, so I am unsure what conclusion to draw. I did try separating the eggs in the first test, whipping the egg whites, and folding them in last. This turned out not to help with this aspect. The outcome was similar to tests 2 and 3, when I used the eggs whole. In my fine tuning, I did add a little baking powder and find it satisfactory on this aspect.
2. Many recipes suggest frying the folded crepes. It was a conscious choice to bake them rather than fry them. I didn’t like the thought of additional oil, and Rivastar did indicate they baked theirs. If you have finished them both by frying and baking, please give me your thoughts.
3. If you make these crepes on a regular basis, or if you try this recipe, I hope you’ll send me some comments. I look forward to learning more about these wonderful Lietiniai su varske.


